小小又去面试了,小小的生活继续,(^o^)/
这次小小的技术方面有Netty,以及Dubbo的通信方式,对这两个点进行继续的复习和学习。
1. Netty
Netty 通过缓冲区实现。
WebSocket
为什么需要WebSocket
聊天室之前采用的是轮询,效率相当的慢,所以这里采用WebSocket,实现长连接通信。
WebSocket于是这样的诞生。
介绍
特点如下
- 建立在TCP连接之上。
- 与HTTP有较好的兼容性。
- 数据格式轻量,性能开销小,消耗小。
- 可以发送文本,可以发送二进制数据。
- 没有同源限制,可以进行任意的通信。
- 协议的标识符是ws。
网址如下
ws://example.com:80/some/path
示例
var ws = new WebSocket("wss://echo.websocket.org");

ws.onopen = function(evt) {
  console.log("Connection open ...");
  ws.send("Hello WebSockets!");
};

ws.onmessage = function(evt) {
  console.log( "Received Message: " + evt.data);
  ws.close();
};

ws.onclose = function(evt) {
  console.log("Connection closed.");
};
客户端的 API
新建实例
var ws = new WebSocket('ws://localhost:8080');readyState属性返回实例对象的当前状态,共有四种。
CONNECTING:值为0,表示正在连接。
OPEN:值为1,表示连接成功,可以通信了。
CLOSING:值为2,表示连接正在关闭。
CLOSED:值为3,表示连接已经关闭,或者打开连接失败。下面是一个实例
switch (ws.readyState) {
  case WebSocket.CONNECTING:
    // do something
    break;
  case WebSocket.OPEN:
    // do something
    break;
  case WebSocket.CLOSING:
    // do something
    break;
  case WebSocket.CLOSED:
    // do something
    break;
  default:
    // this never happens
    break;
}
webSocket.onopen
实例对象的onopen属性,用于指定连接成功后的回调函数。
ws.onopen = function () {
ws.send('Hello Server!');
}
如果要指定多个回调函数,可以使用addEventListener方法。
ws.addEventListener('open', function (event) {
ws.send('Hello Server!');
});webSocket.onclose
实例对象的onclose属性,用于指定连接关闭后的回调函数。
ws.onclose = function(event) {
var code = event.code;
var reason = event.reason;
var wasClean = event.wasClean;
// handle close event
};
ws.addEventListener("close", function(event) {
var code = event.code;
var reason = event.reason;
var wasClean = event.wasClean;
// handle close event
});webSocket.onmessage
实例对象的onmessage属性,用于指定收到服务器数据后的回调函数。
ws.onmessage = function(event) {
var data = event.data;
// 处理数据
};
ws.addEventListener("message", function(event) {
var data = event.data;
// 处理数据
});
注意,服务器数据可能是文本,也可能是二进制数据(blob对象或Arraybuffer对象)。
ws.onmessage = function(event){
if(typeof event.data === String) {
console.log("Received data string");
}
if(event.data instanceof ArrayBuffer){
var buffer = event.data;
console.log("Received arraybuffer");
}
}
除了动态判断收到的数据类型,也可以使用binaryType属性,显式指定收到的二进制数据类型。
// 收到的是 blob 数据
ws.binaryType = "blob";
ws.onmessage = function(e) {
console.log(e.data.size);
};
// 收到的是 ArrayBuffer 数据
ws.binaryType = "arraybuffer";
ws.onmessage = function(e) {
console.log(e.data.byteLength);
};
4.6 webSocket.send()
实例对象的send()方法用于向服务器发送数据。
发送文本的例子。
ws.send('your message');
发送 Blob 对象的例子。
var file = document
.querySelector('input[type="file"]')
.files[0];
ws.send(file);
发送 ArrayBuffer 对象的例子。
// Sending canvas ImageData as ArrayBuffer
var img = canvas_context.getImageData(0, 0, 400, 320);
var binary = new Uint8Array(img.data.length);
for (var i = 0; i < img.data.length; i++) {
binary[i] = img.data[i];
}
ws.send(binary.buffer);
webSocket.bufferedAmount
实例对象的bufferedAmount属性,表示还有多少字节的二进制数据没有发送出去。它可以用来判断发送是否结束。


var data = new ArrayBuffer(10000000);
socket.send(data);

if (socket.bufferedAmount === 0) {
  // 发送完毕
} else {
  // 发送还没结束
}
webSocket.onerror
实例对象的onerror属性,用于指定报错时的回调函数。
socket.onerror = function(event) {
// handle error event
};
socket.addEventListener("error", function(event) {
// handle error event
});
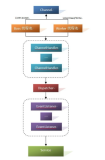
Netty的使用
新建工程,通过meaven导入Netty的库包
<dependency>
    <groupId>io.netty</groupId>
    <artifactId>netty-all</artifactId>
    <version>5.0.0.Alpha2</version>
</dependency>
创建NettyServer
package com.jiutianbian.NettyTest;

import io.netty.bootstrap.ServerBootstrap;
import io.netty.channel.ChannelFuture;
import io.netty.channel.ChannelInitializer;
import io.netty.channel.ChannelOption;
import io.netty.channel.ChannelPipeline;
import io.netty.channel.EventLoopGroup;
import io.netty.channel.nio.NioEventLoopGroup;
import io.netty.channel.socket.SocketChannel;
import io.netty.channel.socket.nio.NioServerSocketChannel;

public class NettyServer {
    private int port;

    public NettyServer(int port) {
        this.port = port;
        bind();
    }

    private void bind() {
        EventLoopGroup boss = new NioEventLoopGroup();
        EventLoopGroup worker = new NioEventLoopGroup();

        try {
            ServerBootstrap bootstrap = new ServerBootstrap();

            bootstrap.group(boss, worker);
            bootstrap.channel(NioServerSocketChannel.class);
            bootstrap.option(ChannelOption.SO_BACKLOG, 1024); // 连接数
            bootstrap.option(ChannelOption.TCP_NODELAY, true); // 不延迟,消息立即发送
            bootstrap.childOption(ChannelOption.SO_KEEPALIVE, true); // 长连接
            bootstrap.childHandler(new ChannelInitializer<SocketChannel>() {
                @Override
                protected void initChannel(SocketChannel socketChannel)
                        throws Exception {
                    ChannelPipeline p = socketChannel.pipeline();
                    p.addLast(new NettyServerHandler());// 添加NettyServerHandler,用来处理Server端接收和处理消息的逻辑
                }
            });
            ChannelFuture channelFuture = bootstrap.bind(port).sync();
            if (channelFuture.isSuccess()) {
                System.err.println("启动Netty服务成功,端口号:" + this.port);
            }
            // 关闭连接
            channelFuture.channel().closeFuture().sync();

        } catch (Exception e) {
            System.err.println("启动Netty服务异常,异常信息:" + e.getMessage());
            e.printStackTrace();
        } finally {
            boss.shutdownGracefully();
            worker.shutdownGracefully();
        }
    }

    public static void main(String[] args) throws InterruptedException {
        new NettyServer(10086);
    }
}
创建NettyServerHandler,用来接收和回复Client端的消息
package com.jiutianbian.NettyTest;

import io.netty.buffer.ByteBuf;
import io.netty.buffer.Unpooled;
import io.netty.channel.ChannelHandlerAdapter;
import io.netty.channel.ChannelHandlerContext;

import java.io.UnsupportedEncodingException;

public class NettyServerHandler extends ChannelHandlerAdapter {

    @Override
    public void channelRead(ChannelHandlerContext ctx, Object msg) {

        ByteBuf buf = (ByteBuf) msg;

        String recieved = getMessage(buf);
        System.err.println("服务器接收到客户端消息:" + recieved);

        try {
            ctx.writeAndFlush(getSendByteBuf("你好,客户端"));
            System.err.println("服务器回复消息:你好,客户端");
        } catch (UnsupportedEncodingException e) {
            e.printStackTrace();
        }
    }

    /*
     * 从ByteBuf中获取信息 使用UTF-8编码返回
     */
    private String getMessage(ByteBuf buf) {

        byte[] con = new byte[buf.readableBytes()];
        buf.readBytes(con);
        try {
            return new String(con, "UTF8");
        } catch (UnsupportedEncodingException e) {
            e.printStackTrace();
            return null;
        }
    }

    private ByteBuf getSendByteBuf(String message)
            throws UnsupportedEncodingException {

        byte[] req = message.getBytes("UTF-8");
        ByteBuf pingMessage = Unpooled.buffer();
        pingMessage.writeBytes(req);

        return pingMessage;
    }
}
启动Server端

Netty Client端
1. 新建工程,通过meaven导入Netty的库包
导入代码同上面的Server端代码

2. 创建NettyClient
新建NettyClient类

package com.jiutianbian.NettyClinetTest;

import io.netty.bootstrap.Bootstrap;
import io.netty.channel.ChannelFuture;
import io.netty.channel.ChannelInitializer;
import io.netty.channel.ChannelOption;
import io.netty.channel.EventLoopGroup;
import io.netty.channel.nio.NioEventLoopGroup;
import io.netty.channel.socket.SocketChannel;
import io.netty.channel.socket.nio.NioSocketChannel;

public class NettyClient {

    /*
     * 服务器端口号
     */
    private int port;

    /*
     * 服务器IP
     */
    private String host;

    public NettyClient(int port, String host) throws InterruptedException {
        this.port = port;
        this.host = host;
        start();
    }

    private void start() throws InterruptedException {

        EventLoopGroup eventLoopGroup = new NioEventLoopGroup();

        try {

            Bootstrap bootstrap = new Bootstrap();
            bootstrap.channel(NioSocketChannel.class);
            bootstrap.option(ChannelOption.SO_KEEPALIVE, true);
            bootstrap.group(eventLoopGroup);
            bootstrap.remoteAddress(host, port);
            bootstrap.handler(new ChannelInitializer<SocketChannel>() {
                @Override
                protected void initChannel(SocketChannel socketChannel)
                        throws Exception {
                    socketChannel.pipeline().addLast(new NettyClientHandler());
                }
            });
            ChannelFuture channelFuture = bootstrap.connect(host, port).sync();
            if (channelFuture.isSuccess()) {
                System.err.println("连接服务器成功");
            }
            channelFuture.channel().closeFuture().sync();
        } finally {
            eventLoopGroup.shutdownGracefully();
        }
    }

    public static void main(String[] args) throws InterruptedException {
        new NettyClient(10086, "localhost");
    }
}
package com.jiutianbian.NettyClinetTest;

import io.netty.buffer.ByteBuf;
import io.netty.buffer.Unpooled;
import io.netty.channel.ChannelHandlerAdapter;
import io.netty.channel.ChannelHandlerContext;

import java.io.UnsupportedEncodingException;

public class NettyClientHandler extends ChannelHandlerAdapter {
    private ByteBuf firstMessage;

    @Override
    public void channelActive(ChannelHandlerContext ctx) throws Exception {
        byte[] data = "你好,服务器".getBytes();
        firstMessage = Unpooled.buffer();
        firstMessage.writeBytes(data);
        ctx.writeAndFlush(firstMessage);
        System.err.println("客户端发送消息:你好,服务器");
    }

    @Override
    public void channelRead(ChannelHandlerContext ctx, Object msg)
            throws Exception {
        ByteBuf buf = (ByteBuf) msg;
        String rev = getMessage(buf);
        System.err.println("客户端收到服务器消息:" + rev);
    }

    private String getMessage(ByteBuf buf) {
        byte[] con = new byte[buf.readableBytes()];
        buf.readBytes(con);
        try {
            return new String(con, "UTF8");
        } catch (UnsupportedEncodingException e) {
            e.printStackTrace();
            return null;
        }
    }
}
启动Client端
Server端日志输出,此时如下
Dubbo 通信
Dubbo通信,Dubbo 通信方式使用RPC的方式进行通信。