路由知识总结
可以把SPA(single page application)理解为是一个视图状态的集合。Angular架构下的各个视图会因为操作的不同显示的也会各有千秋,这些功劳全都得归功于路由。
基础知识
路由相关的对象总结:
1.Routes:路由配置,表示在哪个URL中会显示哪个组件,还有就是在哪个RouterOutlet(像是一个插排一样)中显示组件。
/**
 * Tips: path 不能使用斜杠进行开头,因为可以让Angular自动使用绝对路径和相对路径。
 * 配置好路径以及路径对应的需要显示的component。
 */
const routes: Routes = [
  {path: '', component: HomeComponent},
  {path: 'products', component: ProductsComponent}
];2.RouterOutlet:在HTML标记路由内的占位符指令。
<router-outlet></router-outlet>3.Router:在运行时指定路由的行为,通过navigate()以及navigateByURL()指定路由到哪个路由中去。
//html模版上写入一个点击事件,通过事件,触发clickProductButton事件。通过router实现路由。
constructor(
    private router: Router
  ) {}
public clickProductButton() {
  this.router.navigate(['/products']);
}4.RouterLink:在HTML中声明路由导航用的指令。与Router相类似,只不过Router是在controller中使用的,而RouterLink在HTML中使用的。
<!--必须加入斜杠,因为这样才能区分是跟路由,还是子路由-->
  <!--为什么 routerLink的值是一个数组呢,因为可以通过路由传入一些参数-->
  <a [routerLink]="['/']">主页</a>
<a [routerLink]="['/products']">商品详情</a>5.ActivatedRoute:当前激活路由的相关信息,可以被这个类记录,并且被我们使用。
如何在路由中传递数据
1.在查询参数中传递数据
多添加一个[queryParams]的属性绑定形如:
<a [routerLink]="['/products']" [queryParams]= "{id:1}">商品详情</a>获取:通过ActivatedRoute.queryParams[参数的key]
2.在路由路径中传递数据
- 修改Routes中的path属性,形如:path:'product/:type'
- routerLink中多添加一个参数,形如:[routerLink]="['/products','book']" ,这里的book就是给我们刚刚定义type的值。
获取:通过 ActivatedRoute.params[参数的key]
3.在路由配置中传递数据
通过在Routes中定义data参数 形如:
{path: '', component: HomeComponent, data: [{key: value}]}然后通过ActivatedRoute.data[0] [key] 来获取
Tips:参数快照与参数订阅
首先上代码:
    //参数订阅
    this.activatedRoute.params.subscribe((params: Params) => {
        this.productType = params['type'];
    });
    //参数快照
    this.productType = this.activatedRoute.snapshot.params['type'];
他俩的区别就在于我们现在有两个不同的按钮,跳转到的URL分别为 [routerLink]="['/products','book']",和[routerLink]="['/products','watch']",可以看出它们只有type的参数类型不同。
如果使用了快照,点击了第一个按钮,在点击第二个,那么获取到的参数不会发生变化,这个时候我们就应该使用参数订阅(观察者模式的思想,感兴趣的可以查询RXJS,进行详细了解)。
重定向路由
在Routes中添加 对应参数:
{path: '', redirectTo: '/home', pathMatch: 'full'}子路由
在正常的情况下,组件与组件之间一定是会有嵌套关系的,这种嵌套关系就会导致我们的路由插座()同样也是嵌套的。子路由就是为了解决路由插座父子嵌套关系的
使用子路由的步骤:
1.修改在Routes中,product的路由信息,主要就是添加了一个children属性:
{path: 'products/:type', component: ProductsComponent, children: [
    {path: '', component: ProductDescComponent},
    {path: 'seller/:id', component: SellerComponent}
  ]}
2.在需要子路由的html中,插上 作为插座
3.然后在需要跳转的地方编写如下代码
<a [routerLink] = "['./']">跳转到商品详情</a>
<a [routerLink] = "['./seller', 99]">跳转到售货员信息</a>
辅助路由
刚刚的子路由如果说是父子关系的话,那么辅助路由就是"兄弟关系了"。
这种场景出现在我们在一个界面中,两个component分别被不同的路由机制管理着,如果只使用原来的插槽,没有办法指定用的到底是哪一种路由策略,所以辅助路由就这么诞生了。
使用辅助路由的步骤:
1.> 通过name 指定具体的路由插座名称
2.> 指定当前这个aux路由可以展示哪些component。
{path: /xxx, component: XxxComponent, outlet: aux}
{path: /yyy, component: YyyComponent, outlet: aux}
3.> 在进行导航的地方指定我们需要的那个路由
路由守卫
页面从一种页面状态跳转到另一种页面状态,有的时候需要一些条件,检查这些条件就是路由守卫的职责。
一共可以分为三种:
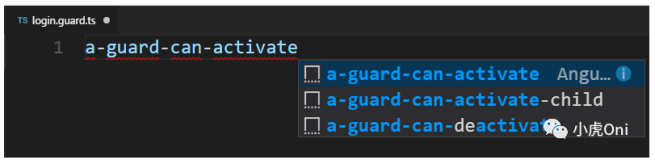
1.CanActivate: 处理导航到某路由的情况
大概的使用步骤:
首先我们先要写一个守卫的类:
import { CanActivate, ActivatedRouteSnapshot, RouterStateSnapshot } from "@angular/router";

/**
 * 这个路由守卫用于实现进入某以页面需要满足某些需求的情况。
 */
export class LoginGuard implements CanActivate {
    private flag = true;
    canActivate(route: ActivatedRouteSnapshot, state: RouterStateSnapshot) {

        //这里给了一个随机数,如果数字大于0.5则可以进行登陆,否则会被拦截
        this.flag = Math.random() > 0.5;
        if ( this.flag ) {
            console.log('可以登陆');

        }
        console.log(this.flag);
        return this.flag;
    }
}
然后将守卫的类添加到Routes中需要守卫的规则中:
{path: 'products/:type', component: ProductsComponent, canActivate: [LoginGuard], children: [
    {path: '', component: ProductDescComponent},
    {path: 'seller/:id', component: SellerComponent}
  ]}
最后在app.module.ts中添加自己需要依赖注入的守卫类即可:
providers: [LoginGuard]
2.CanDeactive: 处理从当前路由离开的情况
大概的使用步骤:
首先我们先要写一个守卫的类:
import { CanDeactivate, ActivatedRouteSnapshot } from "@angular/router";
import { ProductsComponent } from "../products/products.component";

export class NotSaveGuard implements CanDeactivate<ProductsComponent> {
    private flag = true;
    canDeactivate(component: ProductsComponent, _currentRoute: ActivatedRouteSnapshot) {

        //这里暂时给出一个提示框
        return window.confirm("还没有保存确定离开吗?");
    }

}
然后将守卫的类添加到Routes中需要守卫的规则中:
{path: 'products/:type', component: ProductsComponent, canDeActivate: [NotSaveGuard], children:
[
    {path: '', component: ProductDescComponent},
    {path: 'seller/:id', component: SellerComponent}
  ]}
最后在app.module.ts中添加自己需要依赖注入的守卫类即可:
providers: [NotSaveGuard]
3.Resolve:在路由激活之前获取数据
在进入路由之前检测数据是不是已经存在,以为网络请求具有延迟,如果出现了,已经路由到下个界面,但是信息还没有存在的情况,我们就会让界面路由到错误界面或者别的什么界面。
大概的使用步骤:
1.首先我们定义一个Resolve守卫的类:
import { Resolve, ActivatedRouteSnapshot, RouterStateSnapshot, Router } from "@angular/router";
import { ProductsComponent, Product } from "../products/products.component";
import { Injectable } from "@angular/core";

@Injectable()
export class ProductGuard implements Resolve<Product> {


    constructor(private router: Router) {
    }

    resolve(route: ActivatedRouteSnapshot, state: RouterStateSnapshot) {
        if (route.params['type'] === 'book') {
            return new Product(1, 'iphone X');
        } else {
            this.router.navigate(['/home']);
            return undefined;
        }
    }

}
2.然后将resolve属性添加到守卫的规则中
{path: 'products/:type', component: ProductsComponent, resolve: {product: ProductGuard},
children: [
    {path: '', component: ProductDescComponent},
    {path: 'seller/:id', component: SellerComponent}
  ]}
3.依赖注入 ProductGuard
providers: [ProductGuard]4.resolve 其实相当于对返回值的一种增强,接受返回值的地方我们应该这么写
this.activatedRoute.data.subscribe((data: {product: Product}) => {
              //注意:这里之所以可以使用data.product,是因为我们在Routes路由中配置的 resolve:
{product: ProductGuard}所致。这里的product就是返回值的名字,如果变化了,两个名字都要一起变化。
        this.productId = data.product.id;
        this.productName = data.product.name;
    });
最后附加上本文提及到的代码,我已经放在github上,可供参考