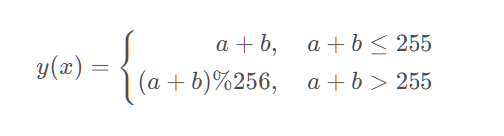
灰度图像为一通道图像,如8位的灰度图的每一个像素点的数据由一个uchar类型来储存,uchar的值代表图像的亮度,灰度图像的中值滤波是根据像素值的3×3的领域内,像素值排序后的中值像素代表该点的像素值值;
而彩色图像一般为RGB图片,像素点的颜色由红绿蓝三通道决定,数据由一个uchar3型存储,如同灰度图的中值滤波一样,彩色图像的中值滤波也是根据图像的亮度来选取相应的像素点的值。
RGB图像的亮度计算:
F(x,y)=(R(x,y)+G(x,y)+B(x,y))/3
F(X,Y)是处理后该点的亮度值,R(x,y),B(x,y),G(x,y)是该点的RGB值
(这里说明一下,在HSV模型中亮度V选取的值是RGB的最大值);
根据得的亮度值来滤波,这时得倒的图像是彩色图像的灰度图。
通过
cucun[0] = (temp[offset - ncols - 1].x + temp[offset - ncols - 1].y + temp[offset - ncols - 1].z) / 3;来计算像素的亮度值;
在c中是直接用两个循环遍历图像来选取该位置像素的亮度值从而决定该点的色彩的值;
在CUDA C中直接申明多线程来处理图像
完整代码:
#include "cuda_runtime.h"
#include "device_launch_parameters.h"
#include <stdio.h>
#include<opencv2\opencv.hpp>
#include<opencv2\core\core.hpp>
#include<opencv2\highgui\highgui.hpp>
using namespace cv;
using namespace std;
__global__ void colorkernel(uchar3 *temp, uchar3 *dirtemp, int ncols, int nrows)
{
int x = threadIdx.x + blockIdx.x*blockDim.x;
int y = threadIdx.y + blockIdx.y*blockDim.y;
int offset = x + y*ncols;
uchar cucun[9];
uchar3* cucuny[9];
uchar3* t;
uchar zs;
cucun[0] = (temp[offset - ncols - 1].x + temp[offset - ncols - 1].y + temp[offset - ncols - 1].z) / 3;
cucun[1] = (temp[offset - ncols].x + temp[offset - ncols].y + temp[offset - ncols].z) / 3;
cucun[2] = (temp[offset - ncols + 1].x + temp[offset - ncols + 1].y + temp[offset - ncols + 1].z) / 3;
cucun[3] = (temp[offset - 1].x + temp[offset - 1].y + temp[offset - 1].z) / 3;
cucun[4] = (temp[offset].x + temp[offset].y + temp[offset].z) / 3;
cucun[5] = (temp[offset + 1].x + temp[offset + 1].y + temp[offset + 1].z) / 3;
cucun[6] = (temp[offset + ncols - 1].x + temp[offset + ncols - 1].y + temp[offset + ncols - 1].z) / 3;
cucun[7] = (temp[offset + ncols].x + temp[offset + ncols].y + temp[offset + ncols].z) / 3;
cucun[8] = (temp[offset + ncols + 1].x + temp[offset + ncols + 1].y + temp[offset + ncols + 1].z) / 3;
cucuny[0] = &temp[offset - ncols - 1];
cucuny[1] = &temp[offset - ncols];
cucuny[2] = &temp[offset - ncols + 1];
cucuny[3] = &temp[offset - 1];
cucuny[4] = &temp[offset];
cucuny[5] = &temp[offset + 1];
cucuny[6] = &temp[offset + ncols - 1];
cucuny[7] = &temp[offset + ncols];
cucuny[8] = &temp[offset + ncols + 1];
if (x > 1 && x < ncols&&y>1 && y < nrows)
{
for (int i = 8; i >= 0; i--)
{
for (int j = 0; j < i; j++)
{
if (cucun[j]>cucun[i])
{
zs = cucun[j];
cucun[j] = cucun[i];
cucun[i] = zs;
t = cucuny[j];
cucuny[j] = cucuny[i];
cucuny[i] = t;
}
}
}
}
dirtemp[offset] = *cucuny[8];
}
void colblur(uchar3 *temp, uchar3 *dirtemp, int ncols, int nrows)
{
dim3 threads(16, 16);
dim3 blocks((nrows + threads.x - 1) / threads.x, (nrows + threads.y - 1) / threads.y);
colorkernel << <blocks, threads >> >(temp, dirtemp, ncols, nrows);
}
void main()
{
uchar3 *temp, *dirtmep;
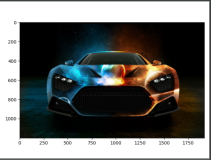
Mat src = imread("1.jpg");
Mat dir(src.rows, src.cols, CV_8UC3);
int size = src.rows*src.cols*sizeof(uchar3);
cudaMalloc((void **)&temp, size);
cudaMalloc((void**)&dirtmep, size);
cudaMemcpy(temp, src.data, size, cudaMemcpyHostToDevice);
colblur(temp, temp, src.cols, src.cols);
cudaMemcpy(dir.data, temp, size, cudaMemcpyDeviceToHost);
imshow("12.jpg", dir);
waitKey();
cudaFree(temp);
cudaFree(dirtmep);
}这仅仅是按公式进行实现,效率较低。