最近在实战做明日科技的一个叫《魔镜》的APP,接触到不少有趣的技能tip,这里记录一下。功能点主要有启动页、摄像头设置、亮度调节、相机焦距调节。界面选择换镜框、吹气起雾、长安碎屏、摇一摇换镜框、系统帮助等子功能,博客会陆续更近
本文自觉有些有趣的地方(这里仅做摘要,详见文中):
- handler.sendEmptyMessageDelayed()
- 1.3 中的修改全局配置文件 AndroidManifest.xml
- name属性表示颜色变量名,在java中调用时就是调用这个名称;#3F51B5表示颜色值;调用格式为@color/setbackground。其中颜色值可以直接在xml中输入,或者点击色块,在弹出窗口中进行选择或输入设置;(如文《资源准备1:颜色资源》中图)
- 资源准备4:styles样式资源
MyTheme表示样式的名称,
android:windowFrame表示窗口的背景颜色,
android:windowBackground表示窗口的背景图片,
android:windowIsTranslucent表示窗口是否显示,
android:windowNoTitle表示窗口是否有标题 - 一般情况,除了直接使用放在drawable目录下的图片,其实drawable的用法都与XML有关,使用shape、layer-list等标签绘制一些背景,还可以通过selector标签定义view的状态效果。
- ImageView.ScaleType设置图解
功能点1.快速构建启动页:
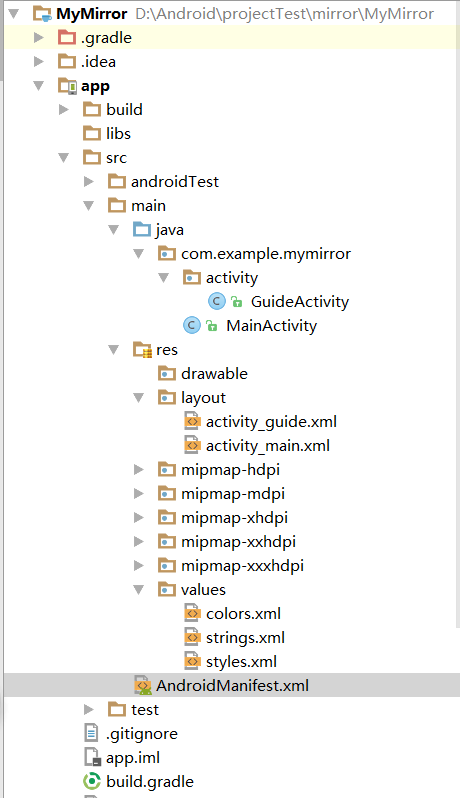
此时目录结构:
1.1 Activity.java全文:
注意代码中的注释,其中 handler.sendEmptyMessageDelayed(1,3000); 这个方法比较有趣
package com.example.mymirror.activity;

import android.content.Intent;
import android.os.Handler;
import android.os.Message;
import android.support.v7.app.AppCompatActivity;
import android.os.Bundle;
import android.view.KeyEvent;

import com.example.mymirror.MainActivity;
import com.example.mymirror.R;

public class GuideActivity extends AppCompatActivity {

    @Override
    protected void onCreate(Bundle savedInstanceState) {
        super.onCreate(savedInstanceState);
        setContentView(R.layout.activity_guide);
        handler.sendEmptyMessageDelayed(1,3000);//传递what值为1的,空消息,延迟3秒
    }
    //消息处理,接收消息
    private Handler handler = new Handler(new Handler.Callback() {
        @Override
        public boolean handleMessage(Message msg) {
            if (msg.what == 1){
                //创建意图
                Intent intent = new Intent(GuideActivity.this, MainActivity.class);
                startActivity(intent);//跳转界面
                finish();//关闭界面
            }
            return false;
        }
    });

    //屏蔽返回键
    @Override
    public boolean onKeyDown(int keyCode, KeyEvent event) {
        if (keyCode == KeyEvent.KEYCODE_BACK){
            return false;
        }
        return false;
    }
}
1.2 布局问价设置背景图片:
android:background="@mipmap/background"
全文:
<?xml version="1.0" encoding="utf-8"?>
<android.support.constraint.ConstraintLayout xmlns:android="http://schemas.android.com/apk/res/android"
    xmlns:app="http://schemas.android.com/apk/res-auto"
    xmlns:tools="http://schemas.android.com/tools"
    android:layout_width="match_parent"
    android:layout_height="match_parent"
    android:background="@mipmap/background"
    tools:context="com.example.mymirror.activity.GuideActivity">

</android.support.constraint.ConstraintLayout>
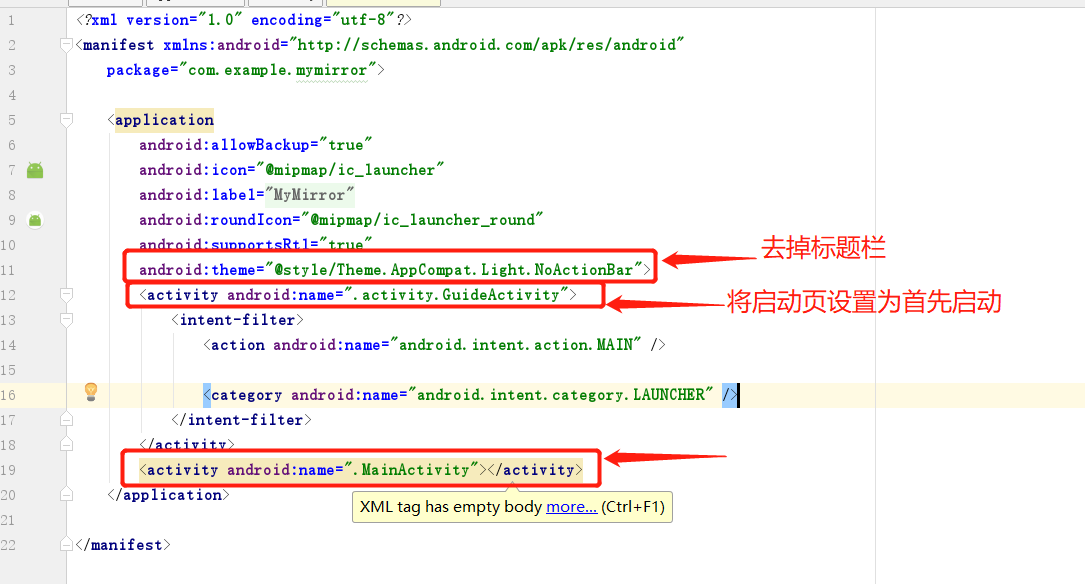
1.3 修改全局配置文件 AndroidManifest.xml
<?xml version="1.0" encoding="utf-8"?>
<manifest xmlns:android="http://schemas.android.com/apk/res/android"
    package="com.example.mymirror">

    <application
        android:allowBackup="true"
        android:icon="@mipmap/ic_launcher"
        android:label="@string/app_name"
        android:roundIcon="@mipmap/ic_launcher_round"
        android:supportsRtl="true"
        android:theme="@style/Theme.AppCompat.Light.NoActionBar">
        <activity android:name=".activity.GuideActivity">
            <intent-filter>
                <action android:name="android.intent.action.MAIN" />

                <category android:name="android.intent.category.LAUNCHER" />
            </intent-filter>
        </activity>
        <activity android:name=".MainActivity"></activity>
    </application>

</manifest>
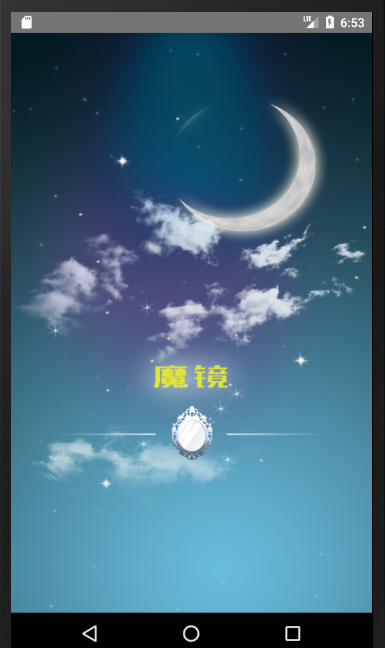
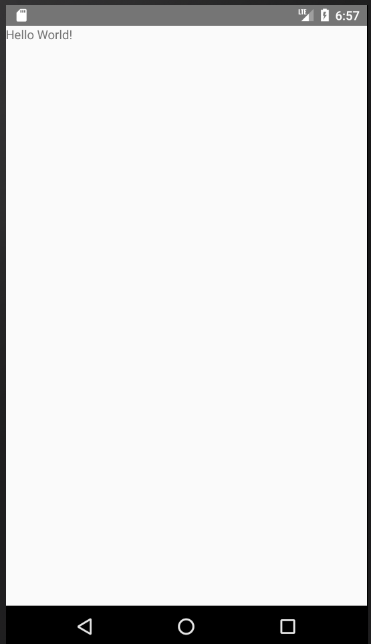
到此,运行程序,结果:启动页界面停顿3秒后,切到MainActivity上:
2.主窗体模块设计
资源准备1:颜色资源
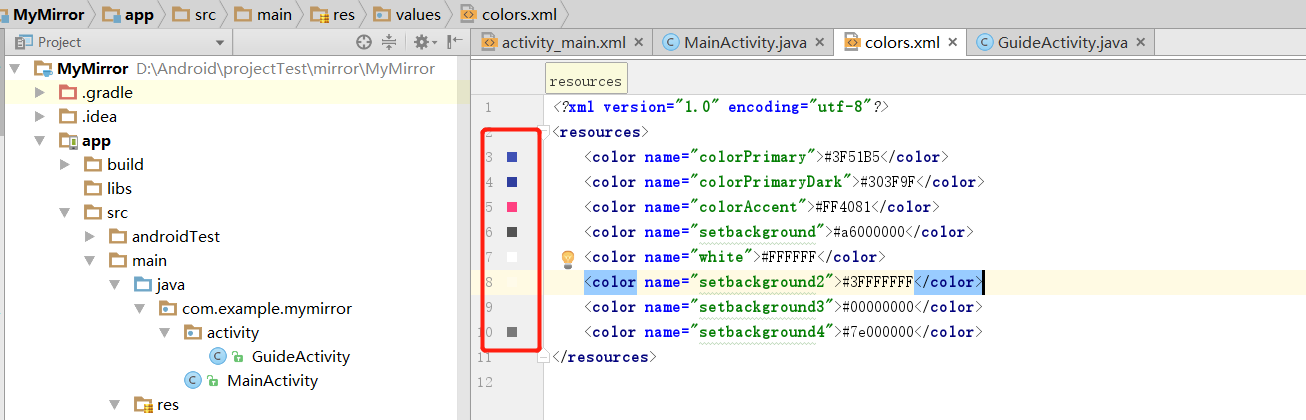
打开app/res/values目录下的colors.xml:
<?xml version="1.0" encoding="utf-8"?>
<resources>
    <color name="colorPrimary">#3F51B5</color>
    <color name="colorPrimaryDark">#303F9F</color>
    <color name="colorAccent">#FF4081</color>
    <color name="setbackground">#a6000000</color>
    <color name="white">#FFFFFF</color>
    <color name="setbackground2">#3FFFFFFF</color>
    <color name="setbackground3">#00000000</color>
    <color name="setbackground4">#7e000000</color>
</resources>
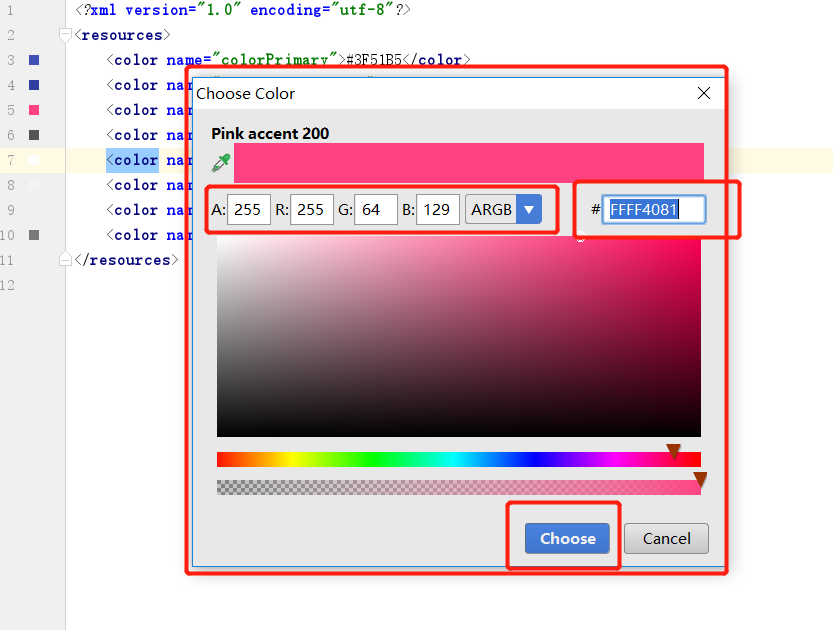
name属性表示颜色变量名,在java中调用时就是调用这个名称;#3F51B5表示颜色值;调用格式为@color/setbackground。其中颜色值可以直接在xml中输入,或者点击下图框中的色块,在弹出窗口中进行选择或输入设置:
资源准备2:尺寸资源
调用格式为@dimen/dp_0

<?xml version="1.0" encoding="utf-8"?>
<resources>
    <!--尺寸资源 -->
    <dimen name="activity_horizontal_margin">16dp</dimen>
    <dimen name="activity_vertical_margin">16dp</dimen>
    <dimen name="dp_0">0dp</dimen>
    <dimen name="dp_3">3dp</dimen>
    <dimen name="dp_5">5dp</dimen>
    <dimen name="dp_10">10dp</dimen>
    <dimen name="dp_18">18dp</dimen>
    <dimen name="dp_20">20dp</dimen>
    <dimen name="dp_30">30dp</dimen>
    <dimen name="dp_45">45dp</dimen>
    <dimen name="dp_55">55dp</dimen>
    <dimen name="dp_160">160dp</dimen>
    <dimen name="dp_200">200dp</dimen>
    <dimen name="dp_300">300dp</dimen>
</resources>
资源准备3:字符串资源

<resources>
    <string name="app_name">MyMirror</string>
    <string name="back_txt">返回</string>
</resources>
资源准备4:styles样式资源
MyTheme表示样式的名称,
android:windowFrame表示窗口的背景颜色,
android:windowBackground表示窗口的背景图片,
android:windowIsTranslucent表示窗口是否显示,
android:windowNoTitle表示窗口是否有标题
<resources>

    <!-- Base application theme. -->
    <style name="AppTheme" parent="Theme.AppCompat.Light.DarkActionBar">
        <!-- Customize your theme here. -->
        <item name="colorPrimary">@color/colorPrimary</item>
        <item name="colorPrimaryDark">@color/colorPrimaryDark</item>
        <item name="colorAccent">@color/colorAccent</item>
    </style>
    <style name="MyTheme" parent="Theme.AppCompat.NoActionBar">
        <item name="android:windowFrame">@android:color/transparent</item>
        <item name="android:windowBackground">@color/setbackground4</item>
        <item name="android:windowIsTranslucent">true</item>
        <item name="android:windowNoTitle">true</item>
    </style>
</resources>
资源准备5:drawable图片资源
一般情况,除了直接使用放在drawable目录下的图片,其实drawable的用法都与XML有关,使用shape、layer-list等标签绘制一些背景,还可以通过selector标签定义view的状态效果。

<?xml version="1.0" encoding="utf-8"?>
<selector xmlns:android="http://schemas.android.com/apk/res/android">
    <item android:state_pressed="false" android:drawable="@drawable/back_shape_pink"/>
    <item android:state_pressed="true" android:drawable="@drawable/back_shape_white"/>
</selector>

<?xml version="1.0" encoding="utf-8"?>
<shape xmlns:android="http://schemas.android.com/apk/res/android">
    <!--实心 -->
    <solid android:color="@color/setbackground2"/>
    <!--描边 -->
    <stroke android:color="@color/white"
        android:width="@dimen/dp_3"/>
    <!--圆角 -->
    <corners android:radius="@dimen/dp_20"/>
    <!--间隔 -->
    <padding android:left="@dimen/dp_10"
        android:top="@dimen/dp_5"
        android:bottom="@dimen/dp_5"
        android:right="@dimen/dp_10"/>
</shape>

<?xml version="1.0" encoding="utf-8"?>
<shape xmlns:android="http://schemas.android.com/apk/res/android">
    <solid android:color="@color/setbackground2"/>
    <stroke android:color="@color/colorAccent"
        android:width="@dimen/dp_3"/>
    <corners android:radius="@dimen/dp_20"/>
    <padding android:left="@dimen/dp_10"
        android:top="@dimen/dp_5"
        android:bottom="@dimen/dp_5"
        android:right="@dimen/dp_10"/>
</shape>
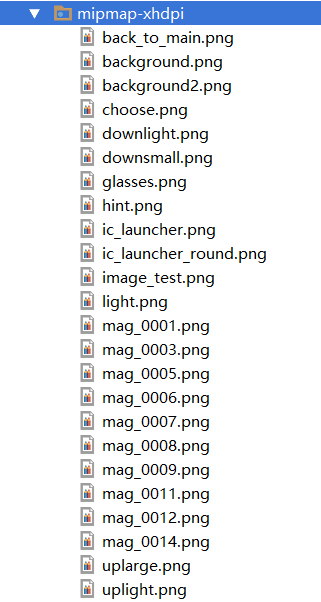
资源准备6:mipmap资源(项目完成后附上码云地址)
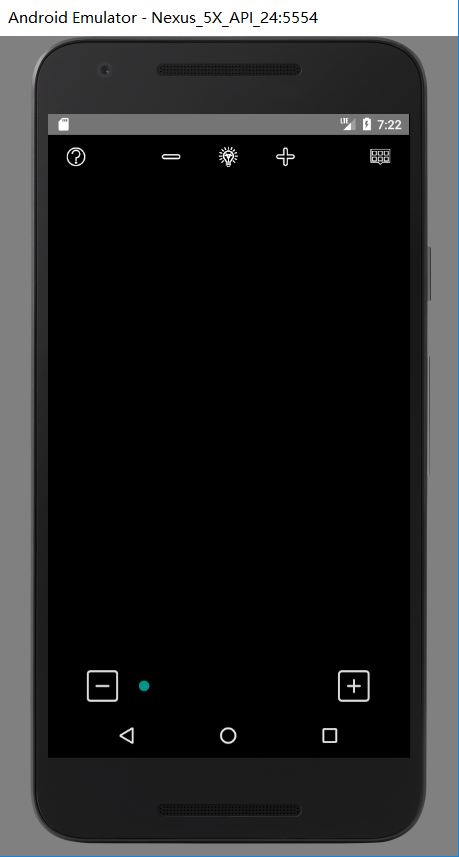
主窗体布局:
即activity_main.xml布局,布局设计框架如下:
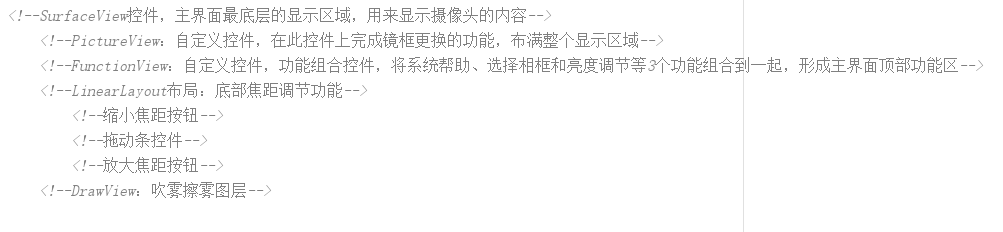
        <!--SurfaceView控件,主界面最底层的显示区域,用来显示摄像头的内容-->
            <!--PictureView:自定义控件,在此控件上完成镜框更换的功能,布满整个显示区域-->
            <!--FunctionView:自定义控件,功能组合控件,将系统帮助、选择相框和亮度调节等3个功能组合到一起,形成主界面顶部功能区-->
            <!--LinearLayout布局:底部焦距调节功能-->
                <!--缩小焦距按钮-->
                <!--拖动条控件-->
                <!--放大焦距按钮-->
            <!--DrawView:吹雾擦雾图层-->
activity_main.xml全文:
<?xml version="1.0"  encoding="utf-8"?>
<RelativeLayout xmlns:android="http://schemas.android.com/apk/res/android"
    xmlns:tools="http://schemas.android.com/tools"
    android:layout_width="match_parent"
    android:layout_height="match_parent"
    tools:context=".activity.MainActivity">
    <!--此处添加主界面上的布局组件 -->
    <SurfaceView
        android:id="@+id/surface"
        android:layout_width="match_parent"
        android:layout_height="match_parent"/>
    <com.example.mymirror.view.PictureView
        android:id="@+id/picture"
        android:layout_width="match_parent"
        android:layout_height="match_parent"
        android:scaleType="fitXY"/>
    <com.example.mymirror.view.FunctionView
        android:id="@+id/function"
        android:layout_width="match_parent"
        android:layout_height="wrap_content"/>

    <LinearLayout
        android:id="@+id/bottom_bar"
        android:layout_alignParentBottom="true"
        android:layout_width="match_parent"
        android:layout_height="wrap_content"
        android:gravity="center_vertical"
        android:padding="@dimen/dp_10">
        <!-- 放大、缩小按钮和拖动条布局代码-->
        <ImageView
            android:id="@+id/minus"
            android:layout_marginLeft="@dimen/dp_30"
            android:layout_width="@dimen/dp_45"
            android:layout_height="@dimen/dp_45"
            android:src="@mipmap/downsmall"
            android:scaleType="centerInside"/>
        <SeekBar
            android:id="@+id/seekbar"
            android:layout_width="@dimen/dp_0"
            android:layout_height="wrap_content"
            android:layout_weight="1"
            android:progress="0"
            android:thumbOffset="@dimen/dp_0"/>
        <ImageView
            android:id="@+id/add"
            android:layout_marginRight="@dimen/dp_30"
            android:layout_width="@dimen/dp_45"
            android:layout_height="@dimen/dp_45"
            android:src="@mipmap/uplarge"
            android:scaleType="centerInside"/>
    </LinearLayout>
    <com.example.mymirror.view.DrawView
        android:id="@+id/draw_glasses"
        android:layout_width="match_parent"
        android:layout_height="match_parent"
        android:visibility="gone"/>

</RelativeLayout>
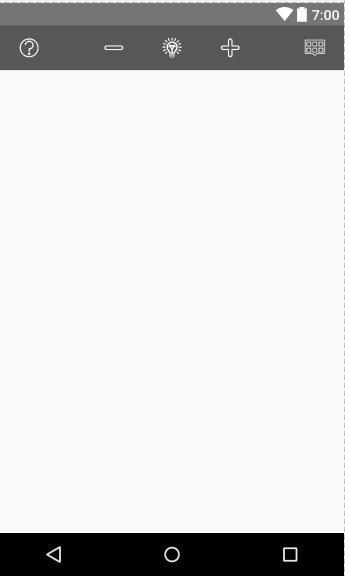
Design界面显示:

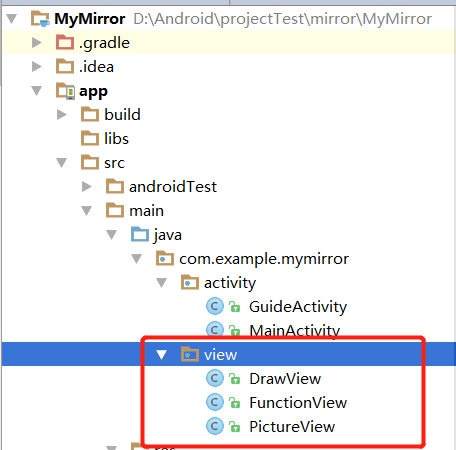
创建view包,在包中添加PictureView、FunctionView、DrawView三个java文件用于描述自定义控件:
layout文件夹下创建文件view_function.xml,存放顶部功能栏布局:

<?xml version="1.0" encoding="utf-8"?>
<LinearLayout xmlns:android="http://schemas.android.com/apk/res/android"
    android:orientation="vertical"
    android:layout_width="match_parent"
    android:layout_height="wrap_content"
    android:padding="@dimen/dp_10"
    android:background="@color/setbackground"
    android:gravity="center">
    <RelativeLayout
        android:layout_width="match_parent"
        android:layout_height="@dimen/dp_30">
        <!--  问号 按钮-->
        <ImageView
            android:id="@+id/hint"
            android:layout_centerVertical="true"
            android:layout_width="@dimen/dp_45"
            android:layout_height="@dimen/dp_45"
            android:scaleType="centerInside"
            android:src="@mipmap/hint"/>
        <!--  选择相框 按钮-->
        <ImageView
            android:id="@+id/choose"
            android:layout_width="@dimen/dp_45"
            android:layout_height="@dimen/dp_45"
            android:layout_centerVertical="true"
            android:src="@mipmap/choose"
            android:scaleType="centerInside"
            android:layout_alignParentRight="true"/>
        <!--  灯泡图标-->
        <ImageView
            android:id="@+id/cencer"
            android:layout_width="@dimen/dp_45"
            android:layout_height="@dimen/dp_45"
            android:src="@mipmap/light"
            android:scaleType="centerInside"
            android:layout_centerInParent="true"/>
        <!--  减亮度 按钮-->
        <ImageView
            android:id="@+id/light_down"
            android:layout_width="@dimen/dp_45"
            android:layout_height="@dimen/dp_45"
            android:layout_centerVertical="true"
            android:src="@mipmap/downlight"
            android:scaleType="centerInside"
            android:layout_toLeftOf="@+id/cencer"
            android:layout_marginRight="@dimen/dp_20"/>
        <!--  加亮度 按钮-->
        <ImageView
            android:id="@+id/light_up"
            android:layout_width="@dimen/dp_45"
            android:layout_height="@dimen/dp_45"
            android:layout_centerVertical="true"
            android:src="@mipmap/uplight"
            android:scaleType="centerInside"
            android:layout_toRightOf="@+id/cencer"
            android:layout_marginLeft="@dimen/dp_20"/>
    </RelativeLayout>

</LinearLayout>
对应预览图:
FunctionView全文:
package com.example.mymirror.view;

import android.content.Context;
import android.util.AttributeSet;
import android.view.LayoutInflater;
import android.view.View;
import android.widget.ImageView;
import android.widget.LinearLayout;

/**
 * Created by 700 on 2018/8/23.
 */

public class FunctionView extends LinearLayout implements View.OnClickListener{
    private LayoutInflater mInflater;//声明寻找XML文件类
    private ImageView hint,choose,down,up;//控件对象
    /**
     * 回调接口,4个按钮
     */
    private onFunctionViewItemClickListener listener;
    public interface onFunctionViewItemClickListener{
        void hint();//提示
        void choose();//选择相框
        void down();//减少亮度
        void up();//增加亮度
    }
    /**
     * 初始化构造函数
     */
    public FunctionView(Context context) {
        super(context);
    }

    public FunctionView(Context context, AttributeSet attrs) {
        super(context, attrs);
    }

    public FunctionView(Context context, AttributeSet attrs, int defStyleAttr) {
        super(context, attrs, defStyleAttr);
    }

    @Override
    public void onClick(View v) {

    }

    public void setOnFunctionViewItemClickListener(onFunctionViewItemClickListener monFunctionViewItemClickListener){
        this.listener = monFunctionViewItemClickListener;//设置监听对象
    }
}
PictureView全文:
package com.example.mymirror.view;

import android.content.Context;
import android.util.AttributeSet;
import android.widget.ImageView;


/**
 * Created by 700 on 2018/8/23.
 */

public class PictureView extends ImageView {
    public PictureView(Context context) {
        super(context);
    }

    public PictureView(Context context, AttributeSet attrs) {
        super(context, attrs);
    }

    public PictureView(Context context, AttributeSet attrs, int defStyleAttr) {
        super(context, attrs, defStyleAttr);
    }
}
DrawView全文:
package com.example.mymirror.view;

import android.content.Context;
import android.util.AttributeSet;
import android.view.View;

/**
 * Created by 700 on 2018/8/23.
 */

public class DrawView extends View{
    public DrawView(Context context) {
        super(context);
    }

    public DrawView(Context context, AttributeSet attrs) {
        super(context, attrs);
    }

    public DrawView(Context context, AttributeSet attrs, int defStyleAttr) {
        super(context, attrs, defStyleAttr);
    }
}
运行结果: