利用xtrabackup备份恢复MySQL
[toc]
一、在主库上操作
安装xtrabackup
# yum -y install http://www.percona.com/downloads/percona-release/redhat/0.1-3/percona-release-0.1-3.noarch.rpm
# yum -y install perl-DBD-mysql perl-DBI percona-xtrabackup-22 qpress
创建同步用户并授权
mysql> GRANT SELECT, RELOAD, FILE, SUPER, LOCK TABLES, REPLICATION SLAVE, REPLICATION CLIENT, PROCESS,SHOW VIEW ON *.* TO 'cgy'@'192.168.1.59' IDENTIFIED BY '123456';
Query OK, 0 rows affected (0.02 sec)
mysql>
mysql> flush privileges;
Query OK, 0 rows affected (0.00 sec)
创建备份目录
# mkdir mysql_backup
开始全库备份
# innobackupex --defaults-file=/etc/my.cnf --socket=/usr/local/mysql/mysql.sock --user=root --password='123456' --port=3300 --slave-info --no-timestamp ~/mysql_backup/20170414
// 打包压缩备份文件,并传给从服务器
# tar zcf sql_backup.tar.gz 20170414/
# scp sql_backup.tar.gz 192.168.1.59:~
查看二进制日志文件及位置
# cd /root/mysql_backup/20170414
# vim xtrabackup_info
11 binlog_pos = filename 'mysql-bin.000001', position 120
二、在从库上操作
1、先停止数据库
[root@web2 ~]# service mysqld stop
Shutting down MySQL. SUCCESS!
2、配置my.cnf
log-bin = mysql-bin
server-id   = 2
3、恢复数据
# tar xf ecshop_sql.tar.gz
# innobackupex --defaults-file=/etc/my.cnf --user=root --apply-log ~/20170414/
# innobackupex --defaults-file=/etc/my.cnf --user=root --copy-back ~/20170414/

// 修改mysql数据目录下的文件权限,否则数据库启动不了
# chown -R mysql.mysql /usr/local/mysql/var
// 启动数据库
# service mysqld start
4、登录从mysql,指定同步信息
# mysql -uroot -p123456
...
mysql> change master to
    -> master_host='192.168.1.16',
    -> master_user='cgy',
    -> master_password='123456',
    -> master_port=3300,
    -> master_log_file='mysql-bin.000001',
    -> master_log_pos=120;
// 打开slave功能
mysql> start slave;
Query OK, 0 rows affected (0.02 sec)

// 查看slave状态
mysql> show slave status \G;
*************************** 1. row ***************************
               Slave_IO_State: Waiting for master to send event
                  Master_Host: 192.168.1.16
                  Master_User: cgy
                  Master_Port: 3300
                Connect_Retry: 60
              Master_Log_File: mysql-bin.000001
          Read_Master_Log_Pos: 630
               Relay_Log_File: web2-relay-bin.000002
                Relay_Log_Pos: 793
        Relay_Master_Log_File: mysql-bin.000001
             Slave_IO_Running: Yes
            Slave_SQL_Running: Yes
              Replicate_Do_DB:
          Replicate_Ignore_DB:
           Replicate_Do_Table:
       Replicate_Ignore_Table:
      Replicate_Wild_Do_Table:
  Replicate_Wild_Ignore_Table:
                   Last_Errno: 0
                   Last_Error:
                 Skip_Counter: 0
          Exec_Master_Log_Pos: 630
              Relay_Log_Space: 965
              Until_Condition: None
               Until_Log_File:
                Until_Log_Pos: 0
           Master_SSL_Allowed: No
           Master_SSL_CA_File:
           Master_SSL_CA_Path:
              Master_SSL_Cert:
            Master_SSL_Cipher:
               Master_SSL_Key:
        Seconds_Behind_Master: 0
Master_SSL_Verify_Server_Cert: No
                Last_IO_Errno: 0
                Last_IO_Error:
               Last_SQL_Errno: 0
               Last_SQL_Error:
  Replicate_Ignore_Server_Ids:
             Master_Server_Id: 1
                  Master_UUID: 5328b9ac-0bf5-11e7-a62b-000c293d97b8
             Master_Info_File: /usr/local/mysql/var/master.info
                    SQL_Delay: 0
          SQL_Remaining_Delay: NULL
      Slave_SQL_Running_State: Slave has read all relay log; waiting for the slave I/O thread to update it
           Master_Retry_Count: 86400
                  Master_Bind:
      Last_IO_Error_Timestamp:
     Last_SQL_Error_Timestamp:
               Master_SSL_Crl:
           Master_SSL_Crlpath:
           Retrieved_Gtid_Set:
            Executed_Gtid_Set:
                Auto_Position: 0
1 row in set (0.00 sec)
注意:重点关注
Slave_IO_Running: Yes和Slave_SQL_Running: Yes状态是否为yes.都为yes表明主从同步正常;关注Seconds_Behind_Master: 0这个参数的值,这个值为0表示主从同步没有延迟。关于Seconds_Behind_Master:参数的详细解释,请点击查看。
- 至此,主从同步已经搭建完成,可以创建一些库,然后再删除之,来验证主从同步情况。
三、用mysqldump备份恢复,做主从复制
1、登录主库锁表
mysql> flush tables with read lock;
// 查看主库状态
mysql> show master status;
+------------------+-----------+
| File             | Position  |
+------------------+-----------+
| mysql-bin.000106 | 452283357 |
+------------------+-----------+
2、备份全库
# mysqldump --all-databases > full_20170415.sql
// 登入主将表解锁
mysql> unlock tables;
// 将备份的数据传给从库服务器
# scp full_20170415.sql dh-db-r:/root
- mysqldump的ERROR 1449的解决方法
请点击此处查看解决方法
3、从库有数据时,先删除mysql数据目录下所有文件删除,然后初始化从库
# rm -rf /mysql_data
# /mysql_base/scripts/mysql_install_db --defaults-file=/etc/my.cnf --basedir=/mysql_base/ --datadir=/mysql_data/ --user=mysql
注意:
- my.cnf文件中加入
log-bin = mysql-bin
server-id   = 2
4、导入数据
# mysqld_safe --user=mysql &
# mysql < full_20170415.sql
5、登录入从库,指定主库信息
mysql>
mysql> change master to
    -> master_host='10.0.1.90',
    -> master_port=6606,
    -> master_user='dh_backup',
    -> master_password='lYRpNiZQ5eTUeS2g',
    -> master_log_file='mysql-bin.000106',
    -> master_log_pos=452283357;
Query OK, 0 rows affected, 2 warnings (0.03 sec)
开启slave
mysql> start slave;
Query OK, 0 rows affected (0.01 sec)
查看slave状态
mysql> show slave status \G;
*************************** 1. row ***************************
Slave_IO_State: Waiting for master to send event
Master_Host: 10.0.1.90
Master_User: dh_backup
Master_Port: 6606
Connect_Retry: 60
Master_Log_File: mysql-bin.000106
Read_Master_Log_Pos: 494159826
Relay_Log_File: relay-log.000002
Relay_Log_Pos: 4534696
Relay_Master_Log_File: mysql-bin.000106
Slave_IO_Running: Yes
Slave_SQL_Running: Yes
Replicate_Do_DB:
Replicate_Ignore_DB:
Replicate_Do_Table:
Replicate_Ignore_Table:
Replicate_Wild_Do_Table:
Replicate_Wild_Ignore_Table:
Last_Errno: 0
Last_Error:
Skip_Counter: 0
Exec_Master_Log_Pos: 456817770
Relay_Log_Space: 41876919
Until_Condition: None
Until_Log_File:
Until_Log_Pos: 0
Master_SSL_Allowed: No
Master_SSL_CA_File:
Master_SSL_CA_Path:
Master_SSL_Cert:
Master_SSL_Cipher:
Master_SSL_Key:
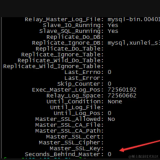
Seconds_Behind_Master: 7256
Master_SSL_Verify_Server_Cert: No
Last_IO_Errno: 0
Last_IO_Error:
Last_SQL_Errno: 0
Last_SQL_Error:
Replicate_Ignore_Server_Ids:
Master_Server_Id: 149
Master_UUID: f2cb2b4e-dbab-11e5-a5f7-c81f66de505f
Master_Info_File: /mysql_data/master.info
SQL_Delay: 0
SQL_Remaining_Delay: NULL
Slave_SQL_Running_State: updating
Master_Retry_Count: 86400
Master_Bind:
Last_IO_Error_Timestamp:
Last_SQL_Error_Timestamp:
Master_SSL_Crl:
Master_SSL_Crlpath:
Retrieved_Gtid_Set:
Executed_Gtid_Set:
Auto_Position: 0
1 row in set (0.00 sec)
6、注意事项
- slave数据库数据同步完成,查看user表里所有的用户都是从master同步过来的,虽然看起来这些用户都存在,但是这些用户都无法登录slave数据库
mysql> select user,password,host from user;
+----------------+-------------------------------------------+----------------+
| user           | password                                  | host           |
+----------------+-------------------------------------------+----------------+
| root           | *1CCC8892FF6EFB87CFC902BC52126A099580F5D3 | localhost      |
| user153        | *1CCC8892FF6EFB87CFC902BC52126A099580F5D3 | 192.168.66.53  |
| dh_backup      | *D87F998D5C584C9CAEB1E977418D35F7E828B910 | 10.0.1.91      |
| dh_check       | *5F354F59BAD68E2B9A520066F42BD27FC18A76FD | localhost      |
| dh_application | *C050D94BAFB51A83A4A7249FC7B244ACDA305DCA | 10.0.1.%       |
+----------------+-------------------------------------------+----------------+
8 rows in set (0.00 sec)
- 通过表中可以看出,slave数据库是明明存在dh_application@10.0.1.%这个用户,但是用这个用户登录,却出现如下错误:
[caigy@DH-A01-PHP01 ~]$ mysql -udh_application -pEqx0Ls75RBN9jbfi -h10.0.1.91 -P6607
ERROR 1130 (HY000): Host 'DH-PHP01' is not allowed to connect to this MySQL server
//注:DH-PHP01的IP是10.0.1.40
- 原因就是因为这个用户是从master同步过来的,是虚假的。要想使用这个用户登录,只能在slave上重新做授权:
mysql> grant all privileges on *.* to 'dh_application'@'10.0.1.%' identified by 'Eqx0Ls75RBN9jbfi';
Query OK, 0 rows affected (0.01 sec)
重新授权后,就可以正常登录了。
- 通过这个现象,最终发现,在slave上修改授权表,不会影响主从同步的进行。
四、MySQL同步故障:" Slave_SQL_Running:No" 两种解决办法
进入slave服务器,运行:
MySQL> show slave status\G
             ...
             Relay_Log_File: localhost-relay-bin.000535
              Relay_Log_Pos: 21795072
      Relay_Master_Log_File: localhost-bin.000094
           Slave_IO_Running: Yes
          Slave_SQL_Running: No
            Replicate_Do_DB:
        Replicate_Ignore_DB:
              ...
解决办法一、
Slave_SQL_Running: No
- 1.程序可能在slave上进行了写操作
- 2.也可能是slave机器重起后,事务回滚造成的.
一般是事务回滚造成的:
解决办法:
mysql> stop slave ;
mysql> set GLOBAL SQL_SLAVE_SKIP_COUNTER=1;
mysql> start slave ;
解决办法二、
首先停掉Slave服务:mysql> slave stop
到主服务器上查看主机状态:
记录File和Position对应的值
进入master
mysql> show master status;
+----------------------+----------+--------------+------------------+
| File                 | Position | Binlog_Do_DB | Binlog_Ignore_DB |
+----------------------+----------+--------------+------------------+
| localhost-bin.000094 | 33622483 |              |                  |
+----------------------+----------+--------------+------------------+
1 row in set (0.00 sec)
然后到slave服务器上执行手动同步:
mysql> change master to
    > master_host='master_ip',
    > master_user='user',
    > master_password='pwd',
    > master_port=3306,
    > master_log_file=localhost-bin.000094',
    > master_log_pos=33622483 ;
1 row in set (0.00 sec)
mysql> start slave ;
1 row in set (0.00 sec)

mysql> show slave status\G
*************************** 1. row ***************************
........
            Master_Log_File: localhost-bin.000094
        Read_Master_Log_Pos: 33768775
             Relay_Log_File: localhost-relay-bin.000537
              Relay_Log_Pos: 1094034
      Relay_Master_Log_File: localhost-bin.000094
           Slave_IO_Running: Yes
          Slave_SQL_Running: Yes
            Replicate_Do_DB:
- 注意:手动同步需要停止master的写操作!可以登入主数据库,用以下命令操作:
mysql> flush tables with read lock;
- 解锁
mysql> unlock tables;