
写在文前
由于最近开发中经常碰到类似日期选择器相关业务使用场景,虽然这个系统控件相对来说非常简单,有点儿类似UITableView的感觉,初始化之后设置数据源,代理,完成相应的数据源方法就可以正常展示了,而且其数据源 代理方法相对来说也很少,肯花心思去思考 记忆,很快就能掌握这个控件。
一、UIPickerView 简介
UIPickerView 是一种使用旋转轮或一个槽机映像来显示一列或多列,可多行展示的滚动视图。 其与UIDatePicker 展示效果极为相似, 但是其是一个相对开发者来说更为通用的滚动选择器。 由类名就可以得出UIDatePicker 是为日期选择而生, 而其是一个通用适合自定义视图展示的选择器。
UIPickerView 继承自 UIView。 UIDatePicker继承自Control。
两者不同的父类也直接导致了 UIPickerView 相对 UIDatePicker 也缺少了很多 Control 自带的特性。毕竟 Control是从 UIView 继承出来的。

二、UIPickerView 相应属性与方法
在此我以系统声明的 UIPickerView.h 文件声明的属性及方法依次介绍, 其实文档上已经写的挺清楚了,但是在使用的时候可能也会由于理解错误,介绍不够详细等导致踩坑,所以我会按系统文档加上自己在使用过程中的理解心得结合起来介绍。
为了便于观看直接把系统 UIPickerView.h 文件代码 Copy 过来。 直接在属性原有注释上添加自己的理解介绍。
//
//  UIPickerView.h
//  UIKit
//
//  Copyright (c) 2006-2017 Apple Inc. All rights reserved.
//

#import <Foundation/Foundation.h>
#import <CoreGraphics/CoreGraphics.h>
#import <UIKit/UIView.h>
#import <UIKit/UIKitDefines.h>

NS_ASSUME_NONNULL_BEGIN

@protocol UIPickerViewDataSource, UIPickerViewDelegate;

NS_CLASS_AVAILABLE_IOS(2_0) __TVOS_PROHIBITED @interface UIPickerView : UIView <NSCoding>

@property(nullable,nonatomic,weak) id<UIPickerViewDataSource> dataSource; // default is nil. weak reference  数据源初始化的时候可以直接设置。
@property(nullable,nonatomic,weak) id<UIPickerViewDelegate>   delegate; // default is nil. weak reference  委托初始化的时候可以直接设置。
@property(nonatomic)        BOOL    showsSelectionIndicator;   // default is NO
很遗憾,这个属性在 iOS7 以及更高的系统就无法使用了,Apple 文档里面有详细介绍。
查了下资料解释说其显示的效果就是在当前选择的行中 有一个默认背景颜色填充的蓝条。
光看着描述,不能看到效果有点难受QAQ, 直接Google 这个属性找到不少相关图片,嘿嘿嘿。


          AI 代码解读
效果: 虽然系统屏蔽掉了这个直接设置已选列表指示器的接口。不过我们通过现有的公共方法实现起来也非常简单,直接在代理的已选中当前 Row 中通过返回当前 Row 的View 方法,直接设置背景即可。
showsSelectionIndicator 实现代码:
- (void)pickerView:(UIPickerView *)pickerView didSelectRow:(NSInteger)row inComponent:(NSInteger)component
{
      UIView* selectView = [pickerView viewForRow:row forComponent:component];
      selectView.backgroundColor = [UIColor redColor];
}


          AI 代码解读
// info that was fetched and cached from the data source and delegate
// Getting the Dimensions of the View Picker
// 这三个方法可以直接获取到当前 UIPickerView 行数,列数,每列的展示行相应大小数据。
@property(nonatomic,readonly) NSInteger numberOfComponents;   // 可直接获取当前选择器的列个数。
- (NSInteger)numberOfRowsInComponent:(NSInteger)component;   //  参数代表当前列下标。直接返回当前列总共包含多少行组件。
- (CGSize)rowSizeForComponent:(NSInteger)component;  //   参入指定列下标,返回当前所展示单行视图的宽度和高度。

// returns the view provided by the delegate via pickerView:viewForRow:forComponent:reusingView:
// or nil if the row/component is not visible or the delegate does not implement
// pickerView:viewForRow:forComponent:reusingView:
- (nullable UIView *)viewForRow:(NSInteger)row forComponent:(NSInteger)component;
// 此方法是传入指定行和列 返回其表示的 View 视图。  但是要主要这个方法是通过 代理方法此 pickerView:viewForRow:forComponent:reusingView:
// 获取到的 View。  所以如果我们没有实现此代理方法的话,调用则返回 nil。
// Reloading whole view or single component
- (void)reloadAllComponents;      // 刷新整个选择控制器。 类似 UITableView 里的 - (void)reloadData;
- (void)reloadComponent:(NSInteger)component; // 传入列下标,指定刷新这一列数据。

// selection. in this case, it means showing the appropriate row in the middle
- (void)selectRow:(NSInteger)row inComponent:(NSInteger)component animated:(BOOL)animated;  // scrolls the specified row to center.
// 传入行和列下标,选择控制器会滚动到相应视图, 并使其展示在中间。

- (NSInteger)selectedRowInComponent:(NSInteger)component;                                   // returns selected row. -1 if nothing selected
//  传入当前列下标,返回当前选择控制器当前所选中的 Row 下标。

@end


          AI 代码解读
数据源
//只有两个必须实现的方法。
__TVOS_PROHIBITED
@protocol UIPickerViewDataSource<NSObject>
@required

// returns the number of 'columns' to display.
- (NSInteger)numberOfComponentsInPickerView:(UIPickerView *)pickerView; //参数表示当前 pickerView,返回选择器总共有几列。

// returns the # of rows in each component..
- (NSInteger)pickerView:(UIPickerView *)pickerView numberOfRowsInComponent:(NSInteger)component;
//参数 pickerView 表示当前 pickerView 视图,component 表示所在列下标, 返回指定列下标的行数。
@end


          AI 代码解读
代理
// 6个方法都是非常好理解的。
__TVOS_PROHIBITED
@protocol UIPickerViewDelegate<NSObject>
@optional

// returns width of column and height of row for each component.
- (CGFloat)pickerView:(UIPickerView *)pickerView widthForComponent:(NSInteger)component
//   传入当前列下标,返回值为此行的宽度。 可以通过这个方法来单独设置每一列的宽度。
__TVOS_PROHIBITED;
- (CGFloat)pickerView:(UIPickerView *)pickerView rowHeightForComponent:(NSInteger)component
//   同上方法,这里是返回高度。
__TVOS_PROHIBITED;

// these methods return either a plain NSString, a NSAttributedString, or a view (e.g UILabel) to display the row for the component.
// for the view versions, we cache any hidden and thus unused views and pass them back for reuse.
// If you return back a different object, the old one will be released. the view will be centered in the row rect
// 这三个方法都是决定 UIPickerVier 展示的内容,效果。  如果对视图没有定义要求的话,直接使用前面两个即可。
// 第三个方法是可以自定义视图进行展示的,并且其原理也是类似UITableView一样用复用的功能。
// 细节:这三个方法 第一个 和 第二个 如果我们同时 实现了,则系统会先调用返回 NSAttributedString 的方法,其次在去调用 返回 NSString 的方法。
// 但是如果我们实现了 返回 UIView 的方法的话, 其他两个方法均不会在被调用。 这点要注意一下。
- (nullable NSString *)pickerView:(UIPickerView *)pickerView titleForRow:(NSInteger)row forComponent:(NSInteger)component __TVOS_PROHIBITED;
- (nullable NSAttributedString *)pickerView:(UIPickerView *)pickerView attributedTitleForRow:(NSInteger)row forComponent:(NSInteger)component NS_AVAILABLE_IOS(6_0) __TVOS_PROHIBITED; // attributed title is favored if both methods are implemented
- (UIView *)pickerView:(UIPickerView *)pickerView viewForRow:(NSInteger)row forComponent:(NSInteger)component reusingView:(nullable UIView *)view __TVOS_PROHIBITED;

//  这个方法顾名思义,在用户滑动 选择器列表的时候会调用此方法。  类似UITableView里面的 将要选择那一分区里面那一行一样的!
- (void)pickerView:(UIPickerView *)pickerView didSelectRow:(NSInteger)row inComponent:(NSInteger)component __TVOS_PROHIBITED;

@end

NS_ASSUME_NONNULL_END


          AI 代码解读
到这里已经基本把 UIPickerView 相关的所有属性及方法介绍完毕。 相信没有使用过这个控件的朋友基本也差不多明白是怎么回事了。
这里我再附上简单的代码实现来供大家参考。
// pickView初始化并设置其大小,如果不设置其大小,默认大小为 320 * 216。
- (void)viewDidLoad {
 [super viewDidLoad];

 UIPickerView* pickerView = [[UIPickerView alloc] initWithFrame:self.view.frame];
 pickerView.delegate = self;
 pickerView.dataSource = self;
 [self.view addSubview:pickerView];
}


#pragma mark - UIPickerView DataSource and Delegate

- (NSInteger)numberOfComponentsInPickerView:(UIPickerView *)pickerView
{
 return 1;
}

- (NSInteger)pickerView:(UIPickerView *)pickerView numberOfRowsInComponent:(NSInteger)component
{
 return self.dataSource.count;
}

- (CGFloat)pickerView:(UIPickerView *)pickerView rowHeightForComponent:(NSInteger)component
{
 return 46;
}

- (nullable NSString *)pickerView:(UIPickerView *)pickerView titleForRow:(NSInteger)row forComponent:(NSInteger)component
{
return @"JerseyCocoa";
}


          AI 代码解读
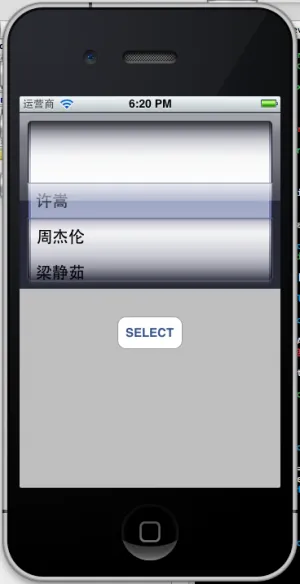
效果如图:

也可以通过另外两个代理方法来实现 UIPickerView 的展示。 我一般比较喜欢用复用 View 的方法。不仅能节省内存开销,自定义修改视图字体等都很轻松的实现。
- (UIView *)pickerView:(UIPickerView *)pickerView viewForRow:(NSInteger)row forComponent:(NSInteger)component reusingView:(UIView *)view
{
UILabel* pickerLabel = (UILabel*)view;
if (!pickerLabel) {
pickerLabel = [[UILabel alloc] init];
pickerLabel.font = [UIFont systemFontOfSize:15];
pickerLabel.contentMode = UIViewContentModeCenter;
pickerLabel.textColor = [UIColor blueColor];
}
pickerLabel.text = [self pickerView:pickerView titleForRow:row forComponent:component];
return pickerLabel;
}
如果我们使用这种方法来实现 UIPickerView 的展现的话,还有一个好处就是可以通过 调用 UIPickerView 的
- (nullable UIView *)viewForRow:(NSInteger)row forComponent:(NSInteger)component;
方法就能轻松实现 其 iOS 7 以后就隐藏掉的属性 showsSelectionIndicator。
具体实现如下:
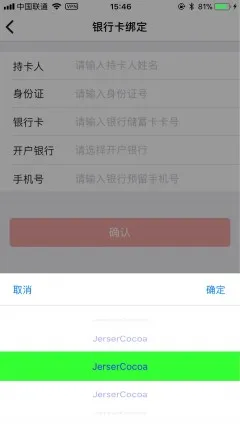
在实现了上面的复用自定义视图代理方法基础上,调用选择指定行列下标代理方法。
- (void)pickerView:(UIPickerView *)pickerView didSelectRow:(NSInteger)row inComponent:(NSInteger)component
{
UIView* view = [self pickerView:pickerView viewForRow:row forComponent:component reusingView:nil];
view.backgroundColor = [UIColor greenColor];
}
AI 代码解读
效果如图:
到这里 UIPickerView 的介绍基本结束了,想必阅读下来大家肯定都能动手自己写一个适合自己业务场景使用的 UIPickerView了。
补充个实用的Tips
一、UIPickerView 默认是会显示在中心的 视图上下分割线, 有时候我们想去去掉这条分割线,或者改变颜色可以使用这个方法。
    //清除或改变分割线的颜色等。
    for(UIView *singleLine in _pickerView.subviews)
    {
        if (singleLine.frame.size.height < 1)
        {
            singleLine.backgroundColor = [UIColor clearColor];
            [singleLine removeFromSuperview];
        }
    }


          AI 代码解读
最后
本文参考了很多前辈的文章及开发中自己总结的结论,希望此篇文章对您有所帮助,如有不对的地方,希望大家能留言指出纠正。欢迎大家一起交流学习 泽西岛上咖啡!!!!!