
FSR402力敏电阻器
模块简介
FSR 402力敏电阻器,它可以便捷地检测外界压力。它实质上是一个可变电阻, 和光电传感器或弯曲传感器的原理类似,通过在其上施加压力的变化来改变阻值。
所需材料
所需材料
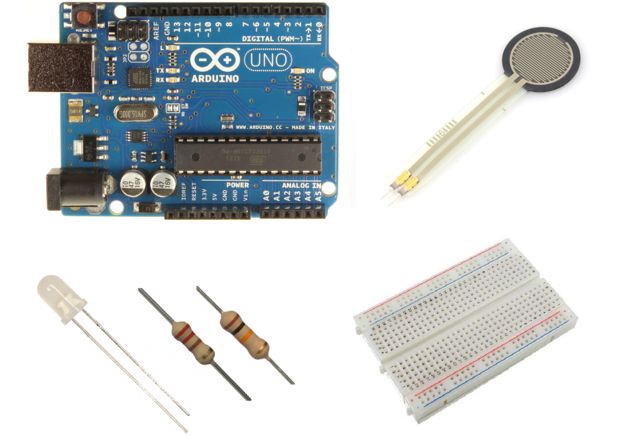
- Arduino Uno 开发板 *1
- 面包板 *1
- FSR 402力敏电阻器 *1
- LED *1
- 10k欧和220欧电阻 *1
接线

接线示意图
FSR402正面(有条纹的)朝上时,左边的引脚为负极,右边为正极
- FSR402
+ ---->5v
- ---->10kOhm ----->GND
- ---->A0 - LED
+ ------->220Ohm ----->D3(PWM)
- ------->GND
示例代码
/* How to use a Force sensitive resistor to fade an LED with Arduino
   More info: http://www.ardumotive.com/how-to-use-a-force-sensitive-resistor-en.html
   Dev: Michalis Vasilakis // Date: 22/9/2015 // www.ardumotive.com  */


//Constants:
const int ledPin = 3;     //pin 3 has PWM funtion
const int sensorPin = A0; //pin A0 to read analog input

//Variables:
int value; //save analog value


void setup(){

  pinMode(ledPin, OUTPUT);  //Set pin 3 as 'output'
  Serial.begin(9600);       //Begin serial communication

}

void loop(){

  value = analogRead(sensorPin);       //Read and save analog value from potentiometer
  Serial.println(value);               //Print value
  value = map(value, 0, 1023, 0, 255); //Map value 0-1023 to 0-255 (PWM)
  analogWrite(ledPin, value);          //Send PWM value to led
  delay(100);                          //Small delay

}
参考文献
http://www.instructables.com/id/How-to-use-a-Force-Sensitive-Resistor-Arduino-Tuto/?ALLSTEPS
