介绍
本次分享将具体介绍如何在Spring Boot中实现文件上传和数据预览。
我们将实现CSV文件的数据预览和部分图片格式的查看。主要的思路如下:
- 利用Spring Boot的MultipartFile实现文件的上传;
- 利用Spring MVC实现整个文件上传流程的控制;
- 利用javacsv API实现CSV文件的读取;
- 利用JavaScript实现CSV文件的数据预览
话不多说,我们直接上项目!
项目介绍
整个项目的结构如下:
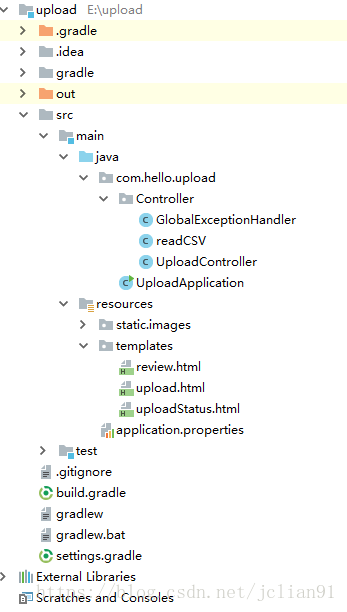
主要是两部分的内容,一部分是Controller(控制器),一部分是view(视图)文件。UploadController.java是控制器,其代码如下:
package com.hello.upload.Controller;

import java.util.*;
import java.io.IOException;
import java.nio.file.Files;
import java.nio.file.Path;
import java.nio.file.Paths;

import org.springframework.stereotype.Controller;
import org.springframework.web.bind.annotation.*;
import org.springframework.web.multipart.MultipartFile;
import org.springframework.web.servlet.config.annotation.ViewControllerRegistry;
import org.springframework.web.servlet.config.annotation.WebMvcConfigurerAdapter;
import org.springframework.web.servlet.mvc.support.RedirectAttributes;

@Controller
public class UploadController{

    private String filename;
    //Save the uploaded file to this folder
    private static String UPLOADED_FOLDER = "E://upload/src/main/resources/static/images/";

    /*
    **文件上传页面
     */

    @GetMapping("/upload")
    public String upload(){
        return "upload";
    }

    @PostMapping("/upload")
    public String singleFileUpload(@RequestParam("file") MultipartFile file,
                                   RedirectAttributes redirectAttributes) {

        if (file.isEmpty()) {
            redirectAttributes.addFlashAttribute("message", "文件为空! 请选择非空文件上传!");
            return "redirect:/uploadStatus";
        }

        try {
            // 获取文件并保存到指定文件夹中
            byte[] bytes = file.getBytes();
            filename = file.getOriginalFilename();
            Path path = Paths.get(UPLOADED_FOLDER + filename);
            Files.write(path, bytes);

            redirectAttributes.addFlashAttribute("message", "您已成功上传 '" + filename + "', 该文件大小约为 " +bytes.length/1024+" KB.");

        }
        catch (IOException e) {
            e.printStackTrace();
        }

        return "redirect:/uploadStatus";
    }

    /*
    ** 文件上传信息处理页面
     */
    @GetMapping("/uploadStatus")
    public String uploadStatus(){
        return "uploadStatus";
    }

    /*
    ** 数据预览页面: 支持CSV文件和部分图片格式的预览
     */

    @GetMapping("/review")
    public String review(Map<String, Object> map) {

        map.put("filename", filename);
        String filetype = filename.split("\\.")[1];
        map.put("filetype",filetype);
        System.out.println(filename);

        if(filetype.equals("csv")) {
            readCSV read_csv = new readCSV(UPLOADED_FOLDER + filename);
            List<String> result = read_csv.read();
            map.put("result", result);
        }

        return "review";
    }

}
文件上传的错误处理包含在代码GlobalExceptionHandler.java中,其代码如下:
package com.hello.upload.Controller;

import org.springframework.web.bind.annotation.ControllerAdvice;
import org.springframework.web.bind.annotation.ExceptionHandler;
import org.springframework.web.multipart.MultipartException;
import org.springframework.web.servlet.mvc.support.RedirectAttributes;

@ControllerAdvice
public class GlobalExceptionHandler {

    @ExceptionHandler(MultipartException.class)
    public String handleError1(MultipartException e, RedirectAttributes redirectAttributes) {

        redirectAttributes.addFlashAttribute("message", e.getCause().getMessage());
        return "redirect:/uploadStatus";

    }

}
接着readCSV.java主要实现CSV文件内容的读取,其代码如下:
package com.hello.upload.Controller;

import java.io.IOException;
import java.util.ArrayList;
import java.util.List;

import com.csvreader.CsvReader;

/*
** readCSV类:实现CSV文件内容的读取
 */
public class readCSV {

    // 参数:文件路径
    private String file_path;

    // 构造函数
    readCSV(){}

    readCSV(String file_path){
        this.file_path = file_path;
    }

    // getter and setter
    public String getFile_path() {
        return file_path;
    }

    public void setFile_path(String file_path) {
        this.file_path = file_path;
    }

    // read()函数实现具体的读取CSV文件内容的方法
    public List<String> read() {

        List<String> result = new ArrayList<>();

        try {
            // 创建CSV读对象
            CsvReader csvReader = new CsvReader(file_path);
            while (csvReader.readRecord()){
                // 读取每一行数据,以逗号分开
                // System.out.println(csvReader.getRawRecord());
                result.add(csvReader.getRawRecord());
            }
            csvReader.close();
            return result;

        } catch (IOException e) {
            e.printStackTrace();
            return result;
        }
    }

}
接着是视图部分,文件都位于templates文件夹下。upload.html文件主要是文件上传的页面,其代码如下:
<!DOCTYPE HTML>

<html xmlns:th="http://www.thymeleaf.org">

<head>
    <title>Upload files by Spring Boot</title>
    <meta http-equiv="Content-Type" content="text/html; charset=UTF-8" />
    <link href="https://cdn.bootcss.com/bootstrap/3.3.7/css/bootstrap.min.css" rel="stylesheet">
    <script src="https://apps.bdimg.com/libs/jquery/2.1.4/jquery.min.js"></script>
    <script src="http://cdn.static.runoob.com/libs/bootstrap/3.3.7/js/bootstrap.min.js"></script>
</head>

<body>

<center>
    <br><br><br>
    <div class="panel panel-primary" style="width:600px">
        <div class="panel-heading">
            <h3 class="panel-title">文件上传</h3>
        </div>
        <div class="panel-body">
            <form class="form-horizontal" role="form" method="POST" action="/upload" enctype="multipart/form-data">

                <div class="form-group" style="width:600px">
                    <label for="upload" class="col-sm-2 control-label">选择文件</label>
                    <div class="col-sm-10">
                        <input type="file" id="upload" name="file" />
                    </div>
                </div>


                <div class="form-group">
                    <div>
                        <button type="submit" class="btn btn-success" id="btn_upload">提交</button>
                        <input type="reset" class="btn btn-danger" value="重置" />

                    </div>
                </div>

            </form>
        </div>
    </div>

</center>

</body>

</html>
uploadStatus.html文件主要用来展示文件上传的信息,包括上传成功和失败的信息,其代码如下:
<!DOCTYPE html>
<html xmlns:th="http://www.thymeleaf.org">

<head>
    <meta http-equiv="Content-Type" content="text/html; charset=UTF-8" />
    <link href="http://cdn.static.runoob.com/libs/bootstrap/3.3.7/css/bootstrap.min.css" rel="stylesheet">
</head>
<body>

<center>
    <br><br>
    <h2>文件上传状态</h2>

    <br><br>
    <div class="panel panel-success" style="width:1000px">

        <div class="panel-heading">
            <h3 class="panel-title">文件上传</h3>
        </div>

        <div class="panel-body">

            <div th:if="${message}">
                <h3 th:text="${message}"/>
            </div>

        </div>

    </div>

    <a href="/upload"><button class="btn btn-primary">返回文件上传</button></a>
    <a href="/review"><button class="btn btn-warning" id="review">数据预览</button></a>
    </center>

</body>

</html>
接着是数据预览部分的HTML,主要实现CSV文件的预览和部分图片格式的查看,其代码如下:
<!DOCTYPE html>
<html xmlns:th="http://www.thymeleaf.org">

<head>
    <meta http-equiv="Content-Type" content="text/html; charset=UTF-8" />
    <title>文件预览</title>
    <link href="http://cdn.static.runoob.com/libs/bootstrap/3.3.7/css/bootstrap.min.css" rel="stylesheet">
    <link href="/css/table.css" rel="stylesheet">

    <script th:inline="javascript">
    var filetype = [[${filetype}]];
    var filename = [[${filename}]];

    function show(){
        if(filetype == "csv"){
            showTable();
        }
        else if((filetype=="jpg") || (filetype=="png") || (filetype=="gif") || (filetype=="bmp")){
            document.getElementById("content").innerHTML = filename;
            document.getElementById("image").src = "/images/"+filename ;
        }
        else{
            document.getElementById("content").innerHTML = "文件预览只支持csv文件以及部分格式的图片文件!"
        }
    }

    function showTable(){

    document.getElementById("content").innerHTML = filename;
    var thread_content = document.getElementById("index").innerHTML+"";
    if (thread_content == ""){
        var result = /*[[${result}]]*/ null ;
        var col_count = result[0].split(",").length;
        if(result.length > 51){
            var record_count = 51;
        }
        else{
            var record_count = result.length;
        }
        // 展示表格各个变量的名称
        var headers = result[0].split(",");
        row=document.createElement("tr"); //创建行
        for(var i=0; i< col_count; i++){
            th1=document.createElement("th"); //创建单元格
            th1.appendChild(document.createTextNode(headers[i])); //为单元格添加内容
            row.appendChild(th1); //将单元格添加到行内
        }
        document.getElementById("index").append(row); //将行添加到<thread>中
        for(var i=1; i < record_count; i++){
            row=document.createElement("tr"); //创建行
            for(var j=0; j< col_count; j++){
                td1=document.createElement("td"); //创建单元格
                td1.appendChild(document.createTextNode(result[i].split(",")[j])); //为单元格添加内容
                row.appendChild(td1); //将单元格添加到行内
            }
            document.getElementById("body").append(row); //将行添加到<thread>中
        }
        }

    }
</script>
</head>

<body>

<br><br>
<center>

    <button class="btn btn-danger" onclick="show()">文件预览</button>
    <a href="/upload"><button class="btn btn-warning" id="review">返回主界面</button></a>
    <br><br>

    <p id="content"></p>

    <div style="width:800px">
        <table class="table table-striped table-condensed table-responsive">
            <thead id="index"></thead>
            <tbody id="body"></tbody>
        </table>
    </div>

    <img id="image" src="" />

</center>

</body>

</html>
最后将以下我们的配置文件,application.properties代码如下:
server.port=8100
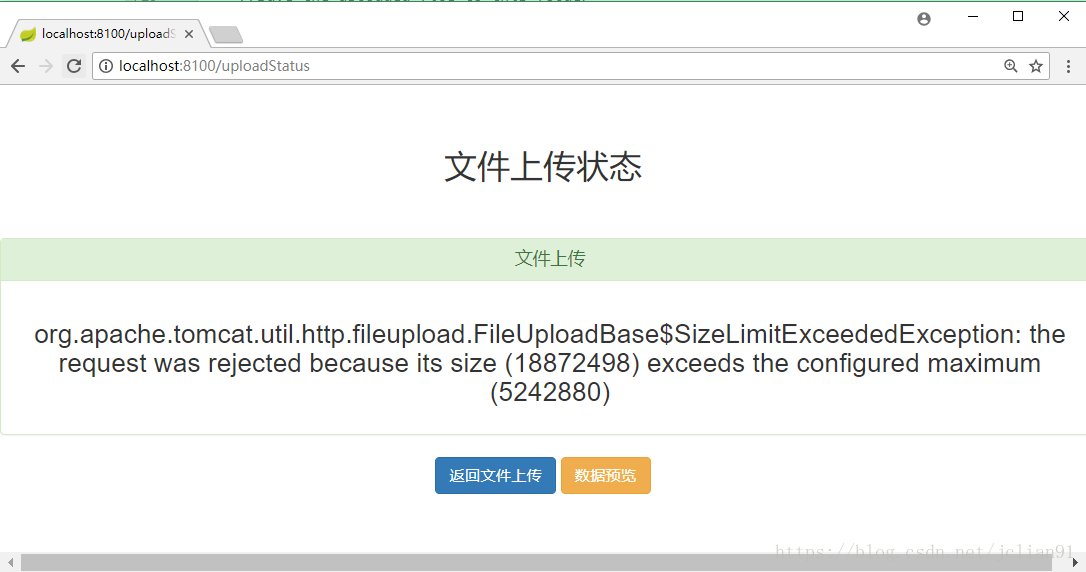
spring.servlet.multipart.max-file-size=5MB
spring.servlet.multipart.max-request-size=5MB
spring.http.multipart.enabled=false其设置网络端口为8100,每次上传的文件大小不超过5MB.项目构建文件build.gradle的代码如下:
buildscript {
    ext {
        springBootVersion = '2.0.1.RELEASE'
    }
    repositories {
        mavenCentral()
    }
    dependencies {
        classpath("org.springframework.boot:spring-boot-gradle-plugin:${springBootVersion}")
    }
}

apply plugin: 'java'
apply plugin: 'eclipse'
apply plugin: 'org.springframework.boot'
apply plugin: 'io.spring.dependency-management'

group = 'com.hello'
version = '0.0.1-SNAPSHOT'
sourceCompatibility = 1.8

repositories {
    mavenCentral()
}


dependencies {
    compile('org.springframework.boot:spring-boot-starter-thymeleaf')
    compile('org.springframework.boot:spring-boot-starter-web')
    compile group: 'net.sourceforge.javacsv', name: 'javacsv', version: '2.0'
    testCompile('org.springframework.boot:spring-boot-starter-test')
}
运行及测试
好不容易写完了项目,不测试一把,对不起观众啊。
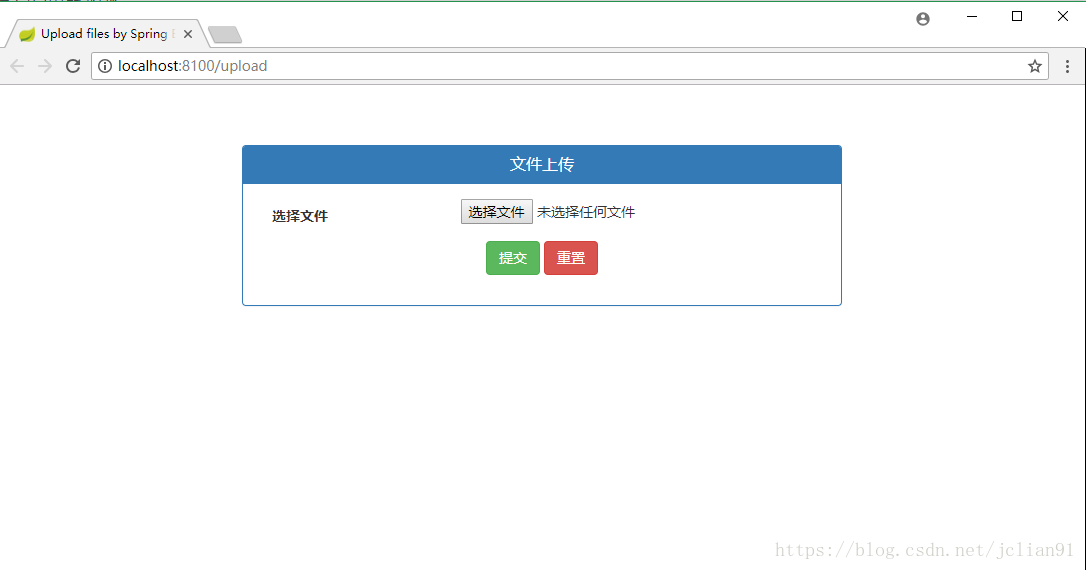
启动Spring Boot项目,在浏览器中输入:http://localhost:8100/upload,页面如下:
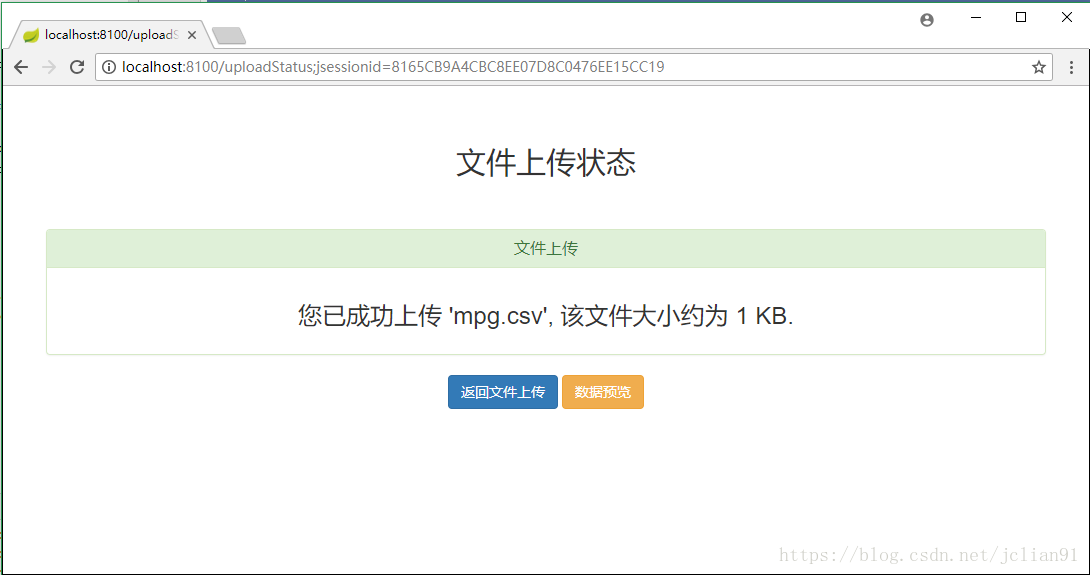
选择本地的mpg.csv文件上传,它将会上传至E://upload/src/main/resources/static/images/ 文件夹中,上传成功后的页面如下图:
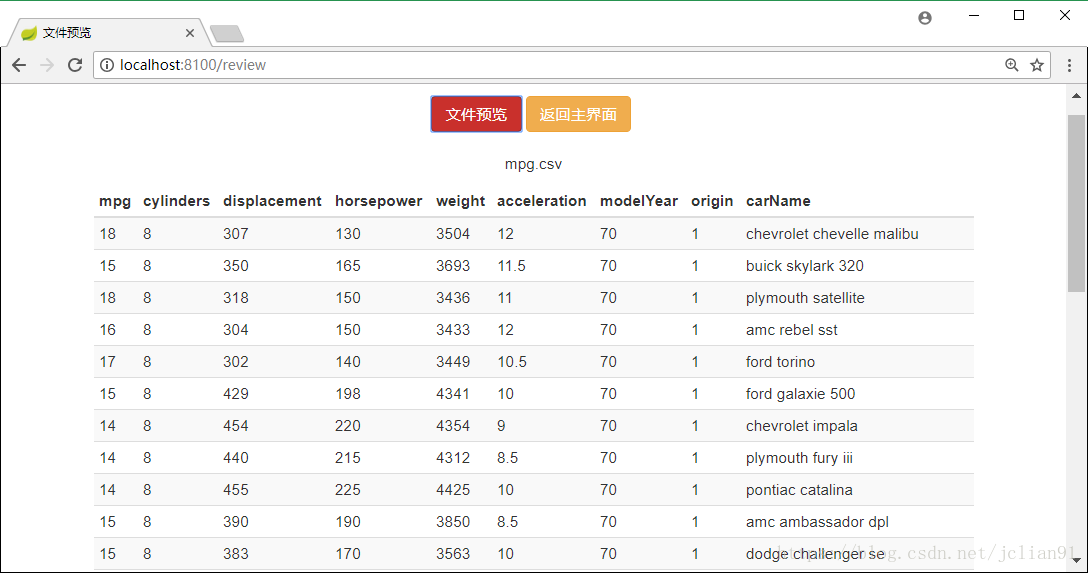
点击数据预览按钮,跳转到review.html页面,再点击该页面的数据预览按钮,显示的页面如下图:
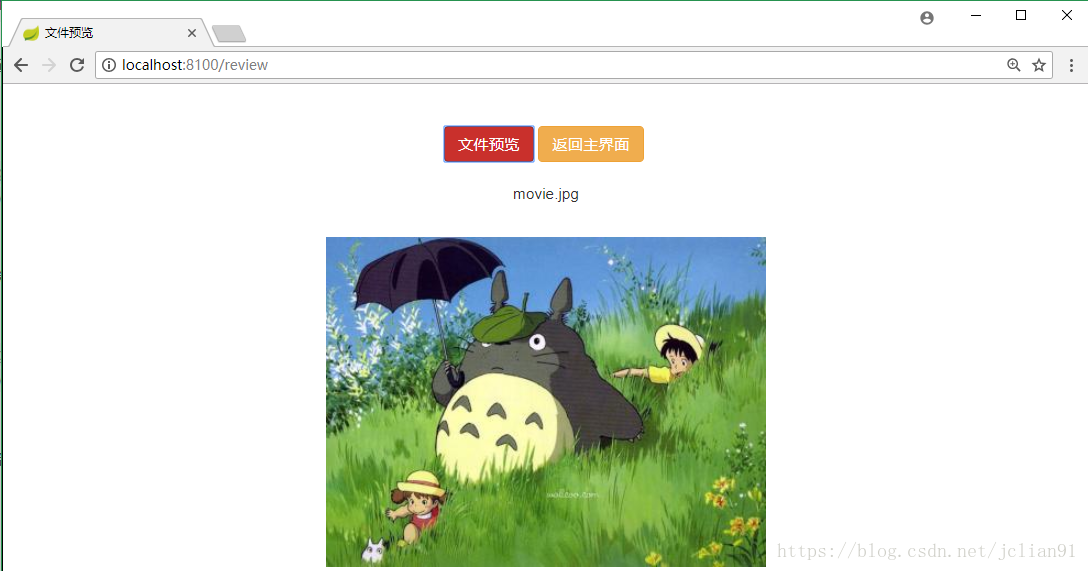
当然也支持部分图片格式的预览,例如:movie.jpg,如下图:
当上传文件大于5MB时,显示的信息如下:
本次分享到此结束,该项目的Github地址为: https://github.com/percent4/Upload-File-Using-Spring-Boot 。 接下来还会继续更新Spring Boot方面的内容,欢迎大家交流~~
注意:本人现已开通两个微信公众号: 用Python做数学(微信号为:python_math)以及轻松学会Python爬虫(微信号为:easy_web_scrape), 欢迎大家关注哦~~