什么是MyBatis
MyBatis 本是apache的一个开源项目iBatis, 2010年这个项目由apache software foundation 迁移到了google code,并且改名为MyBatis。是一个基于Java的持久层框架
为什么我们要用Mybatis?
无论是Mybatis、Hibernate都是ORM的一种实现框架,都是对JDBC的一种封装!
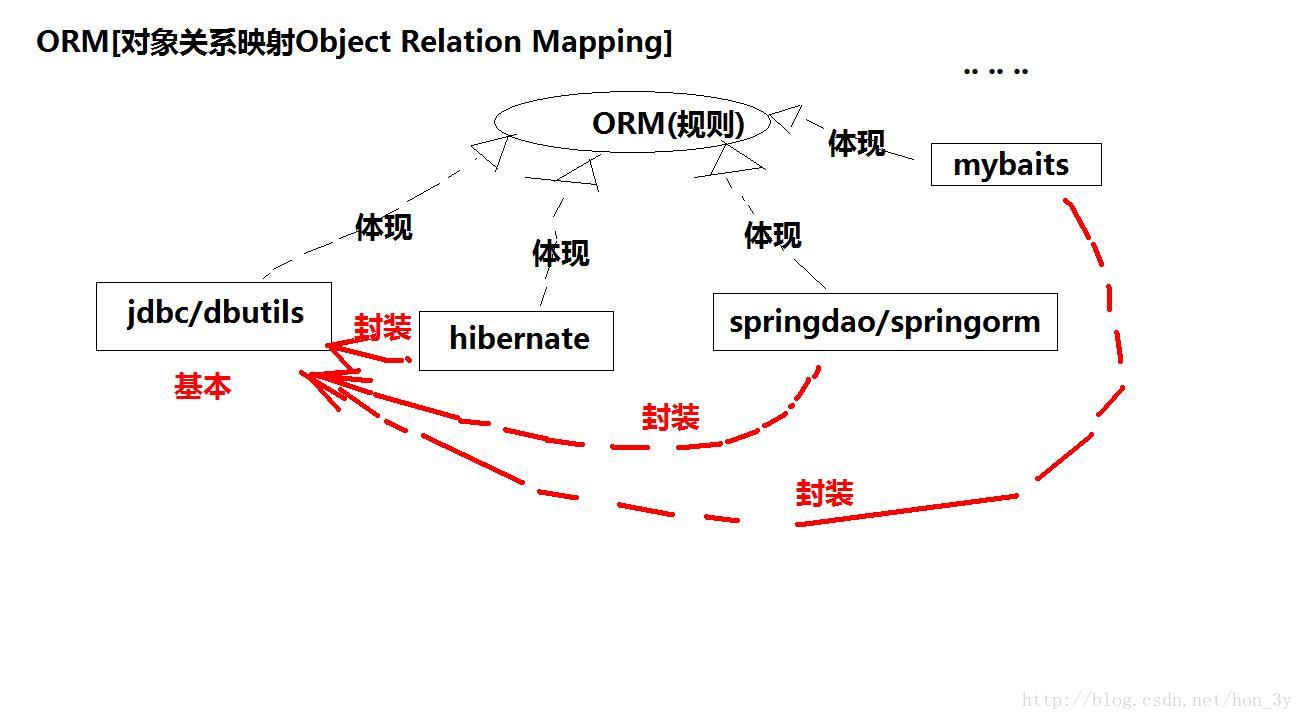
到目前为止,我们已经在持久层中学了几种技术了...
- Hibernate
- jdbc
- SpringDAO
那我们为啥还要学Mybatis呢???现在Mybatis在业内大行其道,那为啥他能那么火呢??
Hibernate是一个比较老旧的框架,用过他的同学都知道,只要你会用,用起来十分舒服...啥sql代码都不用写...但是呢,它也是有的缺点::处理复杂业务时,灵活度差, 复杂的HQL难写难理解,例如多表查询的HQL语句
而JDBC很容易理解,就那么几个固定的步骤,就是开发起来太麻烦了,因为什么都要我们自己干..
而SpringDAO其实就是JDBC的一层封装,就类似于dbutils一样,没有特别出彩的地方....
我们可以认为,Mybatis就是jdbc和Hibernate之间的一个平衡点...毕竟现在业界都是用这个框架,我们也不能不学呀!
Mybatis快速入门
其实我们已经学过了Hibernate了,对于Mybatis入门其实就非常类似的。因此就很简单就能掌握基本的开发了...
导入开发包
导入Mybatis开发包
- mybatis-3.1.1.jar
- commons-logging-1.1.1.jar
- log4j-1.2.16.jar
- cglib-2.2.2.jar
- asm-3.3.1.jar
导入mysql/oracle开发包
- mysql-connector-java-5.1.7-bin.jar
- Oracle 11g 11.2.0.1.0 JDBC_ojdbc6.jar
准备测试工作
创建一张表
create table students(
  id  int(5) primary key,
  name varchar(10),
  sal double(8,2)
);
创建实体:
/**
 * Created by ozc on 2017/7/21.
 */

public class Student {
    private Integer id;
    private String name;
    private Double sal;

    public Student() {
    }

    public Integer getId() {
        return id;
    }

    public void setId(Integer id) {
        this.id = id;
    }

    public String getName() {
        return name;
    }

    public void setName(String name) {
        this.name = name;
    }

    public Double getSal() {
        return sal;
    }

    public void setSal(Double sal) {
        this.sal = sal;
    }
}
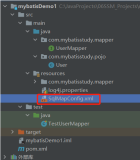
创建mybatis配置文件
创建mybatis的配置文件,配置数据库的信息....数据库我们可以配置多个,但是默认的只能用一个...
<?xml version="1.0" encoding="UTF-8"?>
<!DOCTYPE configuration PUBLIC "-//mybatis.org//DTD Config 3.0//EN"
"http://mybatis.org/dtd/mybatis-3-config.dtd">
<configuration>
<!-- 加载类路径下的属性文件 -->
<properties resource="db.properties"/>
<!-- 设置一个默认的连接环境信息 -->
<environments default="mysql_developer">
<!-- 连接环境信息,取一个任意唯一的名字 -->
<environment id="mysql_developer">
<!-- mybatis使用jdbc事务管理方式 -->
<transactionManager type="jdbc"/>
<!-- mybatis使用连接池方式来获取连接 -->
<dataSource type="pooled">
<!-- 配置与数据库交互的4个必要属性 -->
<property name="driver" value="${mysql.driver}"/>
<property name="url" value="${mysql.url}"/>
<property name="username" value="${mysql.username}"/>
<property name="password" value="${mysql.password}"/>
</dataSource>
</environment>
<!-- 连接环境信息,取一个任意唯一的名字 -->
<environment id="oracle_developer">
<!-- mybatis使用jdbc事务管理方式 -->
<transactionManager type="jdbc"/>
<!-- mybatis使用连接池方式来获取连接 -->
<dataSource type="pooled">
<!-- 配置与数据库交互的4个必要属性 -->
<property name="driver" value="${oracle.driver}"/>
<property name="url" value="${oracle.url}"/>
<property name="username" value="${oracle.username}"/>
<property name="password" value="${oracle.password}"/>
</dataSource>
</environment>
</environments>
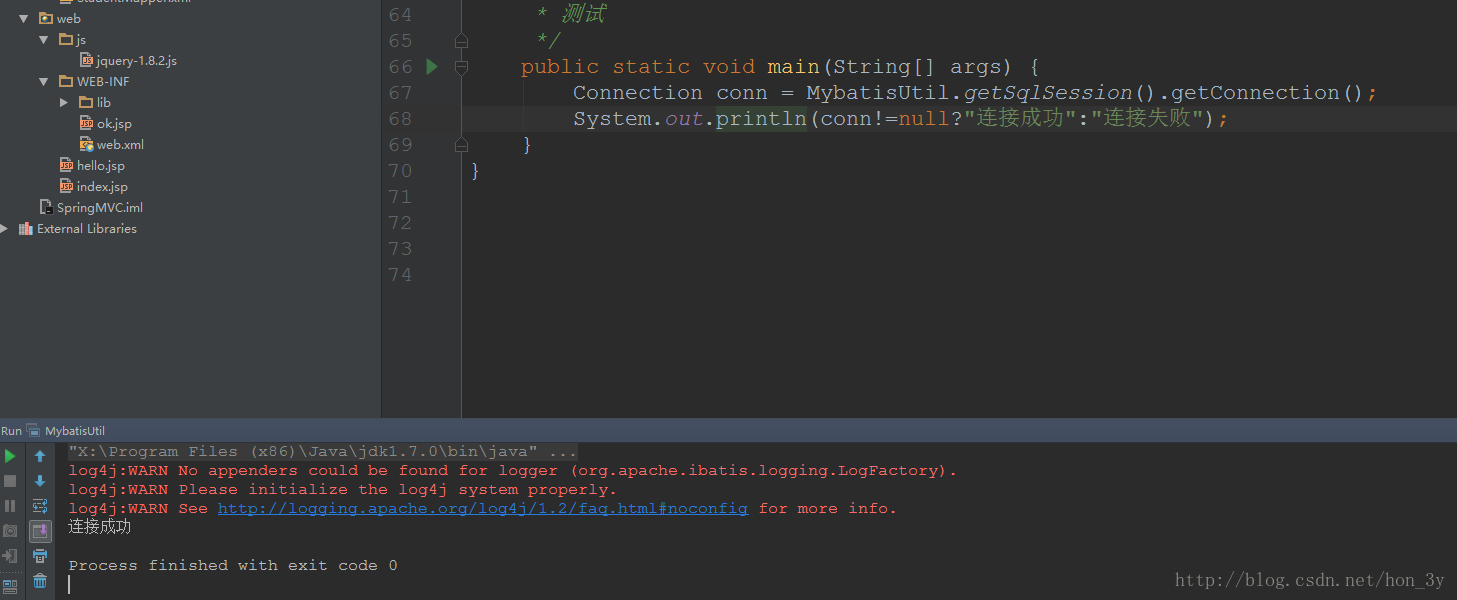
</configuration>编写工具类测试是否获取到连接
使用Mybatis的API来创建一个工具类,通过mybatis配置文件与数据库的信息,得到Connection对象
package cn.itcast.javaee.mybatis.util;

import java.io.IOException;
import java.io.Reader;
import java.sql.Connection;
import org.apache.ibatis.io.Resources;
import org.apache.ibatis.session.SqlSession;
import org.apache.ibatis.session.SqlSessionFactory;
import org.apache.ibatis.session.SqlSessionFactoryBuilder;

/**
 * 工具类
 * @author AdminTC
 */
public class MybatisUtil {
    private static ThreadLocal<SqlSession> threadLocal = new ThreadLocal<SqlSession>();
    private static SqlSessionFactory sqlSessionFactory;
    /**
     * 加载位于src/mybatis.xml配置文件
     */
    static{
        try {
            Reader reader = Resources.getResourceAsReader("mybatis.xml");
            sqlSessionFactory = new SqlSessionFactoryBuilder().build(reader);
        } catch (IOException e) {
            e.printStackTrace();
            throw new RuntimeException(e);
        }
    }
    /**
     * 禁止外界通过new方法创建
     */
    private MybatisUtil(){}
    /**
     * 获取SqlSession
     */
    public static SqlSession getSqlSession(){
        //从当前线程中获取SqlSession对象
        SqlSession sqlSession = threadLocal.get();
        //如果SqlSession对象为空
        if(sqlSession == null){
            //在SqlSessionFactory非空的情况下,获取SqlSession对象
            sqlSession = sqlSessionFactory.openSession();
            //将SqlSession对象与当前线程绑定在一起
            threadLocal.set(sqlSession);
        }
        //返回SqlSession对象
        return sqlSession;
    }
    /**
     * 关闭SqlSession与当前线程分开
     */
    public static void closeSqlSession(){
        //从当前线程中获取SqlSession对象
        SqlSession sqlSession = threadLocal.get();
        //如果SqlSession对象非空
        if(sqlSession != null){
            //关闭SqlSession对象
            sqlSession.close();
            //分开当前线程与SqlSession对象的关系,目的是让GC尽早回收
            threadLocal.remove();
        }
    }
    /**
     * 测试
     */
    public static void main(String[] args) {
        Connection conn = MybatisUtil.getSqlSession().getConnection();
        System.out.println(conn!=null?"连接成功":"连接失败");
    }
}
创建实体与映射关系文件
配置实体与表的映射关系
<?xml version="1.0" encoding="UTF-8" ?>
<!DOCTYPE mapper PUBLIC "-//mybatis.org//DTD Mapper 3.0//EN"
"http://mybatis.org/dtd/mybatis-3-mapper.dtd">

<!-- namespace属性是名称空间,必须唯一 -->
<mapper namespace="cn.itcast.javaee.mybatis.app04.Student">

    <!-- resultMap标签:映射实体与表
         type属性:表示实体全路径名
         id属性:为实体与表的映射取一个任意的唯一的名字
    -->
    <resultMap type="student" id="studentMap">
        <!-- id标签:映射主键属性
             result标签:映射非主键属性
             property属性:实体的属性名
             column属性:表的字段名
        -->
        <id property="id" column="id"/>
        <result property="name" column="name"/>
        <result property="sal" column="sal"/>
    </resultMap>

</mapper>
现在我们已经有了Mybatis的配置文件和表与实体之前的映射文件了,因此我们要将配置文件和映射文件关联起来
    <mappers>
        <mapper resource="StudentMapper.xml"/>
    </mappers>
在测试类上,我们是可以获取得到连接的
编写DAO
public class StudentDao {


    public void add(Student student) throws Exception {
        //得到连接对象
        SqlSession sqlSession = MybatisUtil.getSqlSession();
        sqlSession.insert();
    }

    public static void main(String[] args) throws Exception {

        StudentDao studentDao = new StudentDao();

        Student student = new Student(1, "zhongfucheng", 10000D);
        studentDao.add(student);

    }
}
到现在为止,我们实体与表的映射文件仅仅映射了实体属性与表的字段的关系...
我们在Hibernate中如果想要插入数据什么的,只要调用save()方法就行了。Hibernate是自动化屏蔽掉了数据库的差异,而我们Mybatis是需要自己手动编写SQL代码的...
那么SQL代码是写在哪里的呢???明显地,我们作为一个框架,不可能在程序中写SQL,我们是在实体与表的映射文件中写的!
Mybatis实体与表的映射文件中提供了insert标签【SQL代码片段】供我们使用
    //在JDBC中我们通常使用?号作为占位符,而在Mybatis中,我们是使用#{}作为占位符
    //parameterType我们指定了传入参数的类型
    //#{}实际上就是调用了Student属性的get方法

    <insert id="add" parameterType="Student">

        INSERT INTO ZHONGFUCHENG.STUDENTS (ID, NAME, SAL) VALUES (#{id},#{name},#{sal});
    </insert>
在程序中调用映射文件的SQL代码片段
    public void add(Student student) throws Exception {
        //得到连接对象
        SqlSession sqlSession = MybatisUtil.getSqlSession();
        try{
            //映射文件的命名空间.SQL片段的ID,就可以调用对应的映射文件中的SQL
            sqlSession.insert("StudentID.add", student);
            sqlSession.commit();
        }catch(Exception e){
            e.printStackTrace();
            sqlSession.rollback();
            throw e;
        }finally{
            MybatisUtil.closeSqlSession();
        }
}值得注意的是:Mybatis中的事务是默认开启的,因此我们在完成操作以后,需要我们手动去提交事务!
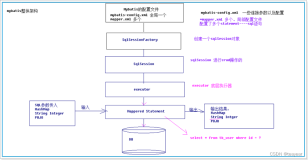
Mybatis工作流程
- 通过Reader对象读取Mybatis映射文件
- 通过SqlSessionFactoryBuilder对象创建SqlSessionFactory对象
- 获取当前线程的SQLSession
- 事务默认开启
- 通过SQLSession读取映射文件中的操作编号,从而读取SQL语句
- 提交事务
- 关闭资源
完成CRUD操作
我们在上面中已经简单知道了Mybatis是怎么使用的以及工作流程了,这次我们使用Mybatis来完成CRUD的操作,再次巩固Mybatis的开发步骤以及一些细节
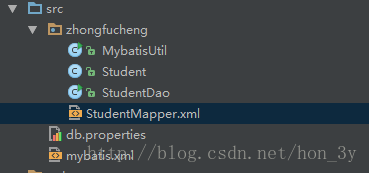
包与类之间的结构
增加学生
配置文件
<?xml version="1.0" encoding="UTF-8"?>
<!DOCTYPE configuration PUBLIC "-//mybatis.org//DTD Config 3.0//EN"
"http://mybatis.org/dtd/mybatis-3-config.dtd">

<configuration>
    <!-- 加载类路径下的属性文件 -->
    <properties resource="db.properties"/>

    <!-- 设置一个默认的连接环境信息 -->
    <environments default="mysql_developer">
        <!-- 连接环境信息,取一个任意唯一的名字 -->
        <environment id="mysql_developer">
            <!-- mybatis使用jdbc事务管理方式 -->
            <transactionManager type="jdbc"/>
            <!-- mybatis使用连接池方式来获取连接 -->
            <dataSource type="pooled">
                <!-- 配置与数据库交互的4个必要属性 -->
                <property name="driver" value="${mysql.driver}"/>
                <property name="url" value="${mysql.url}"/>
                <property name="username" value="${mysql.username}"/>
                <property name="password" value="${mysql.password}"/>
            </dataSource>
        </environment>


        <!-- 连接环境信息,取一个任意唯一的名字 -->
        <environment id="oracle_developer">
            <!-- mybatis使用jdbc事务管理方式 -->
            <transactionManager type="jdbc"/>
            <!-- mybatis使用连接池方式来获取连接 -->
            <dataSource type="pooled">
                <!-- 配置与数据库交互的4个必要属性 -->
                <property name="driver" value="${oracle.driver}"/>
                <property name="url" value="${oracle.url}"/>
                <property name="username" value="${oracle.username}"/>
                <property name="password" value="${oracle.password}"/>
            </dataSource>
        </environment>
    </environments>
    <mappers>
        <mapper resource="zhongfucheng/StudentMapper.xml"/>
    </mappers>
</configuration>
映射文件
<!-- namespace属性是名称空间,必须唯一 -->
<mapper namespace="StudentID">

    <!-- resultMap标签:映射实体与表
         type属性:表示实体全路径名
         id属性:为实体与表的映射取一个任意的唯一的名字
    -->
    <resultMap type="zhongfucheng.Student" id="studentMap">
        <!-- id标签:映射主键属性
             result标签:映射非主键属性
             property属性:实体的属性名
             column属性:表的字段名
        -->
        <id property="id" column="id"/>
        <result property="name" column="name"/>
        <result property="sal" column="sal"/>
    </resultMap>

    <insert id="add" parameterType="zhongfucheng.Student">
        INSERT INTO ZHONGFUCHENG.STUDENTS (ID, NAME, SAL) VALUES (#{id},#{name},#{sal});
    </insert>

</mapper>
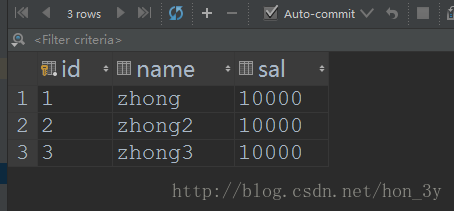
插入数据
public class StudentDao {
public void add(Student student) throws Exception {
//得到连接对象
SqlSession sqlSession = MybatisUtil.getSqlSession();
try{
//映射文件的命名空间.SQL片段的ID,就可以调用对应的映射文件中的SQL
sqlSession.insert("StudentID.add", student);
sqlSession.commit();
}catch(Exception e){
e.printStackTrace();
sqlSession.rollback();
throw e;
}finally{
MybatisUtil.closeSqlSession();
}
}
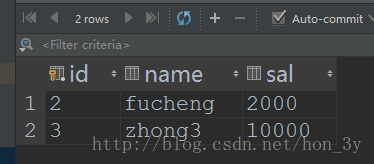
public static void main(String[] args) throws Exception {
StudentDao studentDao = new StudentDao();
Student student = new Student(3, "zhong3", 10000D);
studentDao.add(student);
}
}
根据ID查询数据
增加select标签
    <!--
        查询根据id
        resultMap这个属性代表是返回值类型,返回值的类型是Student,就是上面实体类型
    -->
    <select id="findById" parameterType="int" resultMap="studentMap">
        SELECT * FROM STUDENTS WHERE id = #{id};
    </select>
查询出来的结果是一个Student对象,我们调用SelectOne方法
public Student findById(int id) throws Exception {
//得到连接对象
SqlSession sqlSession = MybatisUtil.getSqlSession();
try{
//映射文件的命名空间.SQL片段的ID,就可以调用对应的映射文件中的SQL
return sqlSession.selectOne("StudentID.findById",id);
}catch(Exception e){
e.printStackTrace();
sqlSession.rollback();
throw e;
}finally{
MybatisUtil.closeSqlSession();
}
}
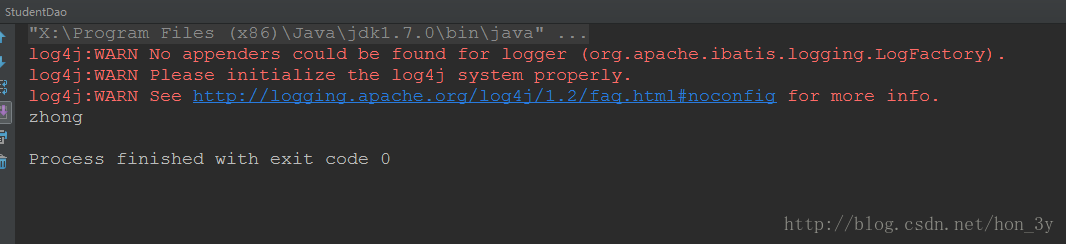
public static void main(String[] args) throws Exception {
StudentDao studentDao = new StudentDao();
Student student = studentDao.findById(1);
System.out.println(student.getName());
}
查询所有数据
    <!--
        查询所有数据
        返回值类型讲道理是List<Student>的,但我们只要写集合中的类型就行了
    -->
    <select id="findAll" resultMap="studentMap">
        SELECT * FROM STUDENTS;
    </select>
我们查询出来的结果不单单只有一个对象了,因此我们使用的是SelectList这个方法
public List<Student> findAll() throws Exception {
//得到连接对象
SqlSession sqlSession = MybatisUtil.getSqlSession();
try{
//映射文件的命名空间.SQL片段的ID,就可以调用对应的映射文件中的SQL
return sqlSession.selectList("StudentID.findAll");
}catch(Exception e){
e.printStackTrace();
sqlSession.rollback();
throw e;
}finally{
MybatisUtil.closeSqlSession();
}
}
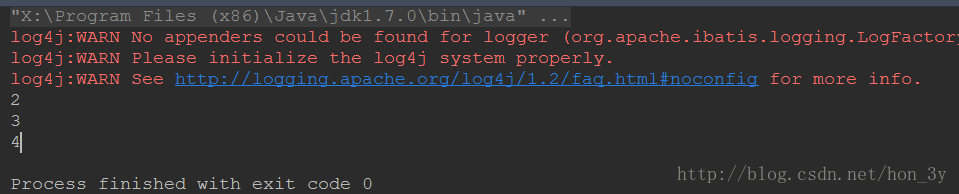
public static void main(String[] args) throws Exception {
StudentDao studentDao = new StudentDao();
List<Student> students = studentDao.findAll();
System.out.println(students.size());
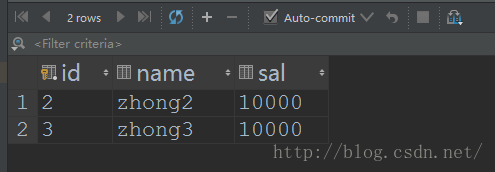
}根据id删除
    <!--根据id删除-->
    <delete id="delete" parameterType="int">
        DELETE FROM STUDENTS WHERE id=#{id};

    </delete>
调用delete方法删除
    public void delete(int id ) throws Exception {
        //得到连接对象
        SqlSession sqlSession = MybatisUtil.getSqlSession();
        try{
            //映射文件的命名空间.SQL片段的ID,就可以调用对应的映射文件中的SQL
            sqlSession.delete("StudentID.delete", id);
            sqlSession.commit();
        }catch(Exception e){
            e.printStackTrace();
            sqlSession.rollback();
            throw e;
        }finally{
            MybatisUtil.closeSqlSession();
        }
    }
    public static void main(String[] args) throws Exception {
        StudentDao studentDao = new StudentDao();
        studentDao.delete(1);

    }
修改
    <!--更新-->
    <update id="update" parameterType="zhongfucheng.Student">

        update students set name=#{name},sal=#{sal} where id=#{id};

    </update>
查询出对应的对象,对其进行修改
    public void update(Student student ) throws Exception {
        //得到连接对象
        SqlSession sqlSession = MybatisUtil.getSqlSession();
        try{
            //映射文件的命名空间.SQL片段的ID,就可以调用对应的映射文件中的SQL
            sqlSession.update("StudentID.update", student);
            sqlSession.commit();
        }catch(Exception e){
            e.printStackTrace();
            sqlSession.rollback();
            throw e;
        }finally{
            MybatisUtil.closeSqlSession();
        }
    }
    public static void main(String[] args) throws Exception {
        StudentDao studentDao = new StudentDao();
        Student student = studentDao.findById(2);
        student.setName("fucheng");
        student.setSal(2000D);
        studentDao.update(student);

    }
小细节
    <!--
        注意:这个insert/update/delete标签只是一个模板,在做操作时,其实是以SQL语句为核心的
             即在做增/删/时,insert/update/delete标签可通用,
             但做查询时只能用select标签
             我们提倡什么操作就用什么标签
    -->
Mybatis分页
分页是一个非常实用的技术点,我们也来学习一下使用Mybatis是怎么分页的...
我们的分页是需要多个参数的,并不是像我们之前的例子中只有一个参数。当需要接收多个参数的时候,我们使用Map集合来装载!
    public List<Student>  pagination(int start ,int end) throws Exception {
        //得到连接对象
        SqlSession sqlSession = MybatisUtil.getSqlSession();
        try{
            //映射文件的命名空间.SQL片段的ID,就可以调用对应的映射文件中的SQL


            /**
             * 由于我们的参数超过了两个,而方法中只有一个Object参数收集
             * 因此我们使用Map集合来装载我们的参数
             */
            Map<String, Object> map = new HashMap();
            map.put("start", start);
            map.put("end", end);
            return sqlSession.selectList("StudentID.pagination", map);
        }catch(Exception e){
            e.printStackTrace();
            sqlSession.rollback();
            throw e;
        }finally{
            MybatisUtil.closeSqlSession();
        }
    }
    public static void main(String[] args) throws Exception {
        StudentDao studentDao = new StudentDao();
        List<Student> students = studentDao.pagination(0, 3);
        for (Student student : students) {

            System.out.println(student.getId());

        }

    }
那么在实体与表映射文件中,我们接收的参数就是map集合
    <!--分页查询-->
    <select id="pagination" parameterType="map" resultMap="studentMap">

        /*根据key自动找到对应Map集合的value*/
        select * from students limit #{start},#{end};

    </select>
动态SQL
何为动态SQL??回顾一下我们之前写的SSH项目中,有多条件查询的情况,如下图
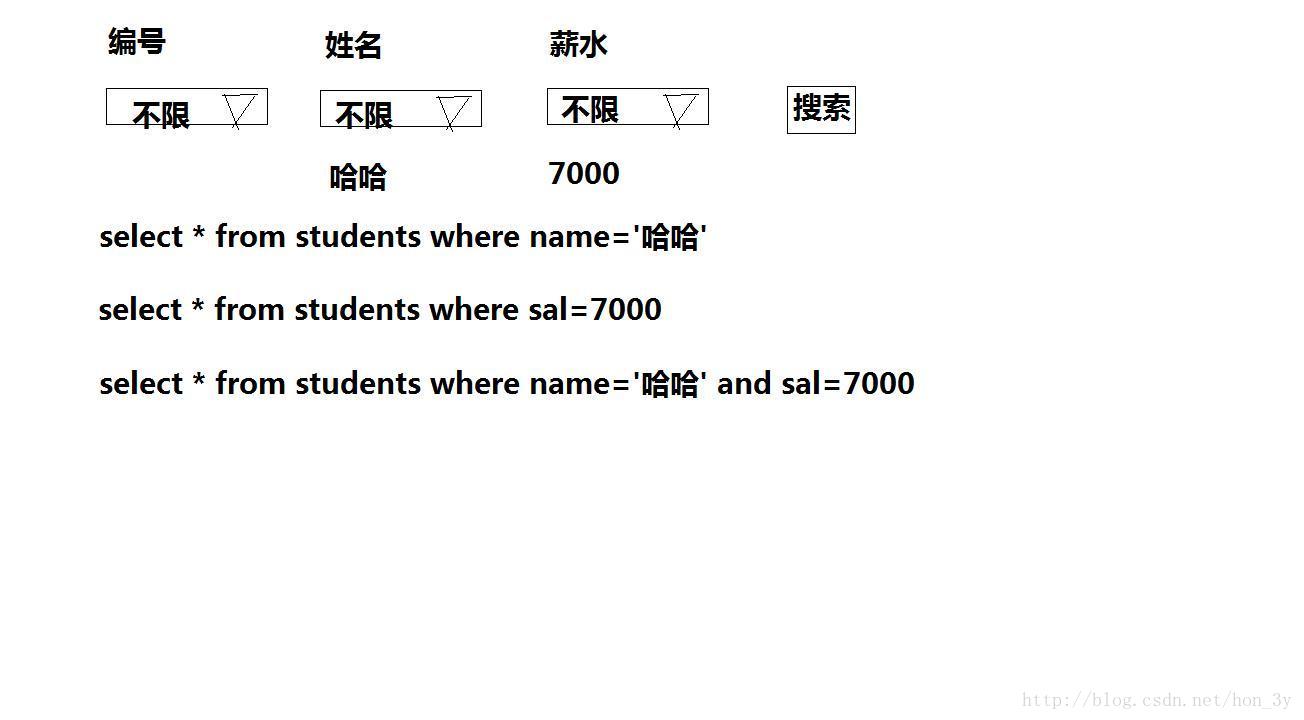
我们当时刚开始做的时候,是需要在Controller中判断SQL是否已经有条件了,因为SQL语句需要拼接起来....这样干的话,就非常容易出错的。
如下的代码,如果有多个条件的话,那么拼接起来很容易出错!
  public String listUI() {

        //查询语句
        String hql = "FROM Info i ";
        List<Object> objectList  = new ArrayList<>();

        //根据info是否为null来判断是否是条件查询。如果info为空,那么是查询所有。
        if (info != null) {
            if (StringUtils.isNotBlank(info.getTitle())) {
                hql += "where i.title like ?";
                objectList.add("%" + info.getTitle() + "%");
            }
        }
        infoList = infoServiceImpl.findObjects(hql,objectList);
        ActionContext.getContext().getContextMap().put("infoTypeMap", Info.INFO_TYPE_MAP);
        return "listUI";
    }
后来,我们觉得这样不好,于是就专门写了一个查询助手类:
package zhongfucheng.core.utils;

import java.util.ArrayList;
import java.util.List;

/**
 * Created by ozc on 2017/6/7.
 */
public class QueryHelper {

    private String fromClause = "";
    private String whereClause = "";
    private String orderbyClause = "";
    private List<Object> objectList;

    public static String ORDER_BY_ASC = "asc";
    public static String ORDER_BY_DESC = "desc";


    //FROM子句只出现一次
    /**
     * 构建FROM字句,并设置查询哪张表
     * @param aClass 用户想要操作的类型
     * @param alias  别名
     */
    public QueryHelper(Class aClass, String alias) {
        fromClause = "  FROM " + aClass.getSimpleName() + "  " + alias;
    }
    //WHERE字句可以添加多个条件,但WHERE关键字只出现一次
    /**
     * 构建WHERE字句
     * @param condition
     * @param objects
     * @return
     */
    public QueryHelper addCondition(String condition, Object... objects) {
        //如果已经有字符了,那么就说明已经有WHERE关键字了
        if (whereClause.length() > 0) {
            whereClause += " AND  " + condition;
        } else {
            whereClause += " WHERE" + condition;
        }
        //在添加查询条件的时候,?对应的查询条件值
        if (objects == null) {
            objectList = new ArrayList<>();
        }

        for (Object object : objects) {
            objectList.add(object);
        }

        return this;
    }
    /**
     *
     * @param property 要排序的属性
     * @param order 是升序还是降序
     * @return
     */
    public QueryHelper orderBy(String property, String order) {

        //如果已经有字符了,那么就说明已经有ORDER关键字了
        if (orderbyClause.length() > 0) {
            orderbyClause += " ,  " + property +"   " + order;
        } else {
            orderbyClause += "  ORDER BY " + property+"   " + order;
        }
        return this;
    }

    /**
     * 返回HQL语句
     */
    public String returnHQL() {
        return fromClause + whereClause + orderbyClause;
    }

    /**
     * 得到参数列表
     * @return
     */
    public List<Object> getObjectList() {
        return objectList;
    }
}
这样一来的话,我们就不用自己手动拼接了,给我们的查询助手类去拼接就好了。
而如果我们使用Mybatis的话,就可以免去查询助手类了。因为Mybatis内部就有动态SQL的功能【动态SQL就是自动拼接SQL语句】!
动态查询
<!--多条件查询【动态SQL】-->
<!--会自动组合成一个正常的WHERE字句-->
<!--name值会从map中寻找-->
<select id="findByCondition" resultMap="studentMap" parameterType="map">
select * from students
<where>
<if test="name!=null">
and name=#{name}
</if>
<if test="sal!=null">
and sal < #{sal}
</if>
</where>
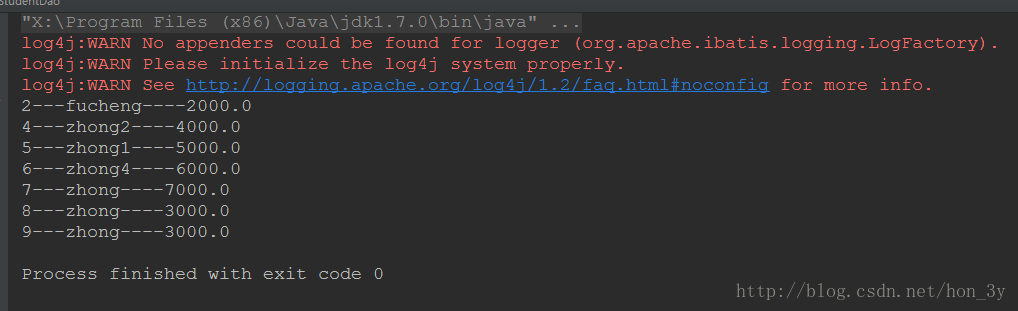
</select>查询出来小于9000块的人
   public List<Student> findByCondition(String name,Double sal) throws Exception {
        //得到连接对象
        SqlSession sqlSession = MybatisUtil.getSqlSession();
        try{
            //映射文件的命名空间.SQL片段的ID,就可以调用对应的映射文件中的SQL
            /**
             * 由于我们的参数超过了两个,而方法中只有一个Object参数收集
             * 因此我们使用Map集合来装载我们的参数
             */
            Map<String, Object> map = new HashMap();
            map.put("name", name);
            map.put("sal", sal);
            return sqlSession.selectList("StudentID.findByCondition", map);
        }catch(Exception e){
            e.printStackTrace();
            sqlSession.rollback();
            throw e;
        }finally{
            MybatisUtil.closeSqlSession();
        }
    }
    public static void main(String[] args) throws Exception {
        StudentDao studentDao = new StudentDao();
        List<Student> students = studentDao.findByCondition(null,9000D);
        for (Student student : students) {
            System.out.println(student.getId() + "---" + student.getName() + "----" + student.getSal());
        }


    }
动态更新
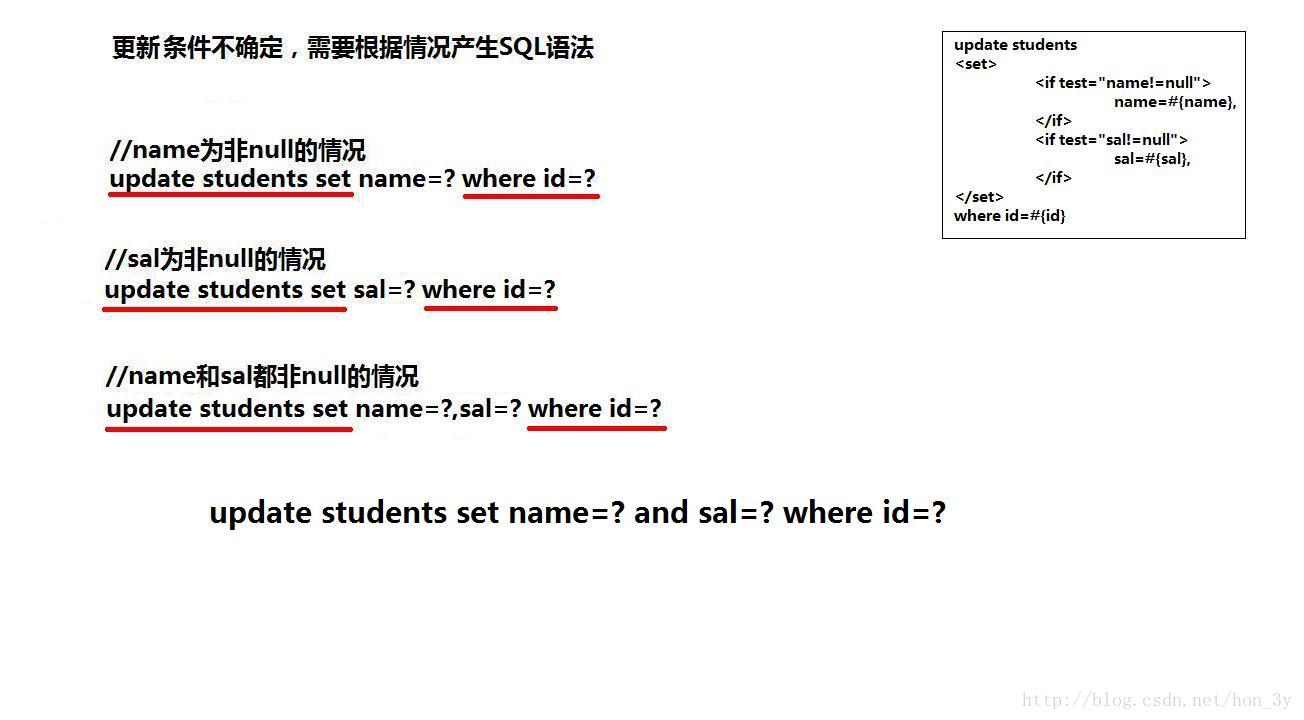
    <!--动态更新-->
    <!--不要忘了逗号-->
    <update id="updateByConditions" parameterType="map">

        update students
        <set>
            <if test="name!=null">
                 name = #{name},
            </if>
            <if test="sal!=null">
                 sal = #{sal},
            </if>
        </set>
        where id = #{id}
    </update>
给出三个更新的字段
public void updateByConditions(int id,String name,Double sal) throws Exception {
//得到连接对象
SqlSession sqlSession = MybatisUtil.getSqlSession();
try{
//映射文件的命名空间.SQL片段的ID,就可以调用对应的映射文件中的SQL
/**
* 由于我们的参数超过了两个,而方法中只有一个Object参数收集
* 因此我们使用Map集合来装载我们的参数
*/
Map<String, Object> map = new HashMap();
map.put("id", id);
map.put("name", name);
map.put("sal", sal);
sqlSession.update("StudentID.updateByConditions", map);
sqlSession.commit();
}catch(Exception e){
e.printStackTrace();
sqlSession.rollback();
throw e;
}finally{
MybatisUtil.closeSqlSession();
}
}
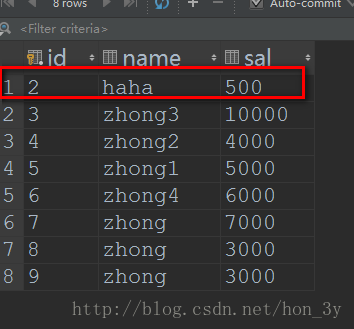
public static void main(String[] args) throws Exception {
StudentDao studentDao = new StudentDao();
studentDao.updateByConditions(2,"haha",500D);
}
动态删除
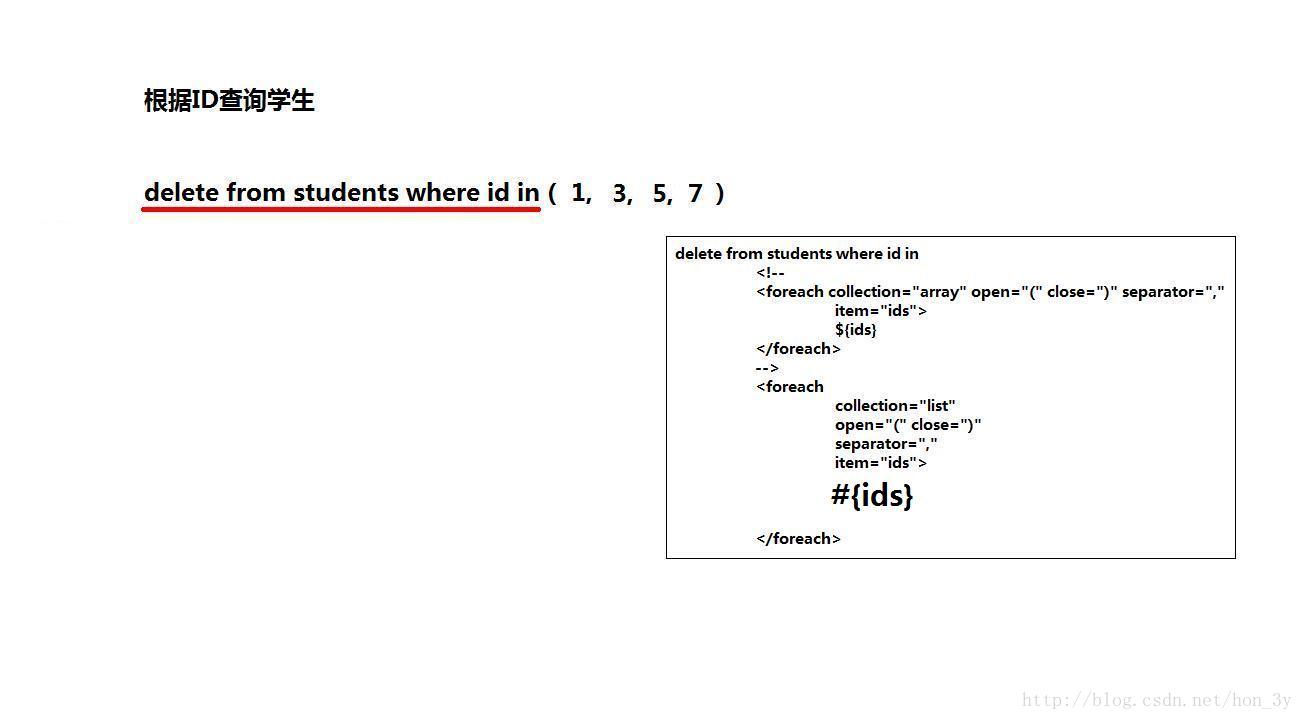
以前我们使用JDBC也好,Hibernate也好,想要批量删除的时候,总是使用的是循环删除。而我们现在使用的是Mybatis,SQL语句是自己写的。所以我们可以写下如下的SQL来进行删除
delete from students where id in (?,?,?,?);而我们的Mybatis又支持动态SQL,所以删除起来就非常方便了!
<delete id="deleteByConditions" parameterType="int">
<!-- foreach用于迭代数组元素
open表示开始符号
close表示结束符合
separator表示元素间的分隔符
item表示迭代的数组,属性值可以任意,但提倡与方法的数组名相同
#{ids}表示数组中的每个元素值
-->
delete from students where id in
<foreach collection="array" open="(" close=")" separator="," item="ids">
#{ids}
</foreach>
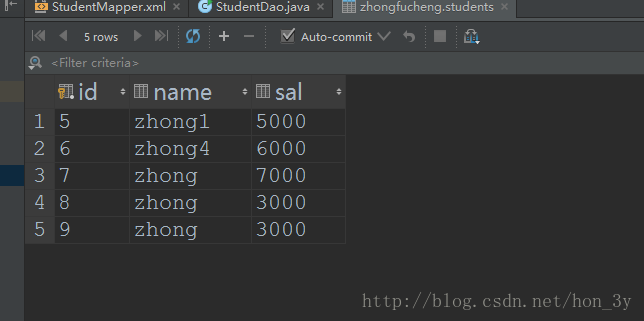
</delete>删除编号为2,3,4的记录
    public void deleteByConditions(int... ids) throws Exception {
        //得到连接对象
        SqlSession sqlSession = MybatisUtil.getSqlSession();
        try{
            //映射文件的命名空间.SQL片段的ID,就可以调用对应的映射文件中的SQL
            /**
             * 由于我们的参数超过了两个,而方法中只有一个Object参数收集
             * 因此我们使用Map集合来装载我们的参数
             */
            sqlSession.delete("StudentID.deleteByConditions", ids);
            sqlSession.commit();
        }catch(Exception e){
            e.printStackTrace();
            sqlSession.rollback();
            throw e;
        }finally{
            MybatisUtil.closeSqlSession();
        }
    }

    public static void main(String[] args) throws Exception {
        StudentDao studentDao = new StudentDao();
        studentDao.deleteByConditions(2,3,4);

    }
动态插入
我们要想动态插入的话,就比其他的DML语句稍微复杂一点,因为它有两部分是不确定的,平常的SQL语句是这样的:
insert into student(id,name,sal) values(?,?,?)
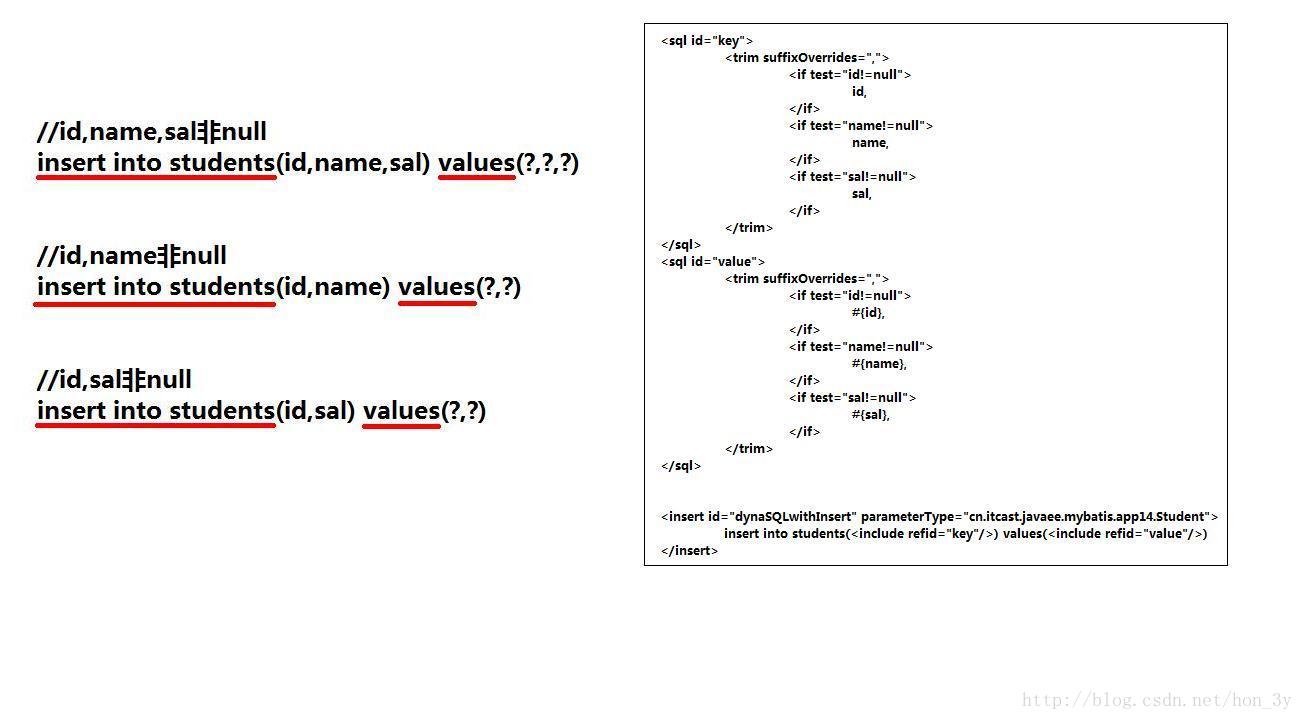
SQL代码块是不能像之前那样帮我们自动去除多余的逗号的,因此我们需要使用trim标签来自己手动去除...
编写insertSQL语句的时候,不要忘了写()括号。
<!--SQL片段默认是不帮我们自动生成合适的SQL,因此需要我们自己手动除去逗号-->
<sql id="key">
<trim suffixOverrides=",">
<if test="id!=null">
id,
</if>
<if test="id!=null">
name,
</if>
<if test="id!=null">
sal,
</if>
</trim>
</sql>
<sql id="value">
<trim suffixOverrides=",">
<if test="id!=null">
#{id},
</if>
<if test="id!=null">
#{name},
</if>
<if test="id!=null">
#{sal},
</if>
</trim>
</sql>
<!--动态插入-->
<insert id="insertByConditions" parameterType="zhongfucheng.Student">
insert into students (<include refid="key"/>) values
(<include refid="value"/>)
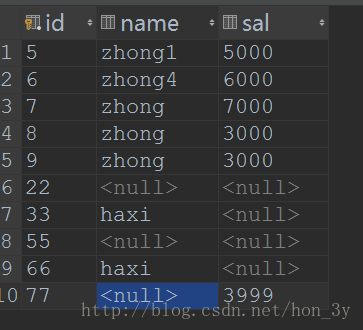
</insert>测试三个不同内容的数据
    public void insertByConditions(Student student) throws Exception {
        //得到连接对象
        SqlSession sqlSession = MybatisUtil.getSqlSession();
        try{
            //映射文件的命名空间.SQL片段的ID,就可以调用对应的映射文件中的SQL
            sqlSession.insert("StudentID.insertByConditions", student);
            sqlSession.commit();
        }catch(Exception e){
            e.printStackTrace();
            sqlSession.rollback();
            throw e;
        }finally{
            MybatisUtil.closeSqlSession();
        }
    }

    public static void main(String[] args) throws Exception {
        StudentDao studentDao = new StudentDao();
        studentDao.insertByConditions(new Student(55, null, null));//name和sal为空

        studentDao.insertByConditions(new Student(66, "haxi", null));//sal为空
        studentDao.insertByConditions(new Student(77, null, 3999d));//name为空


    }
总结
- Mybatis的准备工作与Hibernate差不多,都需要一个总配置文件、一个映射文件。
- Mybatis的SQLSession工具类使用ThreadLocal来对线程中的Session来进行管理。
- Mybatis的事务默认是开启的,需要我们手动去提交事务。
- Mybatis的SQL语句是需要手写的,在程序中通过映射文件的命名空间.sql语句的id来进行调用!
- 在Mybatis中,增删改查都是需要我们自己写SQL语句的,然后在程序中调用即可了。SQL由于是我们自己写的,于是就相对Hibernate灵活一些。
- 如果需要传入多个参数的话,那么我们一般在映射文件中用Map来接收。
- 由于我们在开发中会经常用到条件查询,在之前,我们是使用查询助手来帮我们完成对SQL的拼接的。而Mybatis的话,我们是自己手写SQL代码的。
- Mybatis也支持一些判断标签,于是我们就可以通过这些标签来完成动态CRUD的操作了。
- 值得注意的是,我们的sql片段代码是需要我们自己手动去分割,号的。
更多的文章可往: 文章的目录导航如果文章有错的地方欢迎指正,大家互相交流。习惯在微信看技术文章,想要获取更多的Java资源的同学,可以关注微信公众号:Java3y