0.背景
前段时间看到C1037u多网口版本,很是喜欢,替换的4530r,发现玩openwrt x86的人比较少,写一篇日记,以备后用,有错误之处请指出。
1.配置编译环境
Linux
2.获取源代码
1 |
svn co svn://svn.openwrt.org/openwrt/trunk/ |
3.一些问题
-
3.1.config文件位置
openwrt config文件:.config
kernel config: build_dir/target-xxxxxxx/linux-x86_generic/linux-x.xx.xx/.config -
3.2.内核版本更改
支持内核版本列表: include/kernel-version.mk
更改内核版本位置: target/linux/XXX/Makefile.
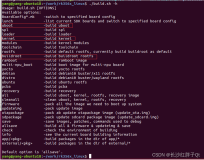
4.make menuconfig
这里给出一个基本配置,不过其中Busybox配置,正常使用默认配置即可,不需要Customize busybox options,我为了在日后的
initramfs中加入一些overlayfs的功能自己加进去了配置,另外的配置基本是x86必须的。
2
3
4
5
6
7
8
9
10
11
12
13
14
15
16
17
18
19
20
21
22
23
24
25
26
27
28
29
30
31
32
33
34
35
36
37
38
39
40
41
42
43
44
45
46
47
48
49
50
51
52
53
54
55
56
57
58
59
60
61
62
63
64
65
66
67
68
69
70
71
72
73
74
75
76
77
78
79
80
Target Images --->
[*] ext4 #生成.EXT4.IMG文件
Base system --->
<*> block-mount
<*> busybox ---> #用于今后initramfs支持,可以将所有lib编译到busybox
[*] Customize busybox options
Busybox Settings --->
General Configuration --->
[*] Support --install [-s] to install applet links at runtime
[*] Don't use /usr
Linux Module Utilities --->
[*] modinfo
[*] Simplified modutils
[*] Accept module options on modprobe command line
[*] Skip loading of already loaded modules
(/lib/modules) Default directory containing modules
Linux System Utilities --->
[*] mdev
[*] Support /etc/mdev.conf
[*] Support subdirs/symlinks
[*] Support regular expressions substitutions when renaming
[*] Support command execution at device addition/removal
[*] Support loading of firmwares
[*] findfs
[*] blkid
[*] Print filesystem type
[*] losetup
[*] lspci
[*] lsusb
[*] mount
[*] Support specifying devices by label or UUID
Filesystem/Volume identification --->
[*] Ext filesystem
[*] fat filesystem
Networking Utilities --->
[*] ftpd
[*] Enable upload commands
[*] Enable workaround for RFC-violating clients
[*] inetd
[*] telnetd
[*] Support standalone telnetd (not inetd only)
[*] tcpsvd
[*] udpsvd
kernel modules --->
Block Devices --->
<*> kmod-ata-core
<*> kmod-ata-ahci
<*> kmod-loop
-*- kmod-scsi-core
<*> kmod-scsi-generic
Filesystems --->
<*> kmod-fs-ext4
<*> kmod-fs-ntfs
<*> kmod-fs-vfat
Input modules --->#键盘
-*- kmod-hid
<*> kmod-hid-generic
-*- kmod-input-core
-*- kmod-input-evdev
Native Language Support --->
<*> kmod-nls-cp437 #vfat需要这个
<*> kmod-nls-iso8859-1
<*> kmod-nls-utf8
Network Devices ---> #网卡驱动
<*> kmod-macvlan
USB Support --->
-*- kmod-usb-core
<*> kmod-usb-hid #usb键盘
<*> kmod-usb-ohci
<*> kmod-usb-storage
<*> kmod-usb2
<*> kmod-usb3
Wireless Drivers --->#wifi卡驱动
Network --->
<*> hostapd #wifi ap模式
<*> hostapd-common
<*> hostapd-utils
<*> wpa-supplicant
Utilities --->#自选 fdisk等
4.make kernel_menuconfig
目的是为了加入x86的多核心以及大内存支持
1 |
Processor type and features ---> |
5.make
编译
1 |
make -j 100 download #下载包,openwrt是基于源码+patch形式,下载过程比较慢,最好在墙外 |
6.安装
-
6.1.固件简介
ls bin/x86
会看到有以下一些文件,与官方编译的固件名称完全相同,这里大概解释下:
openwrt-x86-generic-combined-ext4.img.gz
: 包含vmlinuz、rootfs(ext4)、引导信息以及相关分区信息的img,一般是两个分区,可以把它看成是硬盘镜像,直接dd到某个磁盘openwrt-x86-generic-rootfs-ext4.img.gz
: rootfs分区镜像,可以直接dd到某个分区,或者mount -o到某个目录openwrt-x86-generic-rootfs-squashfs.img
: 同上openwrt-x86-generic-vmlinuz
: kernelopenwrt-x86-generic-Generic-rootfs.tar.gz
: rootfs用gz打包后的文件可以看出,要让系统启动,需要引导器(x86是使用grub,好比是路由中的uboot,当然uboot管的内容更多)、
kernel、rootfs三者。 -
6.2.简易部署
如果你的磁盘(U盘)只用于openwrt系统,可以使用最简单的用combined.img直接dd到目标盘,这样的好处是简单,坏处是如果你的sdb(磁盘/U盘)很大,就带来空间浪费,虽然可以在
rootfs中存数据,但是下次升级系统就带来不必要的麻烦,命令行如下:1
2gunzip bin/x86/openwrt-x86-generic-combined-ext4.img.gz
dd if=bin/x86/openwrt-x86-generic-combined-ext4.img of=/dev/sdb #根据自己情况选择磁盘 -
6.3.自定义部署
适合有一定基础的兄弟,大致步骤:
7.initramfs && overlayfs
-
7.1.overlayfs
由于openwrt x86一般都是安装在U盘/TF卡/硬盘等介质上,默认是ext文件系统,就没有使用
overlayfs,如果要使用overlayfs就得用squashfs。由于从路由过度过来,我个人对overlayfs颇有好感,着手在x86的ext4上加入overlayfs支持。稍后,会单独写一篇关于x86下overlayfs的文档。 -
7.2.initramfs
按照如下编译选项配置,其编译生成的
vmlinuz是一个带initramfs的kernel,当然可以在也可以在Use external cpio中选择自定义initramfs目录,如果没选择Use external cpio,openwrt则会将整个rootfs当作initramfs编译进vmlinuz.Target Images ---> [*] ramdisk #其实就是initramfs () Use external cpio#选择外部cpio,作为initramfs
如果用gurb加载它,则整个系统会在ramfs上运行,所有配置在重启后都将不被保留,一般需要在这个上面启动到另一个
kernel(kexec)或者switch_root 到另一个rootfs(真实的磁盘)环境,ramdisk(initramfs)。因此一般是不勾选编译选项中的ramdisk选项,自己着手来做initramfs,加入一些hook(比如加入overlayfs支持、switch_root到其他rootfs、干脆直接kexec到其他kernel),用gurb的initrd加载,就可以完成系统启动。
著作权归作者所有。商业转载请联系作者获得授权,非商业转载请注明出处。
本文链接:http://blog.ick.im/posts/2014-10-31-openwrt-x86-compile.html
本文转自 Linux_woniu 51CTO博客,原文链接:http://blog.51cto.com/linuxcgi/2055354