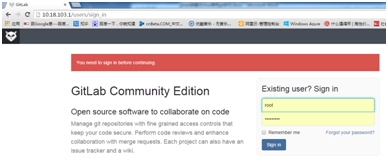
1、gitlab部署
官网 gitlab.com
Ubuntu14.04安装
1、Install and configure the necessary dependencies
sudoapt-get install postfix
2. Download the Omnibus package and install everything
wgethttps://downloads-packages.s3.amazonaws.com/ubuntu-14.04/gitlab_7.9.4-omnibus.1-1_amd64.deb
sudodpkg -i gitlab_7.9.4-omnibus.1-1_amd64.deb
3. Configure and start GitLab
sudogitlab-ctl reconfigure
4. Browse to the hostname and login
Username: root
Password: 5iveL!fe
Centos6部署
1.Install and configure the necessary dependencies
sudo yum install postfix
sudo yum install cronie
sudo service postfix start
sudo chkconfig postfix on
sudo lokkit -s http -s ssh
2.Download the Omnibus package and install everything
curl -O https://downloads-packages.s3.amazonaws.com/centos-6.6/gitlab-7.9.4_omnibus.1-1.el6.x86_64.rpm
sudo rpm -i gitlab-7.9.4_omnibus.1-1.el6.x86_64.rpm
3.Configure and start GitLab
sudo gitlab-ctl reconfigure
4.Browse to the hostname and login
Username: root
Password: 5iveL!fe
安装完成后,在浏览器输入gitlab服务器的IP地址,就可以访问。用户名root,密码是5iveL!fe。
2、gitlab配置更改
当gitlab安装完成后,根据自己的环境,要修改配置。
如:
gitlab修改nginx端口,绑定IP等
gitlab修改ssh端口
gitlab修改访问url等
gitlab修改数据库类型(这个没必要,因为这里的数据库只存储些用户名,gitlab代码放在/var/opt/gitlab/git-data/下)
gitlab修改redis,gunicorn配置等等
所有的配置在/etc/gitlab/gitlab.rb中修改,修改完配置后执行gitlab-ctl reconfigure生效
gitlab所有的工程目录都在/var/opt/gitlab/下
# ls /var/opt/gitlab/
backups bootstrapped git-data gitlab-rails gitlab-shell logrotate nginx postgresql redis
修改配置示例:
#grep -v '#' gitlab.rb |grep -v ^$
external_url 'http://gitlab.sec.com'
gitlab_rails['gitlab_shell_ssh_port'] = 2222
nginx['listen_addresses']= ['10.18.103.1']
修改url是别人通过url拉取代码,IP对客户端透明。修改ssh port及nginx绑定IP等为环境需要解决冲突。
3、gitlab数据备份与恢复
gitlab定时自动备份
0 2 * * * /opt/gitlab/bin/gitlab-rake gitlab:backup:create
gitlab修改备份路径:
修改/etc/gitlab/gitlab.rb文件
gitlab_rails['backup_path'] = '/mnt/backups'
gitlab恢复
# 停止相关数据连接服务
gitlab-ctl stop unicorn
gitlab-ctl stop sidekiq
# 从1393513186编号备份中恢复
gitlab-rake gitlab:backup:restore BACKUP=1393513186
# 启动Gitlab
sudo gitlab-ctl start
Gitlab迁移
把备份文件拷贝到gitlab的备份目录下,根据上面gitlab恢复步骤即可。


