一、开发板接口接线工具
开发板与PC机之间可以进行连接的接口通常有四个:串口、JTAG、USB、网络接口。而如今在PC端是没有JTAG或者接口的,因此可以使用转接板转换为并口或者USB口与PC段相连。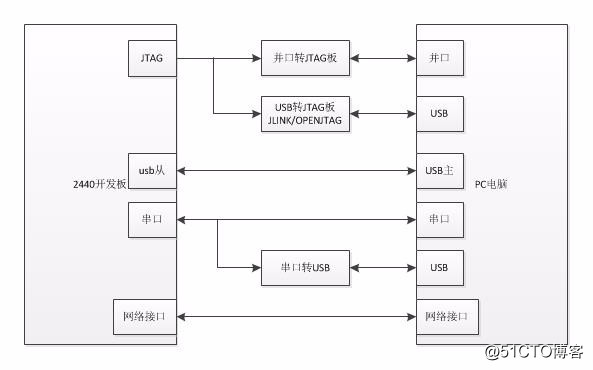
JTAG最初是用来对芯片进行测试的,JTAG测试允许多个器件通过JTAG接口串联在一起,形成一个JTAG链,能实现对各个器件分别测试。如今,JTAG接口还常用于实现ISP(In-System Programmer,在系统编程),对FLASH等器件进行编程。在2440中,当需要对NOR Flash进行烧写时,就需要用到JTAG接口进行烧录软件,而当软件是要烧录到NAND Flash时,使用串口与USB接口就可以操作。这里介绍NOR Flash、NAND Flah与SDRAAM的区别。
ROM和RAM指的都是半导体存储器,ROM是Read Only Memory的缩写,RAM是Random Access Memory的缩写。ROM在系统停止供电的时候仍然可以保持数据,而RAM通常都是在掉电之后就丢失数据,典型的RAM就是计算机的内存。
| 芯片 | 特点 |
|---|---|
| 静态RAM(Static RAM/SRAM),是目前读写最快的存储设备,但是它也非常昂贵; | |
| RAM | 动态RAM(Dynamic RAM/DRAM),DRAM保留数据的时间很短,速度也比SRAM慢,但从价格上来说DRAM相比SRAM要便宜很多; |
| DDR RAM(Date-Rate RAM)也称作DDR SDRAM(Synchronous Dynamic RAM),可以在一个时钟读写两次数据,这样就使得数据传输速度加倍。 |
目前Flash主要有两种NOR Flash和NADN Flash。NOR Flash的读取和SDRAM的读取是一样,用户可以直接运行装载在NOR FLASH里面的代码,这样可以减少SRAM的容量从而节约了成本。NAND Flash没有采取内存的随机读取技术,它的读取是以一次读取一块的形式来进行的,通常是一次读取512个字节,采用这种技术的Flash比较廉价。用户不能直接运行NAND Flash上的代码,因此众多NAND Flash的开发板除了使用NAND Flah以外,还有一块小的NOR Flash来运行启动代码。
在2440开发板中,通常将uboot烧写在nor flash上作为引导程序,而linux kernel与根文件系统烧录在nand flash上,而这些代码会加载到SDRAM中运行。
二、在TQ2440中开发板程序的烧录
一个linux文件系统的构成可分为硬件、bootloader、内核、根文件系统四个层次。首先要想硬件可以工作工作,需要有bootloader引导程序,它设置硬件相关参数以及软件变量,如设置中断变量、关闭看门狗、初始化串口、时钟等硬件参数,设置堆栈等。要完成这些操作,那么UBOOT代码就必须上电就能自动运行,通常将这些代码烧录在NOR Flash中,因为NAND Flash无法运行代码,而linux kernel、 root filesystem则烧录到nand flash中等待bootloader引导完成加载到SDRAM中运行。
1. 使用J-link烧写u-boot到Nor Flash
编译uboot具体操作步骤为:
1、解压u-boot1.1.6,进入解压后的目录
2、打补丁
3、使用arm-linux-gcc3.4.5编译器编译
book/home/test/1_bare_metal/1_test$ tar xjf u-boot-1.1.6.tar.bz2
book/home/test/1_bare_metal/1_test$ cd u-boot-1.1.6/
book/home/test/1_bare_metal/1_test/u-boot-1.1.6$ patch -p1 < ../u-boot-1.1.6_jz2440.patch
book/home/test/1_bare_metal/1_test/u-boot-1.1.6$ arm-linux-gcc -v
Reading specs from /work/tools/gcc-3.4.5-glibc-2.3.6/lib/gcc/arm-linux/3.4.5/specs
Configured with: /work/tools/create_crosstools/crosstool-0.43/build/arm-linux/gcc-3.4.5-glibc-2.3.6/gcc-3.4.5/configure --target=arm-linux --host=i686-host_pc-linux-gnu --prefix=/work/tools/gcc-3.4.5-glibc-2.3.6 --with-float=soft --with-headers=/work/tools/gcc-3.4.5-glibc-2.3.6/arm-linux/include --with-local-prefix=/work/tools/gcc-3.4.5-glibc-2.3.6/arm-linux --disable-nls --enable-threads=posix --enable-symvers=gnu --enable-__cxa_atexit --enable-languages=c,c++ --enable-shared --enable-c99 --enable-long-long
Thread model: posix
gcc version 3.4.5
book/home/test/1_bare_metal/1_test/u-boot-1.1.6$ make 100ask24x0_config
book/home/test/1_bare_metal/1_test/u-boot-1.1.6$ make
烧写uboot:
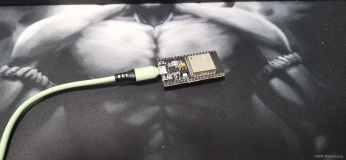
1、JLink 的 USB 口接到电脑上,JTAG 口用排线和开发板的 JTAG 口相连, 开发板设为 Nor Flash 启动并上电。
2、启动 J-Flash, 它在“Windows 开始菜单->所有程序->SEGGER”里面。
3、选择菜单“File -> Open -> Open Project…”,打开光盘里的 s3c2440.jflash。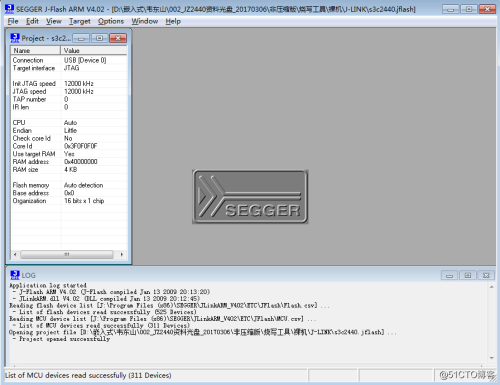
4、选择菜单“Target -> Connect”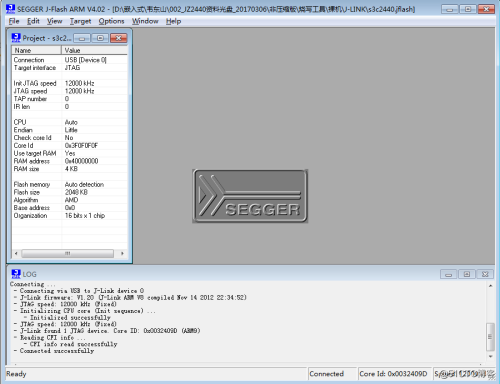
5、选择菜单“File -> Open”,打开要烧写的二进制文件,比如 u-boot.bin,并且在“Start address”里输入 0。
6、选择菜单“Target -> Auto”即可自动烧写。
7、重启开发板,启动uboot。
##### 100ask Bootloader for OpenJTAG #####
[n] Download u-boot to Nand Flash
[o] Download u-boot to Nor Flash
[c] Re-scan Nor Flash
[u] Copy bootloader from nand to nor
[v] Copy bootloader from nor to nand
[k] Download Linux kernel uImage
[j] Download root_jffs2 image
[y] Download root_yaffs image
[d] Download to SDRAM & Run
[z] Download zImage into RAM
[g] Boot linux from RAM
[f] Format the Nand Flash
[s] Set the boot parameters
[b] Boot the system
[r] Reboot u-boot
[q] Quit from menu
Enter your selection:
2. 使用DNW和串口工具CRT烧写Linux内核和根文件系统
编译Linux内核的步骤为:
1、解压linux2.6.22,进入解压后的目录
2、打补丁
3、使用arm-linux-gcc3.4.5编译器编译
book/home/test/1_bare_metal/1_test$ tar xjf linux-2.6.22.6.tar.bz2
book/home/test/1_bare_metal/1_test$ cd linux-2.6.22.6/
book/home/test/1_bare_metal/1_test/linux-2.6.22.6$ patch -p1 < ../linux-2.6.22.6_jz2440.patch
4、这里我是用的是TQ2440开发板,因此韦老师的linux内核源码不能直接使用在TQ2440开发板上,需要对LCD和DM9000两个驱动程序进行修改。
将TQ2440源码\drivers_and_test\17th_dm9000c\修改好的\dm9dev9000c.c复制到linux-2.6.22.6/drivers/net目录下;
修改其Makefile:obj-$(CONFIG_DM9000) += dm9dev9000c.o #dm9000.o
将TQ2440源码drivers_and_test\10th_lcd\4th\lcd.c复制到linux-2.6.22.6/drivers/video目录下,并修改其Makefile:obj-$(CONFIG_FB_S3C2410) += lcd.o #s3c2410fb.o
5、修改config_ok为.configbook/home/test/1_bare_metal/1_test/linux-2.6.22.6$ cp config_ok .config
6、编译make uImage,此事可能出现错误:
book/home/test/1_bare_metal/1_test/linux-2.6.22.6$ make uImage
Makefile:1449: *** mixed implicit and normal rules: deprecated syntax
/home/test/1_bare_metal/1_test/linux-2.6.22.6/Makefile:416: *** mixed implicit and normal rules: deprecated syntax
/home/test/1_bare_metal/1_test/linux-2.6.22.6/Makefile:1449: *** mixed implicit and normal rules: deprecated syntax
make[1]: *** No rule to make target 'silentoldconfig'。 停止。
  CHK     include/linux/version.h
make: *** No rule to make target 'include/config/auto.conf', needed by 'include/asm-arm/.arch'。 停止。
根据提示修改这两行Makefile:
在makefile中将416行代码:config %config: scripts_basic outputmakefile FORCE
改为:%config: scripts_basic outputmakefile FORCE
在makefile中将1449行代码:/ %/: prepare scripts FORCE
改为:%/: prepare scripts FORCE
再次编译,编译成功。
    ...
UIMAGE  arch/arm/boot/uImage
Image Name:   Linux-2.6.22.6
Created:      Fri Dec 29 20:05:44 2017
Image Type:   ARM Linux Kernel Image (uncompressed)
Data Size:    1845828 Bytes = 1802.57 kB = 1.76 MB
Load Address: 0x30008000
Entry Point:  0x30008000
  Image arch/arm/boot/uImage is ready
book/home/test/1_bare_metal/1_test/linux-2.6.22.6$
7、在串口界面输入k命令下载uImage,使用dnw下载数据。
##### 100ask Bootloader for OpenJTAG #####
[n] Download u-boot to Nand Flash
[o] Download u-boot to Nor Flash
[c] Re-scan Nor Flash
[u] Copy bootloader from nand to nor
[v] Copy bootloader from nor to nand
[k] Download Linux kernel uImage
[j] Download root_jffs2 image
[y] Download root_yaffs image
[d] Download to SDRAM & Run
[z] Download zImage into RAM
[g] Boot linux from RAM
[f] Format the Nand Flash
[s] Set the boot parameters
[b] Boot the system
[r] Reboot u-boot
[q] Quit from menu
Enter your selection: k
USB host is connected. Waiting a download.
8、在串口界面输入y命令下载根文件系统,使用dnw下载数据。
##### 100ask Bootloader for OpenJTAG #####
[n] Download u-boot to Nand Flash
[o] Download u-boot to Nor Flash
[c] Re-scan Nor Flash
[u] Copy bootloader from nand to nor
[v] Copy bootloader from nor to nand
[k] Download Linux kernel uImage
[j] Download root_jffs2 image
[y] Download root_yaffs image
[d] Download to SDRAM & Run
[z] Download zImage into RAM
[g] Boot linux from RAM
[f] Format the Nand Flash
[s] Set the boot parameters
[b] Boot the system
[r] Reboot u-boot
[q] Quit from menu
Enter your selection: y
USB host is connected. Waiting a download.
Now, Downloading [ADDRESS:30000000h,TOTAL:49769290]
RECEIVED FILE SIZE:49769290 (725KB/S, 67S)
NAND erase: device 0 offset 0x260000, size 0xfda0000
Erasing at 0xffa0000 -- 3% complete.
OK
NAND write: device 0 offset 0x260000, size 0x2f76b40
Writing data at 0x3033800 -- 13% complete.
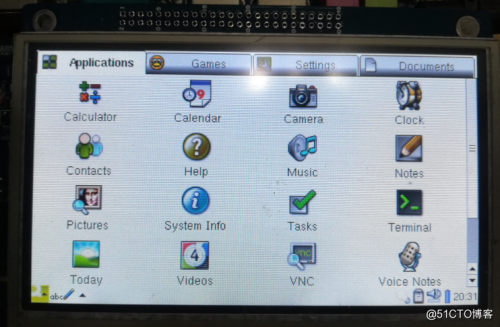
49769280 bytes written: OK9、启动开发板,查看效果。
Warning: firstuse finished 1
tsdev (compaq touchscreen emulation) is scheduled for removal.
See Documentation/feature-removal-schedule.txt for details.
Warning: TimeZone::data Can't create a valid data object for 'Europe/Oslo'
Warning: Unable to open /root/Settings/Categories.xml
Warning: could not register server

starting pid 772, tty '/dev/s3c2410_serial0': '/bin/sh'
#
# ls
bin         lib         mnt         root        tmp
dev         linuxrc     opt         sbin        usr
etc         lost+found  proc        sys
# 
3. 使用tftp网络烧写Linux内核和根文件系统
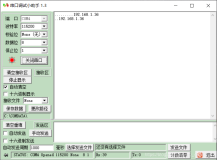
当开发板中安装好uboot后,还可以使用网络tftf下载linux内核与根文件系统,此时当tftp服务器为win7时,要保证开发板与PC机之间可以ping通。这里我采用开发板与PC机直接使用网线相连,PC机有线IP为192.168.2.20;开发板IP为192.168.2.10。
OpenJTAG> set ipaddr 192.168.2.10
OpenJTAG> set serverip 192.168.2.20
OpenJTAG> save
Saving Environment to NAND...
Erasing Nand...Writing to Nand... done
OpenJTAG> printenv
bootargs=noinitrd root=/dev/mtdblock3 init=/linuxrc console=ttySAC0,115200
bootcmd=nand read.jffs2 0x30007FC0 kernel; bootm 0x30007FC0
bootdelay=2
baudrate=115200
ethaddr=08:00:3e:26:0a:5b
netmask=255.255.255.0
stdin=serial
stdout=serial
stderr=serial
mtdids=nand0=nandflash0
mtdparts=mtdparts=nandflash0:256k@0(bootloader),128k(params),2m(kernel),-(root)
partition=nand0,0
mtddevnum=0
mtddevname=bootloader
ipaddr=192.168.2.10
serverip=192.168.2.20

Environment size: 450/131068 bytes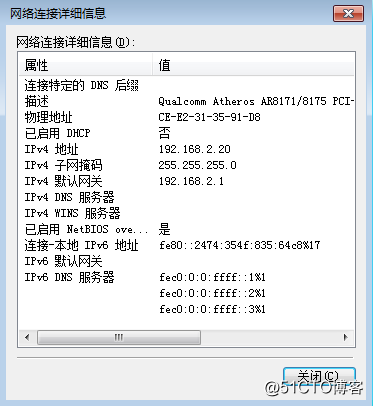
1、PC机tftp端设置,将需要下载的内核与根文件系统放在服务器目录下。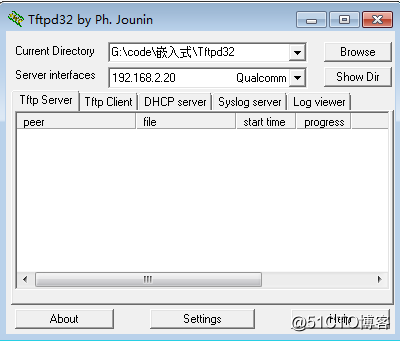
2、开发板进入uboot命令行界面下载kernel:
tftp 30000000 uImage
mtdpart 查看分区信息
nand erase kernel
nand write.jffs2 30000000 kernel
3、下载根文件系统
tftp 30000000 fs_qtopia.yaffs2
nand erase root
nand write.yaffs 30000000 260000(root分区地址) 2fb6b40(大小)
4、开发板启动效果:
4. 使用NFS服务器挂载内核和根文件系统
使用NFS下载方法与tftp下载方式,大致相同,此时要确保开发板可以和虚拟机ubuntu能ping通。同时要设置虚拟机已经开启了nfs服务,并设置了挂载点:
book~$  cat /etc/exports
# /etc/exports: the access control list for filesystems which may be exported
#               to NFS clients.  See exports(5).
#
# Example for NFSv2 and NFSv3:
# /srv/homes       hostname1(rw,sync,no_subtree_check) hostname2(ro,sync,no_subtree_check)
#
# Example for NFSv4:
# /srv/nfs4        gss/krb5i(rw,sync,fsid=0,crossmnt,no_subtree_check)
# /srv/nfs4/homes  gss/krb5i(rw,sync,no_subtree_check)
/work/nfs_root  *(rw,sync,no_root_squash)      #挂载目录
1、下载内核
nfs 30000000 192.168.1.123:/work/nfs_root/uImage
nand erase kernel
nand write.jffs2 30000000 kernel
2、下载根文件系统
nfs 30000000 192.168.1.123:/work/nfs_root/fs_qtopia.yaffs2
nand erase root
nand write.yaffs 30000000 26000 2f76b40
本文转自 梦想成大牛 51CTO博客,原文链接:http://blog.51cto.com/yinsuifeng/2055965,如需转载请自行联系原作者