参考自https://www.pyimagesearch.com/2017/04/03/facial-landmarks-dlib-opencv-python/
在原有基础上有一部分的修改(image改为可选参数,若不填则为拍照后选取),如果有想深入学习的,可以去关注这位‘吴克’先生的文章。
本文不涉及关于人脸检测的训练部分(虽然之后随着学习深入我会再发相关的随笔),只是简单的用轮子。
今天我们来使用dlib和opencv进行人脸的检测标注
首先安装opencv和dlib的方法
pip install dlib
pip install opencv-python
本程序中还使用了imutils用于resize图片,安装方法如下
pip install imutils
dlib中为我们提供了关于人脸检测标注训练好的文件 可在http://dlib.net/files/shape_predictor_68_face_landmarks.dat.bz2下载(如果在参考网页下载到的例程中也包含了这个文件了)
训练好的文件可识别人脸的68个关键点并标注(关键点越少肯定越容易导致识别错误)
本程序运行方法:若.py和shape_predictor_68_face_landmarks.dat以及需要检测的图片在同一目录下,在当前目录console中输入
python my_facial_landmarks.py -p shape_predictor_68_face_landmarks.dat -i guanhai.jpg
或采用拍照识别的方式,输入
python my_facial_landmarks.py -p shape_predictor_68_face_landmarks.dat
在图片框中按q完成拍照
之后会显示标注后的照片
例如输入如下图片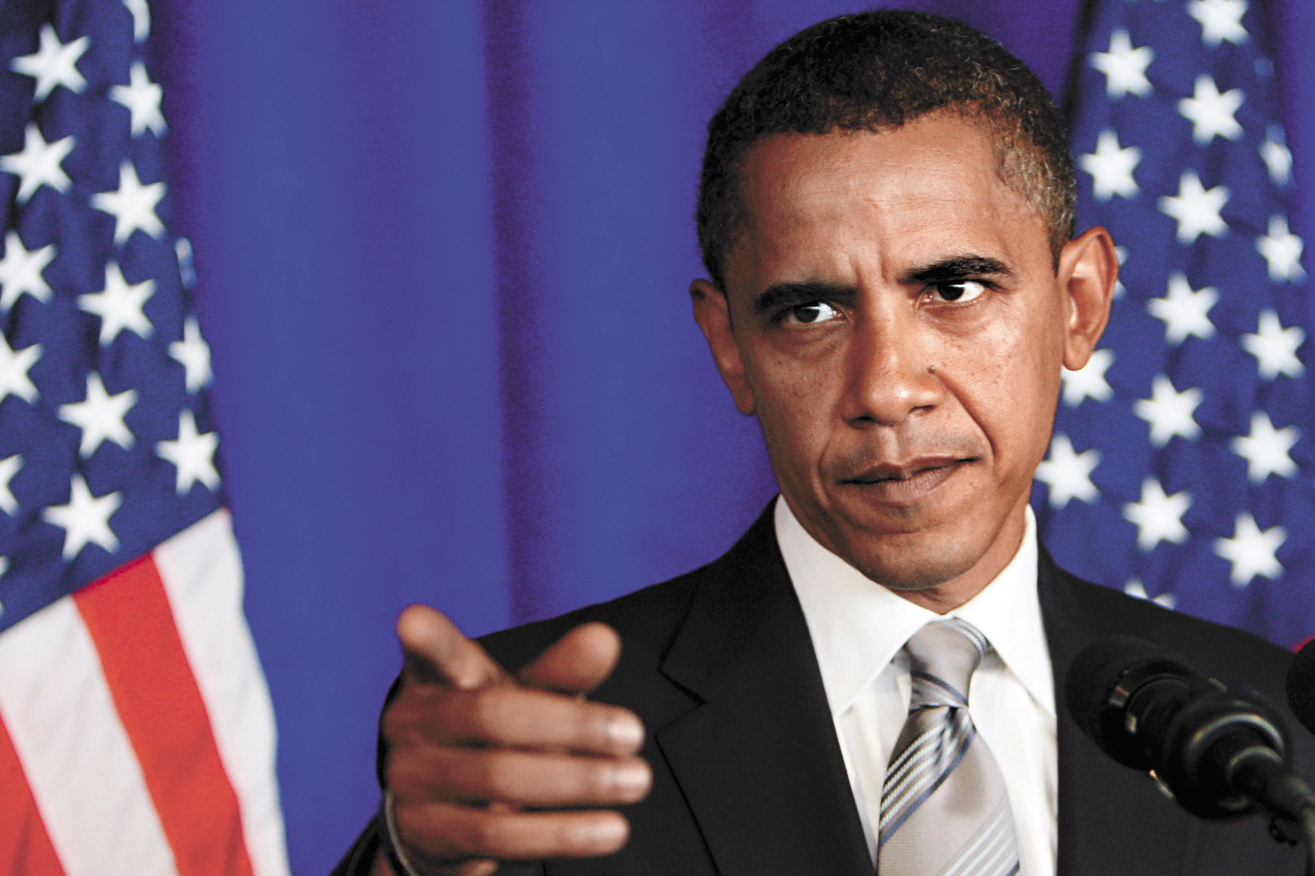 运行截图
运行截图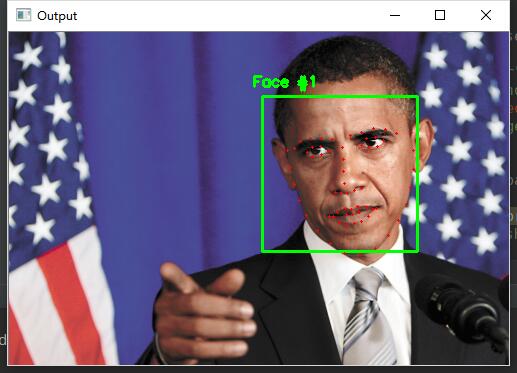
拍照然后识别就不举例了吧,大家可以自行尝试
代码如下my_facial_landmarks.py

from imutils import face_utils

import argparse

import imutils

import dlib

import cv2


def takephoto():

cap = cv2.VideoCapture(0)

while (1):

# get a frame

ret, frame = cap.read()

# show a frame

cv2.imshow("capture", frame)

if cv2.waitKey(1) & 0xFF == ord('q'):#按q键完成照相

# cv2.imwrite("./test0.jpg", frame) 保存照片,但在这里我们并不需要

return frame#返回图片

cap.release()

cv2.destroyAllWindows()


def main():

# construct the argument parser and parse the arguments 使用argparse设置输入所需的实参

ap = argparse.ArgumentParser()

ap.add_argument("-p", "--shape-predictor", required=True, #训练好的关于检测的文件

help="path to facial landmark predictor")

ap.add_argument("-i", "--image", required=False,default='0',  #图片

help="path to input image")

args = vars(ap.parse_args())


# initialize dlib's face detector (HOG-based) and then create

# the facial landmark predictor

#初始化dlib人脸检测(基于HOG),然后创建面部标志预测器

detector = dlib.get_frontal_face_detector()

predictor = dlib.shape_predictor(args["shape_predictor"])


# load the input image, resize it, and convert it to grayscale

if args['image'] != '0':

image = cv2.imread(args['image'])#输入图片实参则读入图片

else:

image = takephoto()#若未输入则进行照相操作


image = imutils.resize(image, width=500)  # 调整图片宽度为500

gray = cv2.cvtColor(image, cv2.COLOR_BGR2GRAY)#图片调整为灰色


# detect faces in the grayscale image 检测灰度图像中的面部

rects = detector(gray, 1)


# loop over the face detections 循环进行人脸的检测

for (i, rect) in enumerate(rects):

# determine the facial landmarks for the face region, then

# convert the facial landmark (x, y)-coordinates to a NumPy

# array

# 确定面部区域的面部标志,然后将面部标志(x,y)坐标转换成NumPy阵列

shape = predictor(gray, rect)

shape = face_utils.shape_to_np(shape)


# convert dlib's rectangle to a OpenCV-style bounding box

# [i.e., (x, y, w, h)], then draw the face bounding box

#将dlib矩形转换为OpenCV样式的边界框[即(x,y,w,h)],然后绘制边界框

(x, y, w, h) = face_utils.rect_to_bb(rect)

cv2.rectangle(image, (x, y), (x + w, y + h), (0, 255, 0), 2)


# show the face number 人脸序号的标记(可识别多张)

cv2.putText(image, "Face #{}".format(i + 1), (x - 10, y - 10),

cv2.FONT_HERSHEY_SIMPLEX, 0.5, (0, 255, 0), 2)


# loop over the (x, y)-coordinates for the facial landmarks

# and draw them on the image

#循环面部地标的(x,y)坐标并在图像上绘制它们

for (x, y) in shape:

cv2.circle(image, (x, y), 1, (0, 0, 255), -1)


# show the output image with the face detections + facial landmarks

#用脸部检测+面部标志显示输出图像

cv2.imshow("Output", image)

cv2.waitKey(0)


if __name__ == '__main__':

main()
转自:https://www.cnblogs.com/take-fetter/p/8310298.html