SpringBoot-WebSocket广播消息+单点消息(指定用户发送消息)

前言
关于Springboot中WebSocket的介绍这里就不赘述了。网上还是有比较多的介绍。本文主要解决的问题是广播消息(某个主题的),特定用户的消息发送。废话不多说,开始我们的实现。
环境
这里只罗列核心的技术点。
jdk :1.8
maven :3.X
Spring boot:1.5.2.RELEASE
WebSocket:spring-boot-starter-websocket
前端引擎:thymeleaf
前端框架:org.webjars:jQuery,Bootstrap,websocket等
实现
socket核心配置容器
配置topic和服务端服务 ,注入session的bean以及监听。
package com.ricky.websocket;

import org.springframework.context.annotation.Bean;
import org.springframework.context.annotation.Configuration;
import org.springframework.messaging.simp.config.MessageBrokerRegistry;
import org.springframework.web.socket.config.annotation.AbstractWebSocketMessageBrokerConfigurer;
import org.springframework.web.socket.config.annotation.EnableWebSocketMessageBroker;
import org.springframework.web.socket.config.annotation.StompEndpointRegistry;

/**
 * socket核心配置容器
 */
@Configuration
@EnableWebSocketMessageBroker
public class WebSocketConfig extends AbstractWebSocketMessageBrokerConfigurer {

    @Override
    public void configureMessageBroker(MessageBrokerRegistry config) {
        config.enableSimpleBroker("/topic");// /users 默认通知
        config.setApplicationDestinationPrefixes("/app");
    }

    @Override
    public void registerStompEndpoints(StompEndpointRegistry registry) {
            registry.addEndpoint("/ricky-websocket").withSockJS();
    }


    @Bean
    public SocketSessionRegistry SocketSessionRegistry(){
        return new SocketSessionRegistry();
    }
    @Bean
    public STOMPConnectEventListener STOMPConnectEventListener(){
        return new STOMPConnectEventListener();
    }
}
用户session记录类
用户session记录,用于销毁和存储以及获取使用。
package com.ricky.websocket;

import org.springframework.util.Assert;

import java.util.Collections;
import java.util.Set;
import java.util.concurrent.ConcurrentHashMap;
import java.util.concurrent.ConcurrentMap;
import java.util.concurrent.CopyOnWriteArraySet;

/**
 * Created by baiguantao on 2017/8/4.
 * 用户session记录类
 */
public class SocketSessionRegistry{
    //this map save every session
    //这个集合存储session
    private final ConcurrentMap<String, Set<String>> userSessionIds = new ConcurrentHashMap();
    private final Object lock = new Object();

    public SocketSessionRegistry() {
    }

    /**
     *
     * 获取sessionId
     * @param user
     * @return
     */
    public Set<String> getSessionIds(String user) {
        Set set = (Set)this.userSessionIds.get(user);
        return set != null?set: Collections.emptySet();
    }

    /**
     * 获取所有session
     * @return
     */
    public ConcurrentMap<String, Set<String>> getAllSessionIds() {
        return this.userSessionIds;
    }

    /**
     * register session
     * @param user
     * @param sessionId
     */
    public void registerSessionId(String user, String sessionId) {
        Assert.notNull(user, "User must not be null");
        Assert.notNull(sessionId, "Session ID must not be null");
        Object var3 = this.lock;
        synchronized(this.lock) {
            Object set = (Set)this.userSessionIds.get(user);
            if(set == null) {
                set = new CopyOnWriteArraySet();
                this.userSessionIds.put(user, (Set<String>) set);
            }

            ((Set)set).add(sessionId);
        }
    }

    public void unregisterSessionId(String userName, String sessionId) {
        Assert.notNull(userName, "User Name must not be null");
        Assert.notNull(sessionId, "Session ID must not be null");
        Object var3 = this.lock;
        synchronized(this.lock) {
            Set set = (Set)this.userSessionIds.get(userName);
            if(set != null && set.remove(sessionId) && set.isEmpty()) {
                this.userSessionIds.remove(userName);
            }

        }
    }
}
STOMP监听类
用于用户session注入。
package com.ricky.websocket;

import org.springframework.beans.factory.annotation.Autowired;
import org.springframework.context.ApplicationListener;
import org.springframework.messaging.simp.stomp.StompHeaderAccessor;
import org.springframework.web.socket.messaging.SessionConnectEvent;

/**
 * Created by baiguantao on 2017/8/4.
 * STOMP监听类
 * 用于session注册 以及key值获取
 */
public class STOMPConnectEventListener  implements ApplicationListener<SessionConnectEvent> {

    @Autowired
    SocketSessionRegistry webAgentSessionRegistry;

    @Override
    public void onApplicationEvent(SessionConnectEvent event) {
        StompHeaderAccessor sha = StompHeaderAccessor.wrap(event.getMessage());
        //login get from browser
        String agentId = sha.getNativeHeader("login").get(0);
        String sessionId = sha.getSessionId();
        webAgentSessionRegistry.registerSessionId(agentId,sessionId);
    }
}
聊天控制器
消息核心控制器,发送单点消息,公共消息功能。
package com.ricky.websocket;

import org.springframework.beans.factory.annotation.Autowired;
import org.springframework.messaging.MessageHeaders;
import org.springframework.messaging.handler.annotation.MessageMapping;
import org.springframework.messaging.simp.SimpMessageHeaderAccessor;
import org.springframework.messaging.simp.SimpMessageType;
import org.springframework.messaging.simp.SimpMessagingTemplate;
import org.springframework.stereotype.Controller;
import org.springframework.web.bind.annotation.GetMapping;
import org.springframework.web.bind.annotation.RequestMapping;
import org.springframework.web.bind.annotation.ResponseBody;

import javax.servlet.http.HttpServletRequest;
import java.util.Date;
import java.util.HashMap;
import java.util.List;
import java.util.Map;
import java.util.stream.Collectors;

/**
 * 聊天控制器
 */
@Controller
public class GreetingController {
    /**session操作类*/
    @Autowired
    SocketSessionRegistry webAgentSessionRegistry;
    /**消息发送工具*/
    @Autowired
    private SimpMessagingTemplate template;

    @RequestMapping(value = "/index")
    public  String index(){
        return "/index";
    }
    @RequestMapping(value = "/msg/message")
    public  String ToMessage(){
        return "/message";
    }
    @RequestMapping(value = "/msg/messaget2")
    public  String ToMessaget2(){
        return "/messaget2";
    }

    /**
     * 用户广播
     * 发送消息广播  用于内部发送使用
     * @param request
     * @return
     */
    @GetMapping(value = "/msg/sendcommuser")
    public  @ResponseBody
    OutMessage SendToCommUserMessage(HttpServletRequest request){
        List<String> keys=webAgentSessionRegistry.getAllSessionIds().entrySet()
                .stream().map(Map.Entry::getKey)
                .collect(Collectors.toList());
        Date date=new Date();
        keys.forEach(x->{
            String sessionId=webAgentSessionRegistry.getSessionIds(x).stream().findFirst().get().toString();
            template.convertAndSendToUser(sessionId,"/topic/greetings",new OutMessage("commmsg:allsend, " + "send  comm" +date.getTime()+ "!"),createHeaders(sessionId));

        });
         return new OutMessage("sendcommuser, " + new Date() + "!");
    }


    /**
     * 同样的发送消息   只不过是ws版本  http请求不能访问
     * 根据用户key发送消息
     * @param message
     * @return
     * @throws Exception
     */
    @MessageMapping("/msg/hellosingle")
    public void greeting2(InMessage message) throws Exception {
        Map<String,String> params = new HashMap(1);
        params.put("test","test");
        //这里没做校验
        String sessionId=webAgentSessionRegistry.getSessionIds(message.getId()).stream().findFirst().get();
        template.convertAndSendToUser(sessionId,"/topic/greetings",new OutMessage("single send to:"+message.getId()+", from:" + message.getName() + "!"),createHeaders(sessionId));
    }
    private MessageHeaders createHeaders(String sessionId) {
        SimpMessageHeaderAccessor headerAccessor = SimpMessageHeaderAccessor.create(SimpMessageType.MESSAGE);
        headerAccessor.setSessionId(sessionId);
        headerAccessor.setLeaveMutable(true);
        return headerAccessor.getMessageHeaders();
    }

}
其他
还有一些其他的辅助工具类,inmessage是用于接受消息,outmessage用于输出消息
前端部分
这里只展示一个,因为此中已经包含核心的功能。包含建立socket链接,发送消息,订阅等功能。
<!DOCTYPE html>
<html lang="en" xmlns:th="http://www.w3.org/1999/xhtml">
<link href="/webjars/bootstrap/3.3.7/css/bootstrap.min.css" rel="stylesheet">
<script src="/webjars/jquery/3.1.0/jquery.min.js"></script>
<script src="/webjars/sockjs-client/1.0.2/sockjs.min.js"></script>
<script src="/webjars/stomp-websocket/2.3.3/stomp.min.js"></script>
<body>
    <blockquote class="layui-elem-quote">/user/topic-message</blockquote>

    <div id="main-content" class="container">
        <div class="row">
            <div class="col-md-6">
                <form class="form-inline">
                    <div class="form-group">
                        <label for="connect">WebSocket connection:</label>
                        <button id="connect" class="btn btn-default" type="submit">Connect</button>
                        <button id="disconnect" class="btn btn-default" type="submit" disabled="disabled">Disconnect
                        </button>

                    </div>
                </form>
            </div>
            <div class="col-md-6">
                <form class="form-inline">
                    <div class="form-group">
                        <label for="name">What is your name?</label>
                        <input type="text" id="name" class="form-control" placeholder="Your name here...">
                    </div>
                    <button id="send" class="btn btn-default" type="submit">Send</button>
                </form>
            </div>
        </div>
        <div class="row">
            <div class="col-md-12">
                <table id="conversation" class="table table-striped">
                    <thead>
                    <tr>
                        <th>Greetings</th>
                    </tr>
                    </thead>
                    <tbody id="greetings">
                    </tbody>
                </table>
            </div>
        </div>
        </form>
    </div>

    <script>
        //  /msg/sendcommuser
        var stompClient = null;
        //传递用户key值
        var login = "ricky";
        function setConnected(connected) {
            $("#connect").prop("disabled", connected);
            $("#disconnect").prop("disabled", !connected);
            if (connected) {
                $("#conversation").show();
            }
            else {
                $("#conversation").hide();
            }
            $("#greetings").html("");
        }

        function connect() {
            var socket = new SockJS('/ricky-websocket');
            stompClient = Stomp.over(socket);
            stompClient.connect({login:login}, function (frame) {
                setConnected(true);
                console.log('Connected: ' + frame);
                stompClient.subscribe('/user/topic/greetings', function (greeting) {
                    showGreeting(JSON.parse(greeting.body).content);
                });
            });
        }

        function disconnect() {
            if (stompClient != null) {
                stompClient.disconnect();
            }
            setConnected(false);
            console.log("Disconnected");
        }

        function sendName() {
            stompClient.send("/app/msg/hellosingle", {}, JSON.stringify({'name': $("#name").val(),'id':'rickyt2'}));
        }


        function showGreeting(message) {
            $("#greetings").append("<tr><td>" + message + "</td></tr>");
        }

        $(function () {
            $("form").on('submit', function (e) {
                e.preventDefault();
            });
            $( "#connect" ).click(function() { connect(); });
            $( "#disconnect" ).click(function() { disconnect(); });
            $( "#send" ).click(function() { sendName(); });
        });
    </script>
</body>
</html>
演示
主页
访问http://localhost:82进入主页,主要提供两个不同的用户ricky和rickyt2,以及发送公共消息功能。

ricky用户
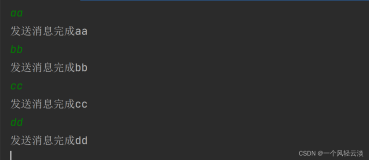
进入之后,先点击连接connect,输入sendName即可发送消息

rickyt2用户
进入之后,先点击连接connect,输入sendName即可发送消息

发送公共消息
点击主页的公共消息按钮,即可发送公共消息,如果想重新发送,刷新公共消息页面即可。
说明
用户的key是从页面传递过来的,发送给特殊用户的key也是从页面传递的,如果想给特定用户发送消息,可以实现相关功能,这里只做演示,所以写死了。
遇到的坑
webjars 404
默认引入相关插件的时候是如下的:
<link href="/webjars/bootstrap/css/bootstrap.min.css" rel="stylesheet">- 1
但是发现不行,即使加了相关插件(locator),也不行,后来查看源代码,发现有3.3.7目录,需要添加版本路径
<link href="/webjars/bootstrap/3.3.7/css/bootstrap.min.css" rel="stylesheet">- 1
消息用户问题
这个坑是关于路径的问题,小伙伴可能会比较疑问为什么我的订阅里面有/user的前缀,这个其实是因为我们要用的SimpMessagingTemplate的convertAndSendToUser源码实现,默认的前缀是user,所以才会加/user前缀,这也是发给特定用户消息的核心。
参阅SimpMessagingTemplate中的destination:
 public void send(D destination, Message<?> message) {
        this.doSend(destination, message);
    }