这回比较费事儿,我给学弟学妹分解一下,下面开始:
配置部分:
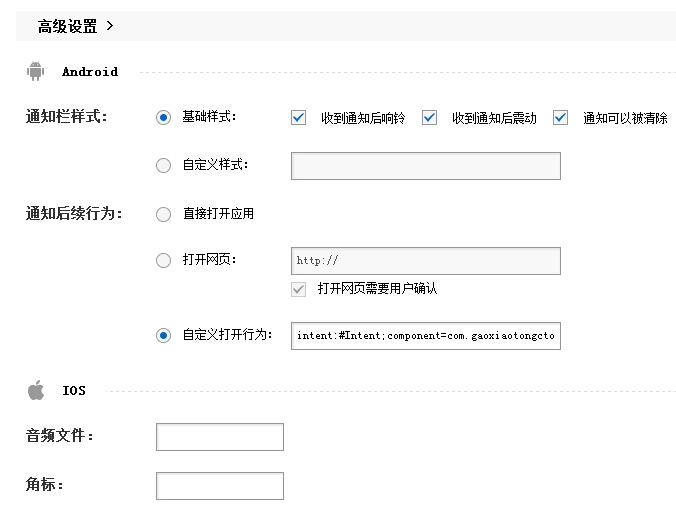
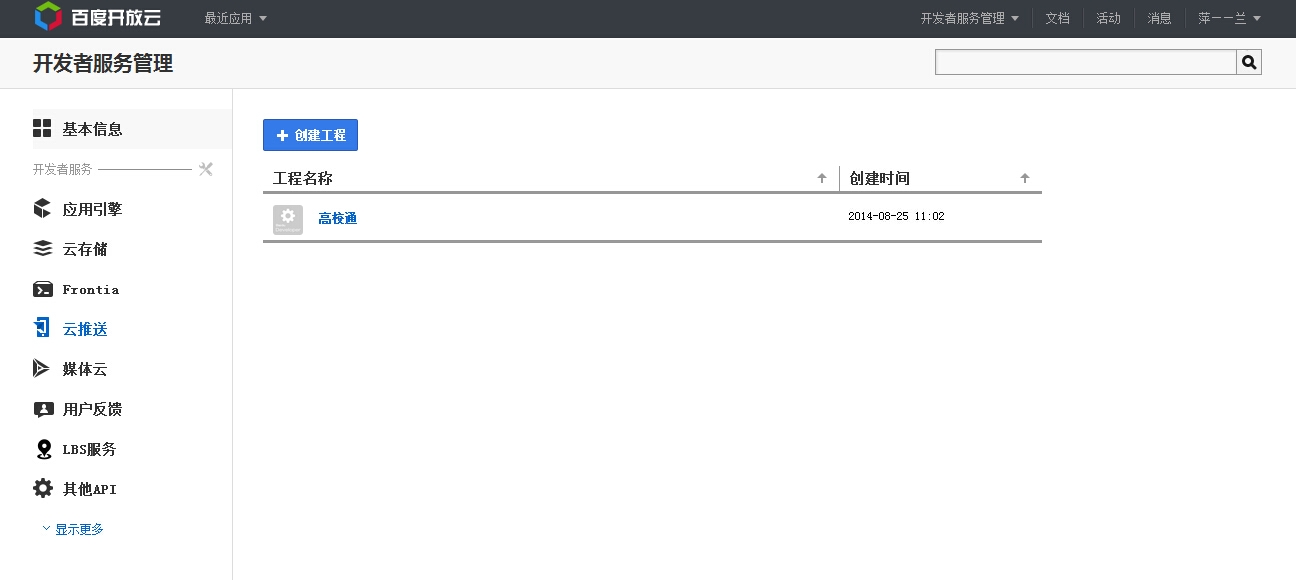
1.去百度云推送注册账号,配置一下,如图:
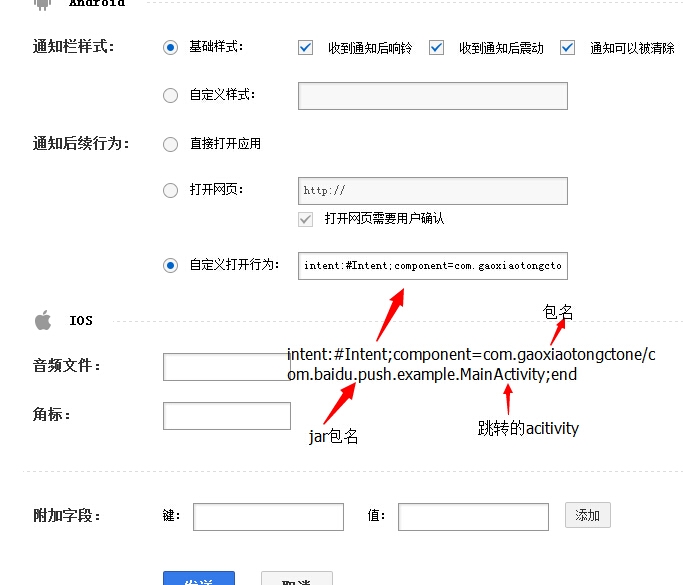
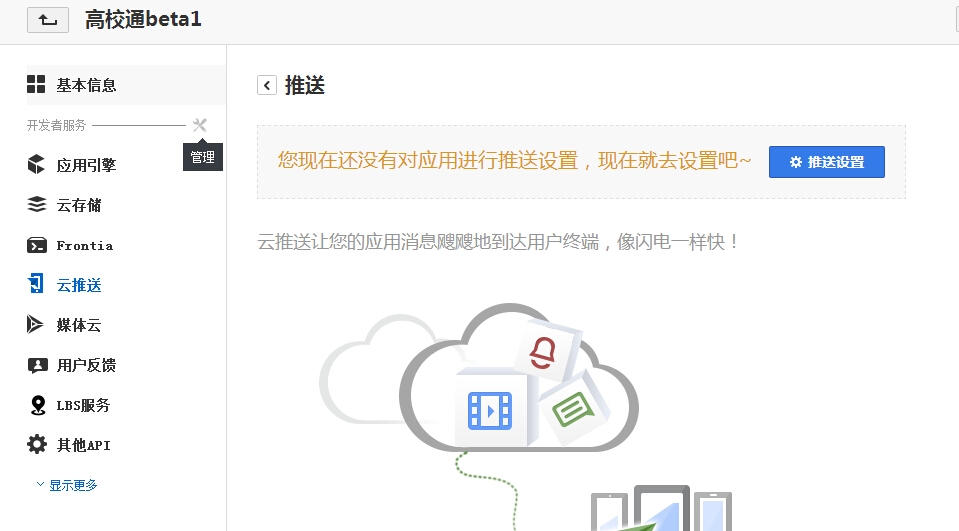
2.点击消息跳转的配置部分,如图:
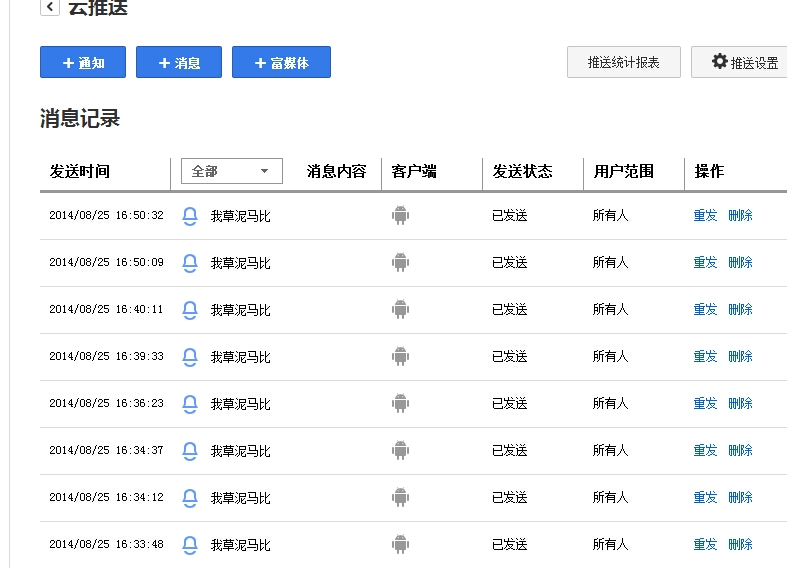
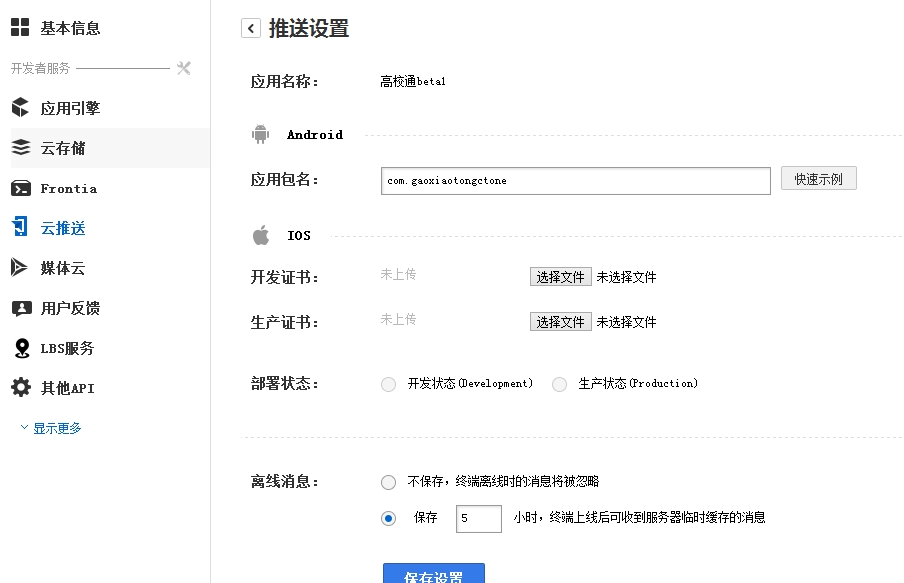
3.发送消息的配置,如图:
这样就完成百度后台的发送消息的服务器的配置了。
接着是App的代码部分:
1.MyPushMessageReceiver:
|
1
2
3
4
5
6
7
8
9
10
11
12
13
14
15
16
17
18
19
20
21
22
23
24
25
26
27
28
29
30
31
32
33
34
35
36
37
38
39
40
41
42
43
44
45
46
47
48
49
50
51
52
53
54
55
56
57
58
59
60
61
62
63
64
65
66
67
68
69
70
71
72
73
74
75
76
77
78
79
80
81
82
83
84
85
86
87
88
89
90
91
92
93
94
95
96
97
98
99
100
101
102
103
104
105
106
107
108
109
110
111
112
113
114
115
116
117
118
119
120
121
122
123
124
125
126
127
128
129
130
131
132
133
134
135
136
137
138
139
140
141
142
143
144
145
146
147
148
149
150
151
152
153
154
155
156
157
158
159
160
161
162
163
164
165
166
167
168
169
170
171
172
173
174
175
176
177
178
179
180
181
182
183
184
185
186
187
188
189
190
191
192
193
194
195
196
197
198
199
200
201
202
203
204
205
206
207
208
209
210
211
212
213
214
215
216
217
218
219
220
221
222
223
224
225
226
227
228
229
230
231
232
233
234
235
236
237
238
239
240
241
242
243
244
245
|
package
com.baidu.push.example;
import
java.text.SimpleDateFormat;
import
java.util.Date;
import
java.util.List;
import
org.json.JSONException;
import
org.json.JSONObject;
import
android.content.Context;
import
android.content.Intent;
import
android.text.TextUtils;
import
android.util.Log;
import
com.baidu.frontia.api.FrontiaPushMessageReceiver;
/**
* Push消息处理receiver。请编写您需要的回调函数, 一般来说: onBind是必须的,用来处理startWork返回值;
* onMessage用来接收透传消息; onSetTags、onDelTags、onListTags是tag相关操作的回调;
* onNotificationClicked在通知被点击时回调; onUnbind是stopWork接口的返回值回调
*
* 返回值中的errorCode,解释如下:
* 0 - Success
* 10001 - Network Problem
* 30600 - Internal Server Error
* 30601 - Method Not Allowed
* 30602 - Request Params Not Valid
* 30603 - Authentication Failed
* 30604 - Quota Use Up Payment Required
* 30605 - Data Required Not Found
* 30606 - Request Time Expires Timeout
* 30607 - Channel Token Timeout
* 30608 - Bind Relation Not Found
* 30609 - Bind Number Too Many
*
* 当您遇到以上返回错误时,如果解释不了您的问题,请用同一请求的返回值requestId和errorCode联系我们追查问题。
*
*/
public
class
MyPushMessageReceiver
extends
FrontiaPushMessageReceiver {
/** TAG to Log */
public
static
final
String TAG = MyPushMessageReceiver.
class
.getSimpleName();
/**
* 调用PushManager.startWork后,sdk将对push
* server发起绑定请求,这个过程是异步的。绑定请求的结果通过onBind返回。 如果您需要用单播推送,需要把这里获取的channel
* id和user id上传到应用server中,再调用server接口用channel id和user id给单个手机或者用户推送。
*
* @param context
* BroadcastReceiver的执行Context
* @param errorCode
* 绑定接口返回值,0 - 成功
* @param appid
* 应用id。errorCode非0时为null
* @param userId
* 应用user id。errorCode非0时为null
* @param channelId
* 应用channel id。errorCode非0时为null
* @param requestId
* 向服务端发起的请求id。在追查问题时有用;
* @return none
*/
@Override
public
void
onBind(Context context,
int
errorCode, String appid,
String userId, String channelId, String requestId) {
String responseString =
"onBind errorCode="
+ errorCode +
" appid="
+ appid +
" userId="
+ userId +
" channelId="
+ channelId
+
" requestId="
+ requestId;
Log.d(TAG, responseString);
// 绑定成功,设置已绑定flag,可以有效的减少不必要的绑定请求
if
(errorCode ==
0
) {
Utils.setBind(context,
true
);
}
// Demo更新界面展示代码,应用请在这里加入自己的处理逻辑
updateContent(context, responseString);
}
/**
* 接收透传消息的函数。
*
* @param context
* 上下文
* @param message
* 推送的消息
* @param customContentString
* 自定义内容,为空或者json字符串
*/
@Override
public
void
onMessage(Context context, String message,
String customContentString) {
String messageString =
"透传消息 message=\""
+ message
+
"\" customContentString="
+ customContentString;
Log.d(TAG, messageString);
// 自定义内容获取方式,mykey和myvalue对应透传消息推送时自定义内容中设置的键和值
if
(!TextUtils.isEmpty(customContentString)) {
JSONObject customJson =
null
;
try
{
customJson =
new
JSONObject(customContentString);
String myvalue =
null
;
if
(customJson.isNull(
"mykey"
)) {
myvalue = customJson.getString(
"mykey"
);
}
}
catch
(JSONException e) {
// TODO Auto-generated catch block
e.printStackTrace();
}
}
// Demo更新界面展示代码,应用请在这里加入自己的处理逻辑
updateContent(context, messageString);
}
/**
* 接收通知点击的函数。注:推送通知被用户点击前,应用无法通过接口获取通知的内容。
*
* @param context
* 上下文
* @param title
* 推送的通知的标题
* @param description
* 推送的通知的描述
* @param customContentString
* 自定义内容,为空或者json字符串
*/
@Override
public
void
onNotificationClicked(Context context, String title,
String description, String customContentString) {
String notifyString =
"通知点击 title=\""
+ title +
"\" description=\""
+ description +
"\" customContent="
+ customContentString;
Log.d(TAG, notifyString);
// 自定义内容获取方式,mykey和myvalue对应通知推送时自定义内容中设置的键和值
if
(!TextUtils.isEmpty(customContentString)) {
JSONObject customJson =
null
;
try
{
customJson =
new
JSONObject(customContentString);
String myvalue =
null
;
if
(customJson.isNull(
"mykey"
)) {
myvalue = customJson.getString(
"mykey"
);
}
}
catch
(JSONException e) {
// TODO Auto-generated catch block
e.printStackTrace();
}
}
// Demo更新界面展示代码,应用请在这里加入自己的处理逻辑
updateContent(context, notifyString);
}
/**
* setTags() 的回调函数。
*
* @param context
* 上下文
* @param errorCode
* 错误码。0表示某些tag已经设置成功;非0表示所有tag的设置均失败。
* @param successTags
* 设置成功的tag
* @param failTags
* 设置失败的tag
* @param requestId
* 分配给对云推送的请求的id
*/
@Override
public
void
onSetTags(Context context,
int
errorCode,
List<String> sucessTags, List<String> failTags, String requestId) {
String responseString =
"onSetTags errorCode="
+ errorCode
+
" sucessTags="
+ sucessTags +
" failTags="
+ failTags
+
" requestId="
+ requestId;
Log.d(TAG, responseString);
// Demo更新界面展示代码,应用请在这里加入自己的处理逻辑
updateContent(context, responseString);
}
/**
* delTags() 的回调函数。
*
* @param context
* 上下文
* @param errorCode
* 错误码。0表示某些tag已经删除成功;非0表示所有tag均删除失败。
* @param successTags
* 成功删除的tag
* @param failTags
* 删除失败的tag
* @param requestId
* 分配给对云推送的请求的id
*/
@Override
public
void
onDelTags(Context context,
int
errorCode,
List<String> sucessTags, List<String> failTags, String requestId) {
String responseString =
"onDelTags errorCode="
+ errorCode
+
" sucessTags="
+ sucessTags +
" failTags="
+ failTags
+
" requestId="
+ requestId;
Log.d(TAG, responseString);
// Demo更新界面展示代码,应用请在这里加入自己的处理逻辑
updateContent(context, responseString);
}
/**
* listTags() 的回调函数。
*
* @param context
* 上下文
* @param errorCode
* 错误码。0表示列举tag成功;非0表示失败。
* @param tags
* 当前应用设置的所有tag。
* @param requestId
* 分配给对云推送的请求的id
*/
@Override
public
void
onListTags(Context context,
int
errorCode, List<String> tags,
String requestId) {
String responseString =
"onListTags errorCode="
+ errorCode +
" tags="
+ tags;
Log.d(TAG, responseString);
// Demo更新界面展示代码,应用请在这里加入自己的处理逻辑
updateContent(context, responseString);
}
/**
* PushManager.stopWork() 的回调函数。
*
* @param context
* 上下文
* @param errorCode
* 错误码。0表示从云推送解绑定成功;非0表示失败。
* @param requestId
* 分配给对云推送的请求的id
*/
@Override
public
void
onUnbind(Context context,
int
errorCode, String requestId) {
String responseString =
"onUnbind errorCode="
+ errorCode
+
" requestId = "
+ requestId;
Log.d(TAG, responseString);
// 解绑定成功,设置未绑定flag,
if
(errorCode ==
0
) {
Utils.setBind(context,
false
);
}
// Demo更新界面展示代码,应用请在这里加入自己的处理逻辑
updateContent(context, responseString);
}
private
void
updateContent(Context context, String content) {
Log.d(TAG,
"updateContent"
);
String logText =
""
+ Utils.logStringCache;
if
(!logText.equals(
""
)) {
logText +=
"\n"
;
}
SimpleDateFormat sDateFormat =
new
SimpleDateFormat(
"HH-mm-ss"
);
logText += sDateFormat.format(
new
Date()) +
": "
;
logText += content;
Utils.logStringCache = logText;
Intent intent =
new
Intent();
intent.setClass(context.getApplicationContext(), PushDemoActivity.
class
);
intent.addFlags(Intent.FLAG_ACTIVITY_NEW_TASK);
context.getApplicationContext().startActivity(intent);
}
}
|
注意:这里面的方法onMessage和 onNotificationClicked可以自定义消息的显示样式。
2.要跳转到的MainActivity:
|
1
2
3
4
5
6
7
8
9
10
11
12
|
package
com.baidu.push.example;
import
com.gaoxiaotongctone.R;
import
android.app.Activity;
import
android.os.Bundle;
public
class
MainActivity
extends
Activity {
@Override
protected
void
onCreate(Bundle savedInstanceState) {
// TODO Auto-generated method stub
super
.onCreate(savedInstanceState);
setContentView(R.layout.custom_activity);
}
}
|
3.主窗体PushDemoActivity的显示:
|
1
2
3
4
5
6
7
8
9
10
11
12
13
14
15
16
17
18
19
20
21
22
23
24
25
26
27
28
29
30
31
32
33
34
35
36
37
38
39
40
41
42
43
44
45
46
47
48
49
50
51
52
53
54
55
56
57
58
59
60
61
62
63
64
65
66
67
68
69
70
71
72
73
74
75
76
77
78
79
80
81
82
83
84
85
86
87
88
89
90
91
92
93
94
95
96
97
98
99
100
101
102
103
104
105
106
107
108
109
110
111
112
113
114
115
116
117
118
119
120
121
122
123
124
125
126
127
128
129
130
131
132
133
134
135
136
137
138
139
140
141
142
143
144
145
146
147
148
149
150
151
152
153
154
155
156
157
158
159
160
161
162
163
164
165
166
167
168
169
170
171
172
173
174
175
176
177
178
179
180
181
182
183
184
185
186
187
188
189
190
191
192
193
194
195
196
197
198
199
200
201
202
203
204
205
206
207
208
209
210
211
212
213
214
215
216
217
218
219
220
221
222
223
224
225
226
227
228
229
230
231
232
233
234
235
236
237
238
239
240
|
package
com.baidu.push.example;
import
java.util.Calendar;
import
java.util.List;
import
android.app.Activity;
import
android.app.AlertDialog;
import
android.app.Notification;
import
android.content.DialogInterface;
import
android.content.Intent;
import
android.content.res.Resources;
import
android.os.Bundle;
import
android.util.Log;
import
android.view.View;
import
android.webkit.CookieManager;
import
android.webkit.CookieSyncManager;
import
android.widget.Button;
import
android.widget.EditText;
import
android.widget.LinearLayout;
import
android.widget.RelativeLayout;
import
android.widget.ScrollView;
import
android.widget.TextView;
import
com.baidu.android.pushservice.CustomPushNotificationBuilder;
import
com.baidu.android.pushservice.PushConstants;
import
com.baidu.android.pushservice.PushManager;
/*
* 云推送Demo主Activity。
* 代码中,注释以Push标注开头的,表示接下来的代码块是Push接口调用示例
*/
public
class
PushDemoActivity
extends
Activity
implements
View.OnClickListener {
private
static
final
String TAG = PushDemoActivity.
class
.getSimpleName();
RelativeLayout mainLayout =
null
;
int
akBtnId =
0
;
int
initBtnId =
0
;
int
richBtnId =
0
;
int
setTagBtnId =
0
;
int
delTagBtnId =
0
;
int
clearLogBtnId =
0
;
Button initButton =
null
;
Button initWithApiKey =
null
;
Button displayRichMedia =
null
;
Button setTags =
null
;
Button delTags =
null
;
Button clearLog =
null
;
TextView logText =
null
;
ScrollView scrollView =
null
;
public
static
int
initialCnt =
0
;
private
boolean
isLogin =
false
;
@Override
public
void
onCreate(Bundle savedInstanceState) {
super
.onCreate(savedInstanceState);
Utils.logStringCache = Utils.getLogText(getApplicationContext());
Resources resource =
this
.getResources();
String pkgName =
this
.getPackageName();
setContentView(resource.getIdentifier(
"main"
,
"layout"
, pkgName));
akBtnId = resource.getIdentifier(
"btn_initAK"
,
"id"
, pkgName);
initBtnId = resource.getIdentifier(
"btn_init"
,
"id"
, pkgName);
richBtnId = resource.getIdentifier(
"btn_rich"
,
"id"
, pkgName);
setTagBtnId = resource.getIdentifier(
"btn_setTags"
,
"id"
, pkgName);
delTagBtnId = resource.getIdentifier(
"btn_delTags"
,
"id"
, pkgName);
clearLogBtnId = resource.getIdentifier(
"btn_clear_log"
,
"id"
, pkgName);
initWithApiKey = (Button) findViewById(akBtnId);
initButton = (Button) findViewById(initBtnId);
displayRichMedia = (Button) findViewById(richBtnId);
setTags = (Button) findViewById(setTagBtnId);
delTags = (Button) findViewById(delTagBtnId);
clearLog = (Button) findViewById(clearLogBtnId);
logText = (TextView) findViewById(resource.getIdentifier(
"text_log"
,
"id"
, pkgName));
scrollView = (ScrollView) findViewById(resource.getIdentifier(
"stroll_text"
,
"id"
, pkgName));
initWithApiKey.setOnClickListener(
this
);
initButton.setOnClickListener(
this
);
setTags.setOnClickListener(
this
);
delTags.setOnClickListener(
this
);
displayRichMedia.setOnClickListener(
this
);
clearLog.setOnClickListener(
this
);
// Push: 以apikey的方式登录,一般放在主Activity的onCreate中。
// 这里把apikey存放于manifest文件中,只是一种存放方式,
// 您可以用自定义常量等其它方式实现,来替换参数中的Utils.getMetaValue(PushDemoActivity.this,
// "api_key")
// 通过share preference实现的绑定标志开关,如果已经成功绑定,就取消这次绑定
if
(!Utils.hasBind(getApplicationContext())) {
PushManager.startWork(getApplicationContext(),
PushConstants.LOGIN_TYPE_API_KEY,
Utils.getMetaValue(PushDemoActivity.
this
,
"api_key"
));
// Push: 如果想基于地理位置推送,可以打开支持地理位置的推送的开关
// PushManager.enableLbs(getApplicationContext());
}
// Push: 设置自定义的通知样式,具体API介绍见用户手册,如果想使用系统默认的可以不加这段代码
// 请在通知推送界面中,高级设置->通知栏样式->自定义样式,选中并且填写值:1,
// 与下方代码中 PushManager.setNotificationBuilder(this, 1, cBuilder)中的第二个参数对应
CustomPushNotificationBuilder cBuilder =
new
CustomPushNotificationBuilder(
getApplicationContext(), resource.getIdentifier(
"notification_custom_builder"
,
"layout"
, pkgName),
resource.getIdentifier(
"notification_icon"
,
"id"
, pkgName),
resource.getIdentifier(
"notification_title"
,
"id"
, pkgName),
resource.getIdentifier(
"notification_text"
,
"id"
, pkgName));
cBuilder.setNotificationFlags(Notification.FLAG_AUTO_CANCEL);
cBuilder.setNotificationDefaults(Notification.DEFAULT_SOUND
| Notification.DEFAULT_VIBRATE);
cBuilder.setStatusbarIcon(
this
.getApplicationInfo().icon);
cBuilder.setLayoutDrawable(resource.getIdentifier(
"simple_notification_icon"
,
"drawable"
, pkgName));
PushManager.setNotificationBuilder(
this
,
1
, cBuilder);
}
@Override
public
void
onClick(View v) {
if
(v.getId() == akBtnId) {
initWithApiKey();
}
else
if
(v.getId() == initBtnId) {
initWithBaiduAccount();
}
else
if
(v.getId() == richBtnId) {
openRichMediaList();
}
else
if
(v.getId() == setTagBtnId) {
setTags();
}
else
if
(v.getId() == delTagBtnId) {
deleteTags();
}
else
if
(v.getId() == clearLogBtnId) {
Utils.logStringCache =
""
;
Utils.setLogText(getApplicationContext(), Utils.logStringCache);
updateDisplay();
}
else
{
}
}
// 打开富媒体列表界面
private
void
openRichMediaList() {
// Push: 打开富媒体消息列表
Intent sendIntent =
new
Intent();
sendIntent.setClassName(getBaseContext(),
"com.baidu.android.pushservice.richmedia.MediaListActivity"
);
sendIntent.addFlags(Intent.FLAG_ACTIVITY_NEW_TASK);
PushDemoActivity.
this
.startActivity(sendIntent);
}
// 删除tag操作
private
void
deleteTags() {
LinearLayout layout =
new
LinearLayout(PushDemoActivity.
this
);
layout.setOrientation(LinearLayout.VERTICAL);
final
EditText textviewGid =
new
EditText(PushDemoActivity.
this
);
textviewGid.setHint(
"请输入多个标签,以英文逗号隔开"
);
layout.addView(textviewGid);
AlertDialog.Builder builder =
new
AlertDialog.Builder(
PushDemoActivity.
this
);
builder.setView(layout);
builder.setPositiveButton(
"删除标签"
,
new
DialogInterface.OnClickListener() {
public
void
onClick(DialogInterface dialog,
int
which) {
// Push: 删除tag调用方式
List<String> tags = Utils.getTagsList(textviewGid
.getText().toString());
PushManager.delTags(getApplicationContext(), tags);
}
});
builder.show();
}
// 设置标签,以英文逗号隔开
private
void
setTags() {
LinearLayout layout =
new
LinearLayout(PushDemoActivity.
this
);
layout.setOrientation(LinearLayout.VERTICAL);
final
EditText textviewGid =
new
EditText(PushDemoActivity.
this
);
textviewGid.setHint(
"请输入多个标签,以英文逗号隔开"
);
layout.addView(textviewGid);
AlertDialog.Builder builder =
new
AlertDialog.Builder(
PushDemoActivity.
this
);
builder.setView(layout);
builder.setPositiveButton(
"设置标签"
,
new
DialogInterface.OnClickListener() {
public
void
onClick(DialogInterface dialog,
int
which) {
// Push: 设置tag调用方式
List<String> tags = Utils.getTagsList(textviewGid
.getText().toString());
PushManager.setTags(getApplicationContext(), tags);
}
});
builder.show();
}
// 以apikey的方式绑定
private
void
initWithApiKey() {
// Push: 无账号初始化,用api key绑定
PushManager.startWork(getApplicationContext(),
PushConstants.LOGIN_TYPE_API_KEY,
Utils.getMetaValue(PushDemoActivity.
this
,
"api_key"
));
}
// 以百度账号登陆,获取access token来绑定
private
void
initWithBaiduAccount() {
if
(isLogin) {
// 已登录则清除Cookie, access token, 设置登录按钮
CookieSyncManager.createInstance(getApplicationContext());
CookieManager.getInstance().removeAllCookie();
CookieSyncManager.getInstance().sync();
isLogin =
false
;
initButton.setText(
"登陆百度账号初始化Channel"
);
}
// 跳转到百度账号登录的activity
Intent intent =
new
Intent(PushDemoActivity.
this
, LoginActivity.
class
);
startActivity(intent);
}
@Override
public
void
onStart() {
super
.onStart();
}
@Override
public
void
onResume() {
super
.onResume();
Log.d(TAG,
"onResume"
);
updateDisplay();
}
@Override
protected
void
onNewIntent(Intent intent) {
String action = intent.getAction();
if
(Utils.ACTION_LOGIN.equals(action)) {
// Push: 百度账号初始化,用access token绑定
String accessToken = intent
.getStringExtra(Utils.EXTRA_ACCESS_TOKEN);
PushManager.startWork(getApplicationContext(),
PushConstants.LOGIN_TYPE_ACCESS_TOKEN, accessToken);
isLogin =
true
;
initButton.setText(
"更换百度账号"
);
}
updateDisplay();
}
@Override
public
void
onStop() {
super
.onStop();
}
@Override
public
void
onDestroy() {
Utils.setLogText(getApplicationContext(), Utils.logStringCache);
super
.onDestroy();
}
// 更新界面显示内容
private
void
updateDisplay() {
Log.d(TAG,
"updateDisplay, logText:"
+ logText +
" cache: "
+ Utils.logStringCache);
if
(logText !=
null
) {
logText.setText(Utils.logStringCache);
}
if
(scrollView !=
null
) {
scrollView.fullScroll(ScrollView.FOCUS_DOWN);
}
}
}
|
注意:这句话才是关键。
PushManager.startWork(getApplicationContext(),
PushConstants.LOGIN_TYPE_API_KEY,
Utils.getMetaValue(PushDemoActivity.this, "api_key"));
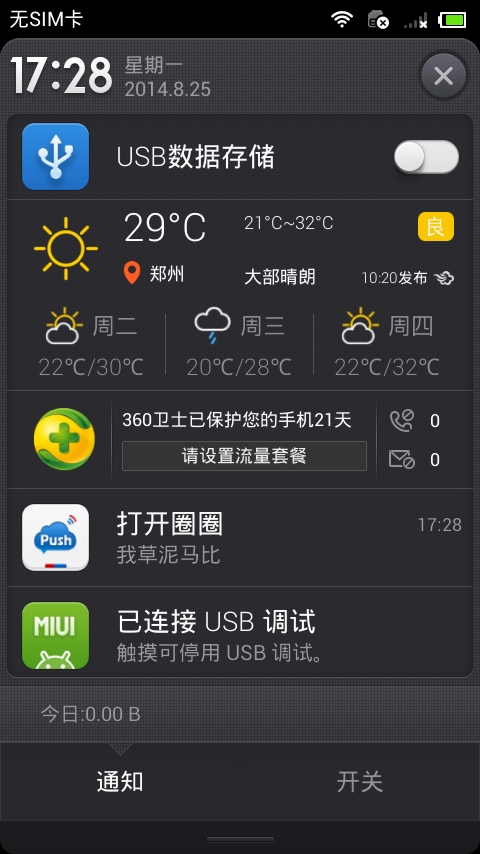
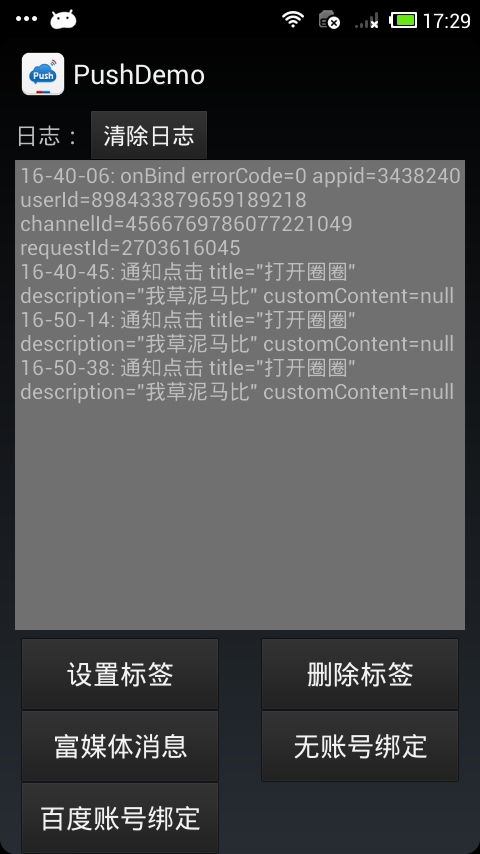
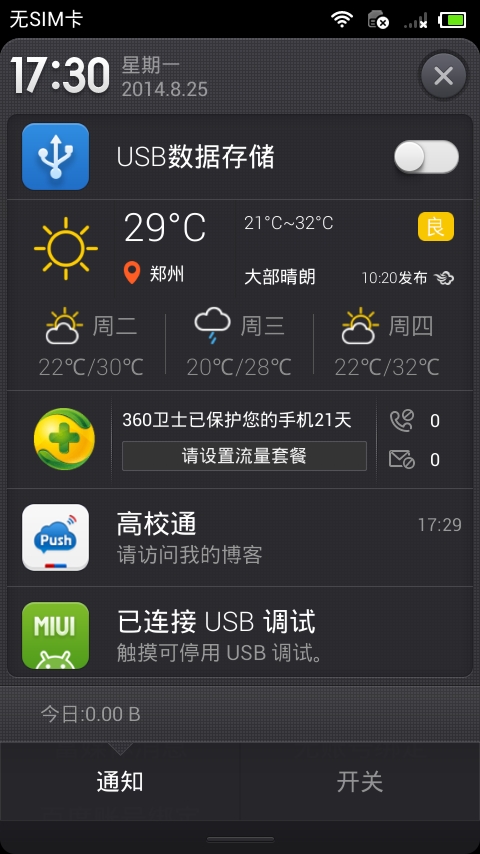
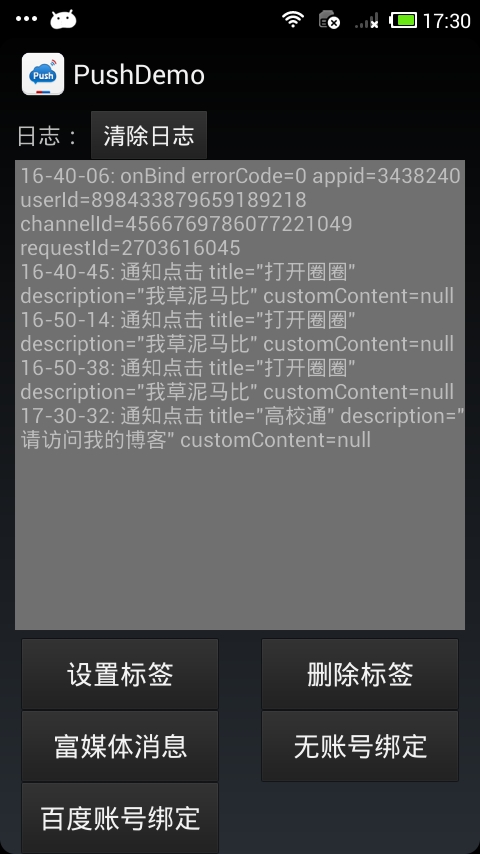
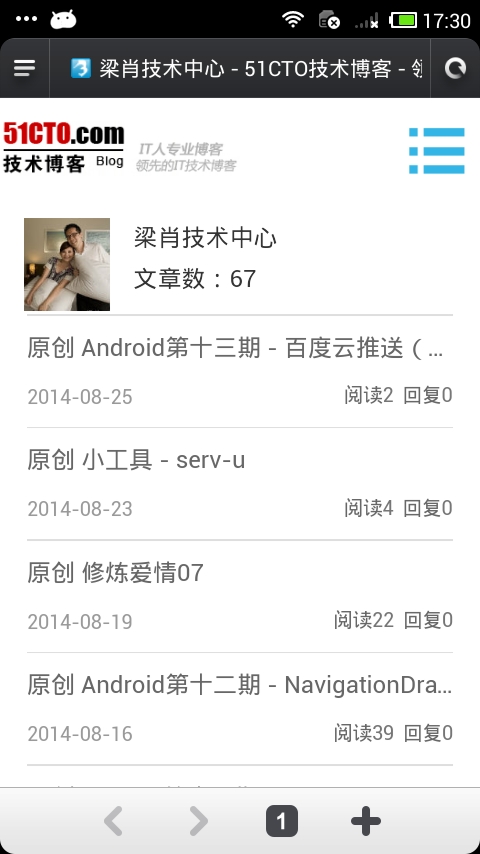
下面分别是打开另一个activity和打开指定的网页的效果图:
附图:
本文转自 吴雨声 51CTO博客,原文链接:http://blog.51cto.com/liangxiao/1544813,如需转载请自行联系原作者
![MM5NO0XP7]0~{$6[QV})43N.png wKioL1P7AMiDrkQ-AAEdCr0Bgcg886.jpg](http://s3.51cto.com/wyfs02/M00/47/78/wKioL1P7AMiDrkQ-AAEdCr0Bgcg886.jpg)

