【嵌入式】使用minicom连接arm开发板错误

简介:

Preface

   把学校的事忙得差不多了,又可以搞这板子了。。。

   minicom的使用操作,前面已经写得很详细,但是下载程序到开发板的过程中,还是有些地方是需要注意的,另外第一次接触,少不了会遇上各种问题


Step1

   连结好开发板与PC机的串口线与USB下载线


Step2

   给板子上电,在minicom中选择linux启动

 
  1. NAND Flash Boot                                                                  

  2. Please select function :                                                        

  3. 0 : USB download file                                                            

  4. 1 : Uart download file                                                          

  5. 2 : Write Nand flash with download file                                          

  6. 3 : Load Pragram from Nand flash and run                                        

  7. 4 : Erase Nand flash regions                                                    

  8. 5 : Write NOR flash with download file                                          

  9. 6 : Set boot params                                                              

  10. 7 : Set AutoBoot parameter,1:linux 2:wince                                      

  11. 8 : Set Lcd Display,1:DH3.5' 2:DH4.3' 3:QC7.0' 4:QC8.0' 5:VGA                    

  12. 3                                                                                

  13. Set boot params = root=1f02 init=/linuxrc console=ttyS0,115200 devfs=mount disp0

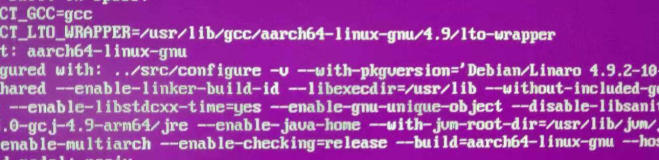
  14. Linux version 2.6.8.1-ptx1 (root@localhost.localdomain) (gcc version 3.3.2) #252

  15. CPU: ARM920Tid(wb) [41129200] revision 0 (ARMv4T)                                

  16. CPU: D VIVT write-back cache                                                    

  17. CPU: I cache: 16384 bytes, associativity 64, 32 byte lines, 8 sets              

  18. CPU: D cache: 16384 bytes, associativity 64, 32 byte lines, 8 sets              

  19. Machine: SMDK2410                                                                


Step3

   进入tmp目录

 
  1. [root@(none) /]# cd /tmp                                                        

  2. [root@(none) tmp]# ls                                                            

  3. Applications            images                  qtembedded-unknown              

  4. Documents               mplayer                 sdcard                          

  5. Settings                qcop-msg-qpe            udisk                            

  6. flashdisk               qcop-msg-quicklauncher                                  


Step4

   输入rz命令

 
  1. [root@(none) tmp]# rz

  2. 樊[root@(none) tmp]# e.**B0100000023be50                                        

<注意1>rz 是非常古老的zmodem协议使用的上传下载命令,输入后可以看到下面出现等待接收信息


Step5

   这时输入minicom命令:先按下ctrl+a,然后松开,再按s,即发送命令,出现协议选择,如上,选zmodem

<注意2>这里是按下ctrl+a,松开后再按s,其它命令也是

 
  1. | zmodem    |                                      

  2. | ymodem    |                                      

  3. | xmodem    |                                      

  4. | kermit    |    

  5. | ascii     |      

  6. +-----------+


Step6

   然后进入文件选择

 
  1. [r+-------------------[Select one or more files for upload]-------------------+  

  2. [r|Directory: /home/mystery                                                   |  

  3. Ap| [.gnome2]                                                                 |  

  4. Do| [.gphoto]                                                                 |  

  5. Se| [.gstreamer-0.10]                                                         |  

  6. fl| [.ibus]                                                                   |  

  7. [r| [.local]                                                                  |  

  8. 樊| [.mission-control]                                                        |  

  9. [r| [.mozilla]                                                                |  

  10. Ap| [.onboard]                                                                |  

  11. Do| [.pki]                                                                    |  

  12. Se| [.pulse]                                                                  |  

  13. fl| [.thumbnails]                                                             |  

  14. [r| [.thunderbird]                                                            |  

  15. ba| [.xinput.d]                                                               |y

  16. [r| [Desktop]                                                                 |  

  17. ba| [Documents]                                                               |y

  18. [r|              ( Escape to exit, Space to tag )                             |  

  19. ba+---------------------------------------------------------------------------+y

  20. [root@(none) tmp]# Cannot suspend - no APM support in kernel                    

  21.                 [Goto]  [Prev]  [Show]   [Tag]  [Untag] [Okay]                  

<注意3>这里是按两下空格健进入选择,并且是半角状态


Step7

   选择好要下载的文件,回车确认

 
  1. +-----------[zmodem upload - Press CTRL-C to quit]------------+        

  2. |Sending: hello.out                                           |        

  3. |sz: skipped: hello.out                                       |        

  4. |                                                             |        

  5. |Transfer complete                                            |        

  6. |                                                             |        

  7. | READY: press any key to continue...                         |        

  8. |                                                             |        

  9. +-------------------------------------------------------------+        


Step8

   查看并运行文件

 
  1. [root@(none) tmp]# ls                                                            

  2. Applications            hello.out               qcop-msg-quicklauncher          

  3. Documents               images                  qtembedded-unknown              

  4. Settings                mplayer                 sdcard                          

  5. flashdisk               qcop-msg-qpe            udisk                            

  6. [root@(none) tmp]# ./hello.out                                                  

  7. bash: ./hello.out:

Error1

 
  1. /lib/ld-linux.so.3: bad ELF interpreter: No such file or diry  

   没有/lib/ld-linux.so.3 ?

<注意4>ld-linux.so.3是进行动态链接时的连接器


Solution1


   我估计是我搭建的目标平台下缺少该库,于是我在PC机的交叉编译工具中找到了该文件

 
  1. mystery@lcw:/usr/local/arm-4.5.1/arm-none-linux-gnueabi/lib$ ls -l ld-linux*

  2. lrwxrwxrwx 1 mystery mystery 10 Sep 28  2010 ld-linux.so.3 -> ld-2.11.so

   可以看到,该文件只是一个符号链接文件,目标指向ld-2.11.so

   于是我把ld-2.11.so拷贝到目标板中,不过问题又来了

 
  1. [root@(none) tmp]# rz                                                          

  2. [root@(none) tmp]# .**B0100000023be50                                        

  3. [root@(none) tmp]# ls                                                          

  4. Applications            hello2.out              qcop-msg-quicklauncher          

  5. Documents               images                  qtembedded-unknown              

  6. Settings                ld-2.11.so              sdcard                          

  7. flashdisk               mplayer                 udisk                          

  8. hello.out               qcop-msg-qpe

  9. [root@(none) tmp]# ./hello2.out                                                

  10. bash: ./hello2.out: /lib/ld-linux.so.3: bad ELF interpreter: No such file or diy

  11. [root@(none) tmp]# ls /lib/ld-*                                                  

  12. /lib/ld-2.3.2.so    /lib/ld-linux.so.2                                          

  13. [root@(none) tmp]# mv /tmp/ld-2.11.so /lib/                                      

  14. mv: unable to open `/lib/ld-2.11.so': Read-only file system                      

   只读文件系统。。。好吧,为了和书上保持一致,文件系统我先不动,所以我只能另外想办法了


Solution2

   既然是解决动态链接问题,那我静态编译,应该就不会调用链接器了吧

 
  1. [root@(none) tmp]# rz                                                            

  2. �[root@(none) tmp]# ls*B0100000023be50                                          

  3. Applications            hello.out               qtembedded-unknown              

  4. Documents               images                  sdcard                          

  5. Settings                mplayer                 udisk                            

  6. flashdisk               qcop-msg-qpe                                            

  7. hello-s.out             qcop-msg-quicklauncher                                  

  8. [root@(none) tmp]# ./hello-s.out                                                

  9. Segmentation fault                                                              

   虽然链接问题解决了,但是代价也是相当大的,首先就体现在文件大小上

 
  1. mystery@lcw:~/Desktop/arm-gcc-c/hello$ ls -l

  2. total 608

  3. -rw-rw-r-- 1 mystery mystery     94 Apr 12 09:23 hello.c

  4. -rwxrwxr-x 1 mystery mystery   7816 Apr 12 09:30 hello.out

  5. -rwxrwxr-x 1 mystery mystery 607564 Apr 12 16:41 hello-s.out

   文件比都接近100倍了,晕,传输时间自然就增加了,还有其它的问题呢


Error2

 
  1. [root@(none) tmp]# ./hello-s.out                                                

  2. Segmentation fault  

   纳尼,段错误。。。不会吧,回pc验证下

 
  1. mystery@lcw:~/Desktop/arm-gcc-c/hello$ gcc hello.c -o hello-gcc.out

  2. mystery@lcw:~/Desktop/arm-gcc-c/hello$ ls

  3. hello.c  hello-gcc.out  hello.out  hello-s.out

  4. mystery@lcw:~/Desktop/arm-gcc-c/hello$ ./hello-gcc.out  

  5. hello,welcome to arm-linux !  

   呃,PC下正确,该纠结呢,看看源代码

<code-1>

 
  1. 1 #include <stdio.h>

  2. 2                                                                              

  3. 3 int main(void)                                                              

  4. 4 {                                                                            

  5. 5         printf("hello,welcome to arm-linux ! \n");                          

  6. 6         return 0;                                                            

  7. 7 }  

   第一次嘛,当然是最经典的hello代码了,但这么短的代码也段错误。。。看看有没有警告

 
  1. mystery@lcw:~/Desktop/arm-gcc-c/hello$ arm-linux-gcc hello.c -o hello-debug.out -Wall

  2. mystery@lcw:~/Desktop/arm-gcc-c/hello$ ls

  3. hello.c  hello-debug.out  hello-gcc.out  hello.out  hello-s.out

   也木有警告啊


Try

   哎,慢慢搞吧,什么事,总是会有第一次的

   段错误,意思就是访问了不该访问的内存,这里就一个printf函数,嗯

   据说有的编译器会对printf的参数中的字符串进行分析,改一下

<code-2>

 
  1. #include <stdio.h>

  2. int main(void)

  3. {

  4.    char *s = "hello,welcome to arm-linux !\n";

  5.    printf(s);

  6.    return 0;

  7. }

   还是不行,依然段错误

<code-3>

 
  1. #include <stdio.h>

  2. int main(void)

  3. {

  4.    //char *s = "hello,welcome to arm-linux !\n";

  5.    char s[]="heool,welcome to arm-linux !\n";

  6.    printf("%s",s);

  7.    return 0;

  8. }

   照样错误,是目标板上的环境有问题吗?太纠结了,这个问题下回分解吧


   网上查了下,错误分析链接如下,暂时等待解决

   http://www.friendlyarm.net/forum/topic/246


   排除各种可能性,好吧,内核不匹配,从头开始。。。。。。。。。。。。。。。。。

164035869.png


补充


   历时好几天,分别用arm-linux-gcc,4.5.1,4.4.3,4.3.2,3.4.1,3.2.3版本编译过linux内核3.4.40,2.4.14版本下s3c2410,smdk2410内核,cramfs只读文件系统,改写过bootloader源代码,遇到过N个问题,尝试过N种方法,终于搞好啦。


总结


   虽然kernel很complex,但终究不过是一段裸机代码,Bootloader进行所谓的“kernel引导”,其过程不过是从bootloader里的一句跳转代码,跳转到kernel代码处(执行kernel中的第一个函数),所谓传递参数也不过是bootloader和kernel约定一个内存地点存放。在这个过程中,bootloader和kernel虽然都处于同一个内存里,但是它们除了“引导”与“传递有限的参数”这样的关系,并无其它关系,完全是两个独立的程序。另外在内核中必须读出所有写入内核的硬件配置信息,开始就是NAND分区信息错误,搞得始终无法挂载根文件系统,MTD都读不出来,几经尝试,加上网友的建议和强大的谷歌,通过分析arm引导过程,黑盒子又清楚一点啦!

   纳尼?新手伤不起。。。。


本文转自infohacker 51CTO博客,原文链接:http://blog.51cto.com/liucw/1177197

相关文章
|
2月前
|
Linux 开发工具 芯片
玩转 PI 系列 - 如何在 Rockchip Arm 开发板上安装 Docker Tailscale K3s Cilium?
|
7月前
|
测试技术 异构计算
Xines广州星嵌全新FPGA开发板—OMAPL138/C6748 DSP+ARM+FPGA
基于广州星嵌TI OMAP-L138(浮点DSP C6748+ARM9) +Xilinx Spartan-6 FPGA工业核心板
|
9月前
|
Ubuntu 物联网 编译器
手把手移植物联网项目到arm开发板笔记(下)
171 0
|
9月前
|
Ubuntu 物联网 Linux
手把手移植物联网项目到arm开发板笔记(上)
手把手移植物联网项目到arm开发板笔记
204 0
|
Linux
ARM6818开发板输入设备(触摸屏)操作(开发五子棋游戏)
308 0
|
缓存 物联网
ARM6818开发板的系统IO(文件IO)与开发板屏幕控制
136 0
|
Linux 编译器 Windows
6818开发板(arm平台)利用SecureCRT连接主机并运行程序(99乘法表)
329 0
|
存储 数据采集 Linux
Xines广州星嵌 DSP+ARM+FPGA开发板XQ138AS-EVM OMAPL138+FPGA
XQ138AS-EVM是广州星嵌基于SOM-XQ138S核心板(OMAPL138+Xilinx FPGA)和SOM-XQ138A核心板(OMAPL138+AlteraFPGA)开发的DSP+ARM+FPGA三核评估套件,底板同时兼容两款核心板,用户可以采用该开发套件进行项目前期的验证和评估,也可以直接用来开发自己的产品。OMAPL138+FPGA
Xines广州星嵌 DSP+ARM+FPGA开发板XQ138AS-EVM  OMAPL138+FPGA
|
Linux C语言
arm开发板更新gcc/gcc++|Deb bain 更新 gcc,无需编译直接更新gcc三
368 0
arm开发板更新gcc/gcc++|Deb bain 更新 gcc,无需编译直接更新gcc三