其实WebApp这个版块已经放置一段时间了,但是一直没有写文章,那是因为我还在学习中。今天的话,我们就来写一篇关于布局的,以前在没有BootStrap,Jquery EasyUI,Jquery Mobile之前不论是做web项目还是web 移动站点都是那么费劲,尤其是我这种学不会css的人,实在是搞不了前台。OK,废话不多说,我们来看一下今天要仿制的页面,手机头条网。

看到了吧,这个界面如果用BootStrap的话可能更简单一些,因为它是单纯的三列或者两列布局,利用Bootstrap的网格系统可以很好的布局出来。那今天的话还是用Jquery Mobile css。
首先看一下最顶端的头部,我的代码如下
|
1
2
3
4
5
6
7
8
9
10
11
12
13
14
15
16
17
18
19
|
@section Header
{
<
div
data-role
=
"header"
data-theme
=
"f"
data-tap-toggle
=
"false"
data-position
=
"fixed"
data-fullscreen
=
"false"
>
<
div
class
=
"ui-grid-b"
>
<
div
class
=
"ui-block-a"
><
img
class
=
"img-corner"
style
=
"padding:3px"
width
=
"40"
height
=
"40"
src
=
"~/Image/IMG_20140531_170818.jpg"
/></
div
>
<
h3
class
=
"ui-block-b"
style
=
"text-align:center;"
>今日头条<
img
height
=
"25"
width
=
"25"
src
=
"~/Image/ic_popup_sync_6.png"
/></
h3
>
<
div
class
=
"ui-block-c"
style
=
"padding:5px;text-align:right"
><
img
src
=
"../Image/ic_menu_search.png"
width
=
"30"
height
=
"30"
/></
div
>
</
div
>
<
div
data-role
=
"navbar"
style
=
"background-color:red;border-bottom-style:solid; border-bottom-width:2px;border-bottom-color:lightyellow"
>
<
ul
>
<
li
><
a
class
=
"a-header"
href
=
"#"
>推荐</
a
></
li
>
<
li
><
a
class
=
"a-header"
href
=
"#"
>热点</
a
></
li
>
<
li
><
a
class
=
"a-header"
href
=
"#"
>社会</
a
></
li
>
<
li
><
a
class
=
"a-header"
href
=
"#"
>娱乐</
a
></
li
>
<
li
><
a
class
=
"a-header"
href
=
"#"
>科技</
a
></
li
>
</
ul
>
</
div
>
</
div
>
}
|
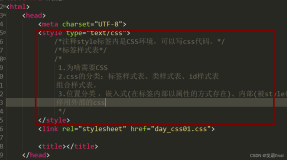
其实这里我们使用Jquery Mobile css中的一些样式及属性。我们看一下data-role="header"

在这里我们设置头部不会在点击屏幕的时候缩回去data-tap-toggle="false",这样当页面内容随着滚动条上移时,会被头部盖住。data-theme="f"这个是我自己定义的主题,主题可以是a-z。而Jquery Mobile css默认只提供了五种主题。

所以f需要自己定义,我们来看一下
|
1
2
3
4
5
6
7
8
9
10
11
12
13
14
15
16
17
18
19
20
21
22
23
24
25
26
27
28
29
30
31
|
.ui-bar-f {
background-color
:
red
;
color
:
white
;
font-weight
:
bold
;
height
:
45px
;
font-family
:微软雅黑;
}
.img-corner {
border-radius:
50%
;
}
.a-header {
text-decoration
:
none
;
color
:
white
;
}
body {
font-family
:微软雅黑;
background-color
:
white
;
}
.img-shrink {
height
:
150px
;
width
:
100%
;
border
:
1px
solid
white
;
}
.news-footer {
font-size
:
10px
;
}
|
第一个css就是我们自己定义的主题,必须是以ui-bar-[a-z]来命名。头部的话在这里共分了三列,因为我们的第一个div是 <div class="ui-grid-b">这个css就把屏幕分成了相等的三份。

然后我们在每一份放我们的元素。

效果如上,那么这个圆圈图片是怎么实现的呢,很简单,css3很好实现,将下面的css应用到图片即可。
|
1
2
3
|
.img-corner {
border-radius:
50%
;
}
|
OK,头部还有一个Nav bar,这个其实将div的data-role设置为navbar,然后在div中嵌套<ul><li>。

头部的这个导航条如果被点击的话,它的颜色会变,这个功能是Jquery Mobile实现的,我们不需要做什么。
头部说完了我们看内容页,为了简单,有一些css我直接写在元素上。
|
1
2
3
4
5
6
7
8
9
10
11
12
13
14
15
16
17
18
19
20
21
22
23
24
25
26
27
28
29
30
31
32
33
34
35
36
37
38
39
40
41
42
43
44
45
46
47
48
49
50
51
52
53
54
55
56
57
58
59
60
61
62
63
64
65
66
67
68
69
70
71
72
73
74
75
76
77
|
<
div
style
=
"font-family:微软雅黑"
>
<
p
><
b
>什么人会买二手车?这四类人才是最精明的消费者</
b
></
p
>
<
div
class
=
"ui-grid-b"
>
<
div
class
=
"ui-block-a"
>
<
img
class
=
"img-shrink"
src
=
"~/Image/News/1.jpg"
/>
</
div
>
<
div
class
=
"ui-block-b"
style
=
"padding-left:5px;padding-right:5px;"
>
<
img
class
=
"img-shrink"
src
=
"~/Image/News/2.jpg"
/>
</
div
>
<
div
class
=
"ui-block-c"
>
<
img
class
=
"img-shrink"
src
=
"~/Image/News/3.jpg"
/>
</
div
>
</
div
>
<
div
class
=
"news-footer"
>
<
label
>第一车网</
label
>
<
img
style
=
"margin-left:15px"
src
=
"/Image/News/pencil.png"
width
=
"12"
height
=
"12"
/>
<
label
>200</
label
>
<
div
style
=
"float:right"
>
<
label
>刚刚</
label
>
<
img
src
=
"~/Image/News/add.jpg"
width
=
"12"
height
=
"12"
/>
</
div
>
</
div
>
<
hr
/>
<
div
class
=
"ui-grid-a"
style
=
"height:150px"
>
<
div
class
=
"ui-block-a"
>
<
div
style
=
"height:135px"
><
b
>《芈月转》孙俪近照曝光网友:太美了!</
b
></
div
>
<
div
class
=
"news-footer"
style
=
"float:left;width:100%"
>
<
label
>海外网</
label
>
<
img
style
=
"margin-left:15px"
src
=
"/Image/News/pencil.png"
width
=
"12"
height
=
"12"
/>
125
<
div
style
=
"float:right;margin-right:10px"
>
<
img
src
=
"~/Image/News/add.jpg"
width
=
"12"
height
=
"12"
/>
</
div
>
</
div
>
</
div
>
<
div
class
=
"ui-block-b"
style
=
" border: 1px solid white;"
>
<
img
src
=
"~/Image/News/tvphoto.jpg"
style
=
"width: 100%; height: 150px;"
/>
</
div
>
</
div
>
<
hr
/>
<
div
class
=
"ui-grid-a"
style
=
"height:100px"
>
<
div
class
=
"ui-block-a"
>
<
div
style
=
"height:85px"
><
b
>初二女生收到情书,超牛老妈只说了五句话!</
b
></
div
>
<
div
class
=
"news-footer"
style
=
"float:left;width:100%"
>
<
label
>达达兔</
label
>
<
img
style
=
"margin-left:15px"
src
=
"/Image/News/pencil.png"
width
=
"12"
height
=
"12"
/>
751
<
div
style
=
"float:right;margin-right:10px"
>
<
img
src
=
"~/Image/News/add.jpg"
width
=
"12"
height
=
"12"
/>
</
div
>
</
div
>
</
div
>
<
div
class
=
"ui-block-b"
style
=
" border: 1px solid white;"
>
<
img
src
=
"~/Image/News/qingshu.jpg"
style
=
"width: 100%;"
/>
</
div
>
</
div
>
<
hr
/>
<
div
class
=
"ui-grid-a"
style
=
"height:100px"
>
<
div
class
=
"ui-block-a"
>
<
div
style
=
"height:85px"
><
b
>那些发生在汽车历史上的第一次!</
b
></
div
>
<
div
class
=
"news-footer"
style
=
"float:left;width:100%"
>
<
label
style
=
"background-color:red;color:white;border-radius:20%"
>推广</
label
>
<
label
style
=
"margin-left:10px"
>上海通用</
label
>
<
img
style
=
"margin-left:15px"
src
=
"/Image/News/pencil.png"
width
=
"12"
height
=
"12"
/>
751
<
div
style
=
"float:right;margin-right:10px"
>
<
img
src
=
"~/Image/News/add.jpg"
width
=
"12"
height
=
"12"
/>
</
div
>
</
div
>
</
div
>
<
div
class
=
"ui-block-b"
style
=
" border: 1px solid white;"
>
<
img
src
=
"~/Image/News/car.jpg"
style
=
"width: 100%; height: 100px;"
/>
</
div
>
</
div
>
<
hr
/>
</
div
>
|
其实我们观察一下,就会发现,第一行是标题,第二行是三个图片,第三行是一些其他的信息。
那么第一部分我们布局就可以采用<p><div><div>完成这三部分。第一行没什么说的,第二行我们使用网格系统,将屏幕分成三列,每列一张图,最后一行需要注意这个"刚刚+"是在右边,需要使用float="right",看一下效果

怎么样,还行吧。OK,我们接着看下面的布局,下面的布局我在使用Jquery mobile的网格系统的时候没有查到像BootStrap那样的跨列功能。所以我暂时先用50%/50%的网格。
第一个网格我们放置文字,第二个网格我们放置图片。

需要注意的是上面的两个height,我们设置总高度为150,设置文字的高度为135,那么小文字的高度为15,此时我们设置小文字所在的层的float:left,因为高度不够,它就会自动沉底。

如上图,小字都沉底了。OK,其实真个头条网都采用这样的布局方式,其实我们只需要在数据库表创建好类型(是一行文字+一行3图片+小字或者是左边文字(打字加小字)+右边图片),标题,小字内容,图片我们就可以动态生成或者加载页面,这个是我下节要实现的内容。
最后我们还给这个页面加了foot。
|
1
2
3
4
5
6
|
@section Footer
{
<
div
data-role
=
"footer"
data-theme
=
"c"
data-position
=
"fixed"
data-fullscreen
=
"true"
>
<
h3
><
label
style
=
"color:red"
>头条网,一个神奇的网站!</
label
></
h3
>
</
div
>
}
|

头条网,一个神奇的网站。这个脚我们设置点击屏幕时该脚会收缩。好了,我们看一下全部页面的效果

收缩掉脚,我们再看看

OK,页面今天就到这里,最后告诉大家怎么创建移动项目的

点击确定

选择移动应用程序,确定,项目就创建好了。
最后,大家如果需要源码的话去下载,下载请点击这里源码
本文转自 BruceAndLee 51CTO博客,原文链接:http://blog.51cto.com/leelei/1591204,如需转载请自行联系原作者