一、简介
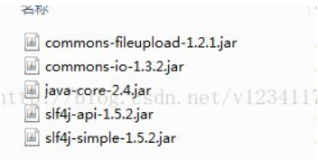
Uploadify 是一种基于html5 或 flash的多文件上传的jQuery插件。Uploadify可以支持多种定制。它是一种异步的文件上传插件。下载网站为http://www.uploadify.com/。这里使用的是Uploadify Version 3.2.1版本。下载解压后,目录如下所示:

使用Uploadify需要加入如下js
<script src="jquery1.10.2 .min.js" type="text/javascript"></script> <!-- 这里jquery 版本问1.10.2 -->
<script src="jquery.uploadify.min.js" type="text/javascript"></script>
<link rel="stylesheet" type="text/css" href="uploadify.css"> <!-- 样式文件 -->
二、示例
网页示例如下:
  1 <%@ page contentType="text/html; charset=UTF-8"%>
  2 <%@ taglib uri="http://java.sun.com/jsp/jstl/core" prefix="c"%>
  3 <c:set var="ctx" value="${pageContext.request.contextPath}" />
  4 <!DOCTYPE HTML>
  5 <html>
  6 <head>
  7 <meta http-equiv="Content-Type" content="text/html; charset=utf-8">
  8 <title>UploadiFive Test</title>
  9 <script src="${ctx}/index/uploadify/jquery1.10.2 .min.js" type="text/javascript"></script>
 10 <script src="${ctx}/index/uploadify/jquery.uploadify.min.js" type="text/javascript"></script>
 11 <style type="text/css">
 12 body {
 13     font: 13px Arial, Helvetica, Sans-serif;
 14 }
 15 .uploadify {
 16     position: relative;
 17     margin-bottom: 1em;
 18 }
 19 .uploadify-button {
 20     background-color: #505050;
 21     background-image: linear-gradient(bottom, #505050 0%, #707070 100%);
 22     background-image: -o-linear-gradient(bottom, #505050 0%, #707070 100%);
 23     background-image: -moz-linear-gradient(bottom, #505050 0%, #707070 100%);
 24     background-image: -webkit-linear-gradient(bottom, #505050 0%, #707070 100%);
 25     background-image: -ms-linear-gradient(bottom, #505050 0%, #707070 100%);
 26     background-image: -webkit-gradient(
 27         linear,
 28         left bottom,
 29         left top,
 30         color-stop(0, #505050),
 31         color-stop(1, #707070)
 32     );
 33     background-position: center top;
 34     background-repeat: no-repeat;
 35     -webkit-border-radius: 30px;
 36     -moz-border-radius: 30px;
 37     border-radius: 30px;
 38     border: 2px solid #808080;
 39     color: #FFF;
 40     font: bold 12px Arial, Helvetica, sans-serif;
 41     text-align: center;
 42     text-shadow: 0 -1px 0 rgba(0,0,0,0.25);
 43     width: 100%;
 44 }
 45 .uploadify:hover .uploadify-button {
 46     background-color: #606060;
 47     background-image: linear-gradient(top, #606060 0%, #808080 100%);
 48     background-image: -o-linear-gradient(top, #606060 0%, #808080 100%);
 49     background-image: -moz-linear-gradient(top, #606060 0%, #808080 100%);
 50     background-image: -webkit-linear-gradient(top, #606060 0%, #808080 100%);
 51     background-image: -ms-linear-gradient(top, #606060 0%, #808080 100%);
 52     background-image: -webkit-gradient(
 53         linear,
 54         left bottom,
 55         left top,
 56         color-stop(0, #606060),
 57         color-stop(1, #808080)
 58     );
 59     background-position: center bottom;
 60 }
 61 .uploadify-button.disabled {
 62     background-color: #D0D0D0;
 63     color: #808080;
 64 }
 65 .uploadify-queue {
 66     margin-bottom: 1em;
 67 }
 68 .uploadify-queue-item {
 69     background-color: #F5F5F5;
 70     -webkit-border-radius: 3px;
 71     -moz-border-radius: 3px;
 72     border-radius: 3px;
 73     font: 11px Verdana, Geneva, sans-serif;
 74     margin-top: 5px;
 75     max-width: 350px;
 76     padding: 10px;
 77 }
 78 .uploadify-error {
 79     background-color: #FDE5DD !important;
 80 }
 81 .uploadify-queue-item .cancel a {
 82     background: url('../uploadify/uploadify-cancel.png') 0 0 no-repeat;
 83     float: right;
 84     height:    16px;
 85     text-indent: -9999px;
 86     width: 16px;
 87 }
 88 .uploadify-queue-item.completed {
 89     background-color: #E5E5E5;
 90 }
 91 .uploadify-progress {
 92     background-color: #E5E5E5;
 93     margin-top: 10px;
 94     width: 100%;
 95 }
 96 .uploadify-progress-bar {
 97     background-color: #0099FF;
 98     height: 3px;
 99     width: 1px;
100 }
101 </style>
102 </head>
103
104 <body>
105     <h1>Uploadify Demo</h1>
106     <form>
107         <div id="queue"></div>
108         <input id="file_upload" name="file_upload" type="file" multiple="true">
109         <input type="button" value="开始上传" onclick="startupload();" />
110     </form>
111
112 <script type="text/javascript">
113 var upload;
114 $(function() {
115     upload = $('#file_upload').uploadify({
116         'auto'     : false,
117         'fileTypeDesc' : '图片文件',
118         'fileTypeExts' : '*.gif; *.jpg; *.png',
119         'buttonText' : '选择文件...',
120         'width'    : 300,
121         'multi': true,
122         'formData'     : {
123             'timestamp' : 'ddd',
124             'token'     : '/sdf/fdsfs'
125         },
126         'fileDataName' : 'Filename',//与后端获取文件的名称一致
127         'cancelImg'      : 'images/cancel.png',
128         'method'   : 'post',
129         'swf'      : '${ctx}/index/uploadify/uploadify.swf',
130         'uploader' : '${ctx}/control/file/upload.action',
131         'button_image_url':'${ctx}/index/uploadify/', //'overrideEvents' : ['onSelectError', 'onDialogClose'],重写事件,从而自定义错误消息显示
132         'requeueErrors' : true,
133         'onSelectError' : function() {
134             alert('请选择图片文件');
135             return false;
136         },
137         'onSelect' : function(file) {
138             console.log('The file ' + file.name + ' was added to the queue.');
139         },
140         'onUploadStart' : function(file) {
141             console.log('开始上传: ' + file.name);
142         },
143         'onUploadComplete' : function(file) {
144             console.log('文件 ' + file.name + ' 上传成功');
145         },
146         'onUploadSuccess' : function(file, data, response) {
147             console.log('文件 ' + file.name + ' 上传成功  相应数据为: ' + response + ':' + data);
148             if(data){
149                 alert("上传成功!");
150             }else{
151                 alert("上传失败,请重新上传!");
152             }
153         }
154     });
155 });
156
157 function startupload(){
158     upload.uploadify('upload','*');
159 }
160 </script>
161 </body>
162 </html>
下载地址:点击下载 。
后端处理代码如下:
package com.test.web.test;

import java.io.File;
import java.io.FileOutputStream;
import java.io.IOException;
import java.io.InputStream;
import java.io.OutputStream;
import java.io.UnsupportedEncodingException;
import java.util.Calendar;
import java.util.Date;

import javax.servlet.http.HttpServletRequest;

import org.apache.commons.io.IOUtils;
import org.springframework.context.annotation.Scope;
import org.springframework.stereotype.Controller;
import org.springframework.web.bind.annotation.RequestMapping;
import org.springframework.web.bind.annotation.RequestMethod;
import org.springframework.web.bind.annotation.ResponseBody;
import org.springframework.web.multipart.MultipartFile;
import org.springframework.web.multipart.MultipartHttpServletRequest;

@Controller
@Scope("prototype")
@RequestMapping("/control/file")
public class FileUpload {

    @RequestMapping(value = "upload", method = RequestMethod.POST)
    @ResponseBody
    public boolean test(HttpServletRequest request) throws UnsupportedEncodingException {
        String path = request.getSession().getServletContext().getRealPath("");
        Calendar calendar = Calendar.getInstance();
        calendar.setTime(new Date());
        request.setCharacterEncoding("UTF-8");
        path = String.format("%s\\%s\\%s\\%s\\%s\\%s", path, "file", "upload", calendar.get(calendar.YEAR),
                calendar.get(calendar.MONTH), calendar.get(calendar.DAY_OF_MONTH));
        File filepath = new File(path);
        if (!filepath.exists()) {
            filepath.mkdirs();
        }

        MultipartHttpServletRequest multipartRequest = (MultipartHttpServletRequest) request;
        // 获得文件
        MultipartFile multipartFile = multipartRequest.getFile("Filedata");//与前端设置的fileDataName属性值一致
        String filename = multipartFile.getOriginalFilename();// 文件名称

        OutputStream os = null;
        InputStream is = null;
        File uploadFile = null;
        try {
            is = multipartFile.getInputStream();
            if (is != null) {
                uploadFile = new File(filepath, System.currentTimeMillis() + filename.substring(filename.lastIndexOf(".") - 1));
                os = new FileOutputStream(uploadFile);
                IOUtils.copy(is, os);
                os.flush();
            }
        } catch (IOException e) {
            e.printStackTrace();
            return false;
        } finally {
            IOUtils.closeQuietly(os);
            IOUtils.closeQuietly(is);
        }
        return true;
    }
}