前言
EasyUI 一款简洁而又不简单的前端框架,近来因为要做一些管理信息处理,为了偷懒写那么多前端代码,就尝试着使用easyui做了一下适配。因为是基于JQuery实现,所以兼容性是没得说啦,其他的除了界面略显粗糙,还都挺不错的。
环境搭建
要想使用easyui,就必须下载相关的依赖。因为是基于JQuery,所以必不可少需要JQuery的支持。通常来讲,可以使用离线版和在线版两种方式来引入相关文件。接下来简单的叙述一下。
离线版
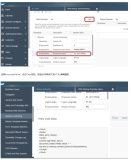
使用离线版的话,需要将下载好的javascript文件引入到我们的项目中来。该文件可以在http://www.jeasyui.com/download/index.php 处下载。下载完后我们需要的文件就是下面这张图上展示的了。

到时候需要的时候,在HTML代码中进行引入就可以了。
在线版
在线版的话就方便多了,但是缺点就是当网速不给力的时候,页面加载的会非常的缓慢,导致用户体验的直线下降。
所以一般来讲,实际项目中都会先把依赖的文件保存到服务器的特定目录中,方便代码的加载和调用。最大程度上给用户更好的使用体验。
因为我这次的实验比较简单,家里的网速还挺不错。为了让项目目录更加精简,我就用一下在线版的好了。具体来讲就是在相关的HTML页面中添加上这段代码。
<!DOCTYPE html>
<html>
<head>
    <meta charset="UTF-8">
    <title>Basic CRUD Application - jQuery EasyUI CRUD Demo</title>
    <link rel="stylesheet" type="text/css" href="http://www.jeasyui.com/easyui/themes/default/easyui.css">
    <link rel="stylesheet" type="text/css" href="http://www.jeasyui.com/easyui/themes/icon.css">
    <link rel="stylesheet" type="text/css" href="http://www.jeasyui.com/easyui/themes/color.css">
    <link rel="stylesheet" type="text/css" href="http://www.jeasyui.com/easyui/demo/demo.css">
    <script type="text/javascript" src="http://code.jquery.com/jquery-1.6.min.js"></script>
    <script type="text/javascript" src="http://www.jeasyui.com/easyui/jquery.easyui.min.js"></script>
</head>
前端代码
前端部分代码比较长,但是仔细阅读以下,不难发现流程还是很清晰的。
完整代码
<!DOCTYPE html>
<html>
<head>
    <meta charset="UTF-8">
    <title>Basic CRUD Application - jQuery EasyUI CRUD Demo</title>
    <link rel="stylesheet" type="text/css" href="http://www.jeasyui.com/easyui/themes/default/easyui.css">
    <link rel="stylesheet" type="text/css" href="http://www.jeasyui.com/easyui/themes/icon.css">
    <link rel="stylesheet" type="text/css" href="http://www.jeasyui.com/easyui/themes/color.css">
    <link rel="stylesheet" type="text/css" href="http://www.jeasyui.com/easyui/demo/demo.css">
    <script type="text/javascript" src="http://code.jquery.com/jquery-1.6.min.js"></script>
    <script type="text/javascript" src="http://www.jeasyui.com/easyui/jquery.easyui.min.js"></script>
</head>
<body>
<h2>Basic CRUD Application</h2>
<p>Click the buttons on datagrid toolbar to do crud actions.</p>

<table id="dg" title="My Users" class="easyui-datagrid" style="width:700px;height:250px"
       url="get_users.php"
       toolbar="#toolbar" pagination="true"
       rownumbers="true" fitColumns="true" singleSelect="true">
    <thead>
    <tr>
        <th field="firstname" width="50">First Name</th>
        <th field="lastname" width="50">Last Name</th>
        <th field="phone" width="50">Phone</th>
        <th field="email" width="50">Email</th>
    </tr>
    </thead>
</table>
<div id="toolbar">
    <a href="javascript:void(0)" class="easyui-linkbutton" iconCls="icon-add" plain="true" onclick="newUser()">New User</a>
    <a href="javascript:void(0)" class="easyui-linkbutton" iconCls="icon-edit" plain="true" onclick="editUser()">Edit User</a>
    <a href="javascript:void(0)" class="easyui-linkbutton" iconCls="icon-remove" plain="true" onclick="destroyUser()">Remove User</a>
</div>

<div id="dlg" class="easyui-dialog" style="width:400px"
     closed="true" buttons="#dlg-buttons">
    <form id="fm" method="post" novalidate style="margin:0;padding:20px 50px">
        <div style="margin-bottom:20px;font-size:14px;border-bottom:1px solid #ccc">User Information</div>
        <div style="margin-bottom:10px">
            <input name="firstname" class="easyui-textbox" required="true" label="First Name:" style="width:100%">
        </div>
        <div style="margin-bottom:10px">
            <input name="lastname" class="easyui-textbox" required="true" label="Last Name:" style="width:100%">
        </div>
        <div style="margin-bottom:10px">
            <input name="phone" class="easyui-textbox" required="true" label="Phone:" style="width:100%">
        </div>
        <div style="margin-bottom:10px">
            <input name="email" class="easyui-textbox" required="true" validType="email" label="Email:" style="width:100%">
        </div>
    </form>
</div>
<div id="dlg-buttons">
    <a href="javascript:void(0)" class="easyui-linkbutton c6" iconCls="icon-ok" onclick="saveUser()" style="width:90px">Save</a>
    <a href="javascript:void(0)" class="easyui-linkbutton" iconCls="icon-cancel" onclick="javascript:$('#dlg').dialog('close')" style="width:90px">Cancel</a>
</div>
<script type="text/javascript">
    var url;
    function newUser(){
        $('#dlg').dialog('open').dialog('center').dialog('setTitle','New User');
        $('#fm').form('clear');
        url = 'save_user.php';
    }
    function editUser(){
        var row = $('#dg').datagrid('getSelected');
        if (row){
            $('#dlg').dialog('open').dialog('center').dialog('setTitle','Edit User');
            $('#fm').form('load',row);
            url = 'update_user.php?id='+row.id;
        }
    }
    function saveUser(){
        $('#fm').form('submit',{
            url: url,
            onSubmit: function(){
                return $(this).form('validate');
            },
            success: function(result){
                var result = eval('('+result+')');
                alert(result.success);
                alert(result.errorMsg);
                if (result.errorMsg){
                    $.messager.show({
                        title: 'Error',
                        msg: result.errorMsg
                    });
                } else {
                    $('#dlg').dialog('close');        // close the dialog
                    $('#dg').datagrid('reload');    // reload the user data
                }
            }
        });
    }
    function destroyUser(){
        var row = $('#dg').datagrid('getSelected');
        if (row){
            $.messager.confirm('Confirm','Are you sure you want to destroy this user?',function(r){
                if (r){
                    $.post('destroy_user.php',{id:row.id},function(result){
//                        alert('asdsasasd'+result);
                        if (result.success){
                            $('#dg').datagrid('reload');    // reload the user data
                        } else {
                            $.messager.show({    // show error message
                                title: 'Error',
                                msg: result.errorMsg
                            });
                        }
                    },'json');
                }
            });
        }
    }
</script>
</body>
</html>
经典解析
HTML页面中使用了很多easyui中定制的类型。这里不过多的阐述了。但是页面中使用到的JavaScript代码可谓是非常的经典了。
秉承“一次只做一件事”的理念,对应页面上的超链接这里实现了相应的处理函数,以供调用。逻辑非常的清晰。
尤其是对于新建和修改段代码更值得仔细品读。
数据库
建表语句
DROP TABLE IF EXISTS `easyui_application`;
CREATE TABLE `easyui_application` (
  `id` int(100) NOT NULL AUTO_INCREMENT,
  `firstname` varchar(32) NOT NULL,
  `lastname` varchar(32) NOT NULL,
  `phone` int(11) NOT NULL,
  `email` varchar(64) NOT NULL,
  PRIMARY KEY (`id`)
) ENGINE=InnoDB AUTO_INCREMENT=8 DEFAULT CHARSET=utf8;
预先分配一些值
INSERT INTO `easyui_application` VALUES ('1', 'tom', 'Boris', '123456789', '1234567890@tom.com');
INSERT INTO `easyui_application` VALUES ('2', 'jack', 'James', '123456799', '1236765342@jack.com');
INSERT INTO `easyui_application` VALUES ('3', 'Herry', 'Jackson', '634343423', 'esdfsfdsds@herry.com');
INSERT INTO `easyui_application` VALUES ('4', 'Dsad', 'Hankson', '122344546', 'dasdsaudas@dasd.com');
INSERT INTO `easyui_application` VALUES ('5', 'Mark', 'Sinoberg', '232323722', 'sadbsadsasaid@mark.com');
INSERT INTO `easyui_application` VALUES ('6', 'pu', 'guo', '123456789', '1064319632@qq.com');
INSERT INTO `easyui_application` VALUES ('7', 'pupu', 'guo', '123456787', '13981283326@qq.com');
后端代码
PHP在web开发中有先天优势,所以这里仍旧选择使用PHP作为后端处理语言,当然JavaWeb或者Python做后端处理也都是可以的。
数据库这块为了配合PHP的使用,选择了MySQL数据库。下面针对前端特定功能实现特定的后端处理代码。
数据库小扳手
之前有种预感,要经常性的接触数据库编程,所以为了偷懒,写了个通俗易懂的数据库小扳手,来处理常用的数据库操作。没想到这么快就派上了用场,如果有需要的话,可以在我的 http://blog.csdn.net/marksinoberg/article/details/54650032
这篇文章中找到源码,这里不再阐述。
get_users.php
<?php
/**
 * Created by PhpStorm.
 * User: ${郭璞}
 * Date: 2017/2/2
 * Time: 10:08
 * Description: get_users. 返回值记得要为JSON格式
 */

include "db.php";

$querier = new QueryRunner();

$resultset = $querier->select("select * from easyui_application");

echo json_encode($resultset);
save_user.php
<?php
/**
 * Created by PhpStorm.
 * User: ${郭璞}
 * Date: 2017/2/2
 * Time: 11:39
 * Description:
 */

$firstname = $_REQUEST['firstname'];
$lastname = $_REQUEST['lastname'];
$phone = $_REQUEST['phone'];
$email = $_REQUEST['email'];

if($firstname&&$lastname&&$phone&&$email) {
    include "db.php";
    $querier = new QueryRunner();
    $params = array($firstname, $lastname, $phone, $email);
    $isInserted = $querier->insert("insert into easyui_application(firstname, lastname, phone, email) values(?, ?, ?, ?)", $params);
    if($isInserted) {
        $result = array("success"=>"saved success!");
        echo json_encode($result);
    }else{
        $result = array("errorMsg"=>"saved Success!");
        echo json_encode($result);
    }
}else{
    $result = array("errorMsg"=>"Field should be cpmpleted!");
    echo json_encode($result);
}
update_user.php
<?php
/**
 * Created by PhpStorm.
 * User: ${郭璞}
 * Date: 2017/2/2
 * Time: 11:39
 * Description:
 */
$id = $_GET['id'];
$firstname = $_REQUEST['firstname'];
$lastname = $_REQUEST['lastname'];
$phone = $_REQUEST['phone'];
$email = $_REQUEST['email'];

if($firstname&&$lastname&&$phone&&$email) {
    include "db.php";
    $querier = new QueryRunner();
    $params = array($firstname, $lastname, $phone, $email, $id);
    $isInserted = $querier->insert("update easyui_application set firstname = ?, lastname=?, phone=?, email=? WHERE id=?", $params);
    if($isInserted) {
        $result = array("success"=>"updated success!");
        echo json_encode($result);
    }else{
        $result = array("errorMsg"=>"updated Success!");
        echo json_encode($result);
    }
}else{
    $result = array("errorMsg"=>"Field should be cpmpleted!");
    echo json_encode($result);
}
destroy_user.php
<?php
/**
 * Created by PhpStorm.
 * User: ${郭璞}
 * Date: 2017/2/2
 * Time: 11:39
 * Description:
 */
include 'db.php';

$querier = new QueryRunner();

$params = array(
    $_POST['id'],
);
$isDeleted = $querier ->delete("delete from easyui_application where ID=?", $params);

if($isDeleted){
    $result = array("success"=>"destroy success!");
    echo json_encode($result);
}else{
    $result = array("errorMsg"=>"Destroy Failed!");
    echo json_encode($result);
}
至此,前后端所需代码全部搞定了。下面就一起来看看实现的效果吧。
效果演示
罗列User
打开与之对应的网址即可看到前端从数据库中取得的所有的值了。可以使用组件自带的分页处理来实现灵活的分页效果,是不是很赞呢?

新增User
下面进行添加用户的演示。

新增用户的时候可以按照需求灵活地添加自己的验证规则,很灵活!
修改User信息
修改用户信息的时候最讨厌的就是重新输入一遍信息了,不过还好easyui帮我们想到了这点,我们只需要修改需要修改的地方就行了,很省心!!!

删除User
下面继续拧删除用户的演示。

删除的操作是先选中要删除的行,然后点击removeUser按钮,来明确要删除哪一行记录。
总结
最后来回顾一下,本次试验主要是使用了easyui的组件来帮助后端开发人员减少前端代码的编写,高效的处理业务流程。
在线版以及离线版都是可以的,按需使用即可。
后端处理不固定,有很多语言都可以实现后端处理,Java, Python,C, C#,ASP等都是可以的。
前后端代码耦合的时候非常的重要,接口之间的处理也是如此。最后对于代码的复用性争取能重构到最大限度。
命名规范什么的也不过多的说了,老生常谈的问题。不是不重要,而是非常的重要。
好了,先写这么一个,以后对于用得到的easyui组件再进行描述吧。