在Android中可以通过CursorAdapter直接将数据映射到ListView中,如下处理:
 public class Chapter22Test1 extends ListActivity{
private SQLiteDatabase db = null;
private Cursor cursor = null;
private SimpleCursorAdapter adapter = null;
protected void onCreate(Bundle savedInstanceState) {
super.onCreate(savedInstanceState);
db= (new Chapter22Db (getApplicationContext())).getWritableDatabase();
cursor =db.rawQuery("SELECT _id,Name,Weight from mytable ORDER BY Weight", null);
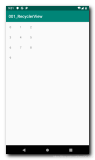
//layout/chapter_22_test1.xml的Android XML文件定义了ListView中每个单元的排列方式,每个单元R.id.c22_name和R.id.c22_gravity都是TextView,分列左右
adapter = new SimpleCursorAdapter(this,
R.layout.chapter_22_test1,
cursor,
new String[]{"Name","Weight"},//游标数据的名称,实际是Table列名字
new int[]{R.id.c22_name, R.id.c22_gravity});//对应的UI微件的id
setListAdapter(adapter);
}
protected void onDestroy() {
super.onDestroy();
cursor.close(); //我们在onCreate()中没有关闭游标,因为需要和ListView进行数据关联,关闭curosr,会导致List无数据,故在最后释放资源
db.close(); //断开和数据库的连接,释放相关资源
}
}
更新数据(以增加为例)
我们要实现:通过Menu弹出菜单,有一个为增加,按之,弹出一个Dialog,可以在当中填入数据,按Dialog的确定按键,在SQLite数据库的表格mytable中加入相关的数据,并且同步ListView的显示。
第一步:建立OptionsMenu,里面有菜单“Add”,按键后,触发执行add()的操作。
第二步:在add()中,要完成弹出指定格式的 Dialog,采用AlertDialog的方式,Dialog的格式在xml中给出。处理方式之前都学过,但是没有合并使用的例子,包括Dialog的 格式,同ListView中自定义元素的格式一样,采用LayoutInflater。具体如下:
 private void add(){
//步骤2.1:通过LayoutInflater从Android的XML文件中生成View
LayoutInflater inflater = LayoutInflater.from(this);
final View addView = inflater.inflate(R.layout.add_dialgo,null);
//步骤2.2:通过AlertDialog弹出对话框,并且在第一个button,即PositiveButton监听事件,触发操作
new AlertDialog.Builder(this)
.setTitle("添加框")
.setView(addView)
.setPositiveButton("确定", new DialogInterface.OnClickListener() {
//我们希望得到addView中的数据,但是这个inner class,只能获取final的值,所以之前将addView设置为final,也就是所有addView的地址是固定的,而不是动态生成。
public void onClick(DialogInterface dialog, int which) {
EditText nameView = (EditText)addView.findViewById(R.id.c22_name);
EditText weigthView = (EditText)addView.findViewById(R.id.c22_weight);
// addData是下面步骤三,实现SQLite的数据更新和ListView的显示同步add(name,weight);
addData(nameView.getText().toString(), new Float(weigthView.getText().toString()).floatValue());
}
})
.setNegativeButton("取消",null)
.show();
}
第三步:更新数据库和同步ListView,具体如下:
 private void addData(String name ,float weight){
/* 略去数据的判断,例如如果name一样,采用update的方式等等*/
//步骤3.1 在数据库表格中添加数据
ContentValues values = new ContentValues(2);
values.put("Name",name);
values.put("Weight",weight);
db.insert("mytable","Name",values);
//步骤3.2 同步ListView,更新游标的信息
cursor.requery();
}
异步后台同步数据
在上面的例子,貌似可以,而且的确是可以,但是在Android的API文档中,Cursor的方法requery()这样写道:This method is deprecated.Don't use this. Just request a new cursor, so you can do this asynchronously and update your list view once the new cursor comes back. 这提示我们风险的存在,如果数据量大,会导致重写读取的事件长(也就是requery()的执行时间)。虽然手机是人手操作,互动频率较低,在数据库数据 少的时候,例如上面的例子,我们仍然可以安全地使用requery。但是对于具有大量数据时,我们就需要修改上面的程序。
修订的方式步骤如下:1,通过后台线程来读取数据库;2、通过更换cursor来更新ListView,具体如下:
//步骤1:通过后台线程AsyncTask来读取数据库,放入更换Cursor
private class RefreshList extends AsyncTask {
//步骤1.1:在后台线程中从数据库读取,返回新的游标newCursor
protected Cursor doInBackground(Void... params) {
Cursor newCursor = db.rawQuery("SELECT _id,Name,Weight from mytable ORDER BY Weight", null);
return newCursor;
}
//步骤1.2:线程最后执行步骤,更换adapter的游标,并奖原游标关闭,释放资源
protected void onPostExecute(Cursor newCursor) {
adapter. changeCursor( newCursor); //网上看到很多问如何更新ListView的信息,采用CusorApater其实很简单,换cursor就可以
cursor.close();
cursor = newCursor;
}
}
//步骤2:取缔requrey的方式,采用后台线程更新形式
private void addData(String name ,float weight){
... ...
//cursor.requery();
new RefreshList().execute();
}
通过ContextMenu来删除ListView的数据
ContextMenu用户手指长按某个View触发的菜单。这里通过这个例子详细展开。实现场景:用户长按某个List元素,则弹出ContextMenu,选择菜单“Delete”,按下后,弹出AlertDialog,请用户再去确定是否删除,确定后将数据从SQLite中删除,并更新ListView的显示。具体如下:
   |
... ...
//步骤1:向ListView注册Context Menu,当系统检测到用户长按某单元是,触发Context Menu弹出
registerForContextMenu(getListView());
}
// 步骤2:创建ContextMenu同OptionMenu,用户长按元素后,会弹出菜单
public void onCreateContextMenu(ContextMenu menu, View v, ContextMenuInfo menuInfo) {
menu.add(Menu.NONE,DELETE_ID,Menu.NONE,"Delete");
super.onCreateContextMenu(menu, v, menuInfo);
}
//步骤 3: ContextMenu的触发操作,例子将触发delete()
public boolean onContextItemSelected(MenuItem item) {
switch(item.getItemId()){
case DELETE_ID:
/* 在此处,我们关键引入 AdapterView.AdapterContextMenuInfo来获取单元的信息。在有三个重要的信息。 1、id:The row id of the item for which the context menu is being displayed ,在cursorAdaptor中,实际就是表格的_id序号; 2、position 是list的元素的顺序;3、view就可以获得list中点击元素的View,通过view可以获取里面的显示的信息 */
AdapterView.AdapterContextMenuInfo info = (AdapterView.AdapterContextMenuInfo)item.getMenuInfo();
delete(info.id);
return true;
default:
break;
}
return super.onContextItemSelected(item);
}
//步骤4: 对触发弹框,和Add的相似,确定后,更新数据库和更新ListView的显示,其中getNameById是通过id查名字的方法,上次学习已有相类的例子,不再重复。值得注意的是,为了内部类中使用,delete的参数采用来final的形式。
private void delete(final long rowId){
if(rowId>0){
new AlertDialog.Builder(this)
.setTitle("删除" + getNameById(rowId))
.setPositiveButton("确定", new DialogInterface.OnClickListener() {
public void onClick(DialogInterface dialog, int which) {
deleteData(rowId);
}
})
.setNegativeButton("取消", null)
.show();
}
}
private void deleteData(long rowId){
String[] str = {String.valueOf(rowId)};
db.delete("mytable","_id=?",str);
new RefreshList().execute(); //采用后台方式,当然也可以用crusor.requery()来处理。
}
通过模拟器的Console进行数据库操作
通过android-sdk-linux_x86/platform-tools目录下面有adb命令,使用adb shell,可提供模拟器的console窗口。数据库文件存放的位置为/data/data/ your.app.package /databases/ your-db-name ,进入相关的目录,可以使用#sqlite3 your-db-name,进入相关的数据库,可以在里面执行SQL语句,例如在整个例子中,通过#.schema来查看表格的格式,通过#select * from mytable;可以显示数据库的内容。